Merry Christmas 2021!
Merry Christmas 2021!
Dear colleagues and friends,
we hope you received our new Christmas card. We made a brief tutorial on how to assemble it. Enjoy the task and the final reindeer.
Since we did not send a card last year, we have many exciting updates to share from the last two years as well. We extended our group with two Post-Docs - Uwe and Marion - and added 3 Ph.D. students - Jonas, Nick, and Carina - working on different BMBF funded projects.
We organized multiple events such as the MUM conference in 2020 which, due to the pandemic, had to be held virtually in 2020. Nevertheless, it was great fun and success. Further, we also organized several workshops, for example, at CHI, SOUPS, AutoUI.
Merry Christmas and a happy new year 2022!
Trenner
Construction Manual
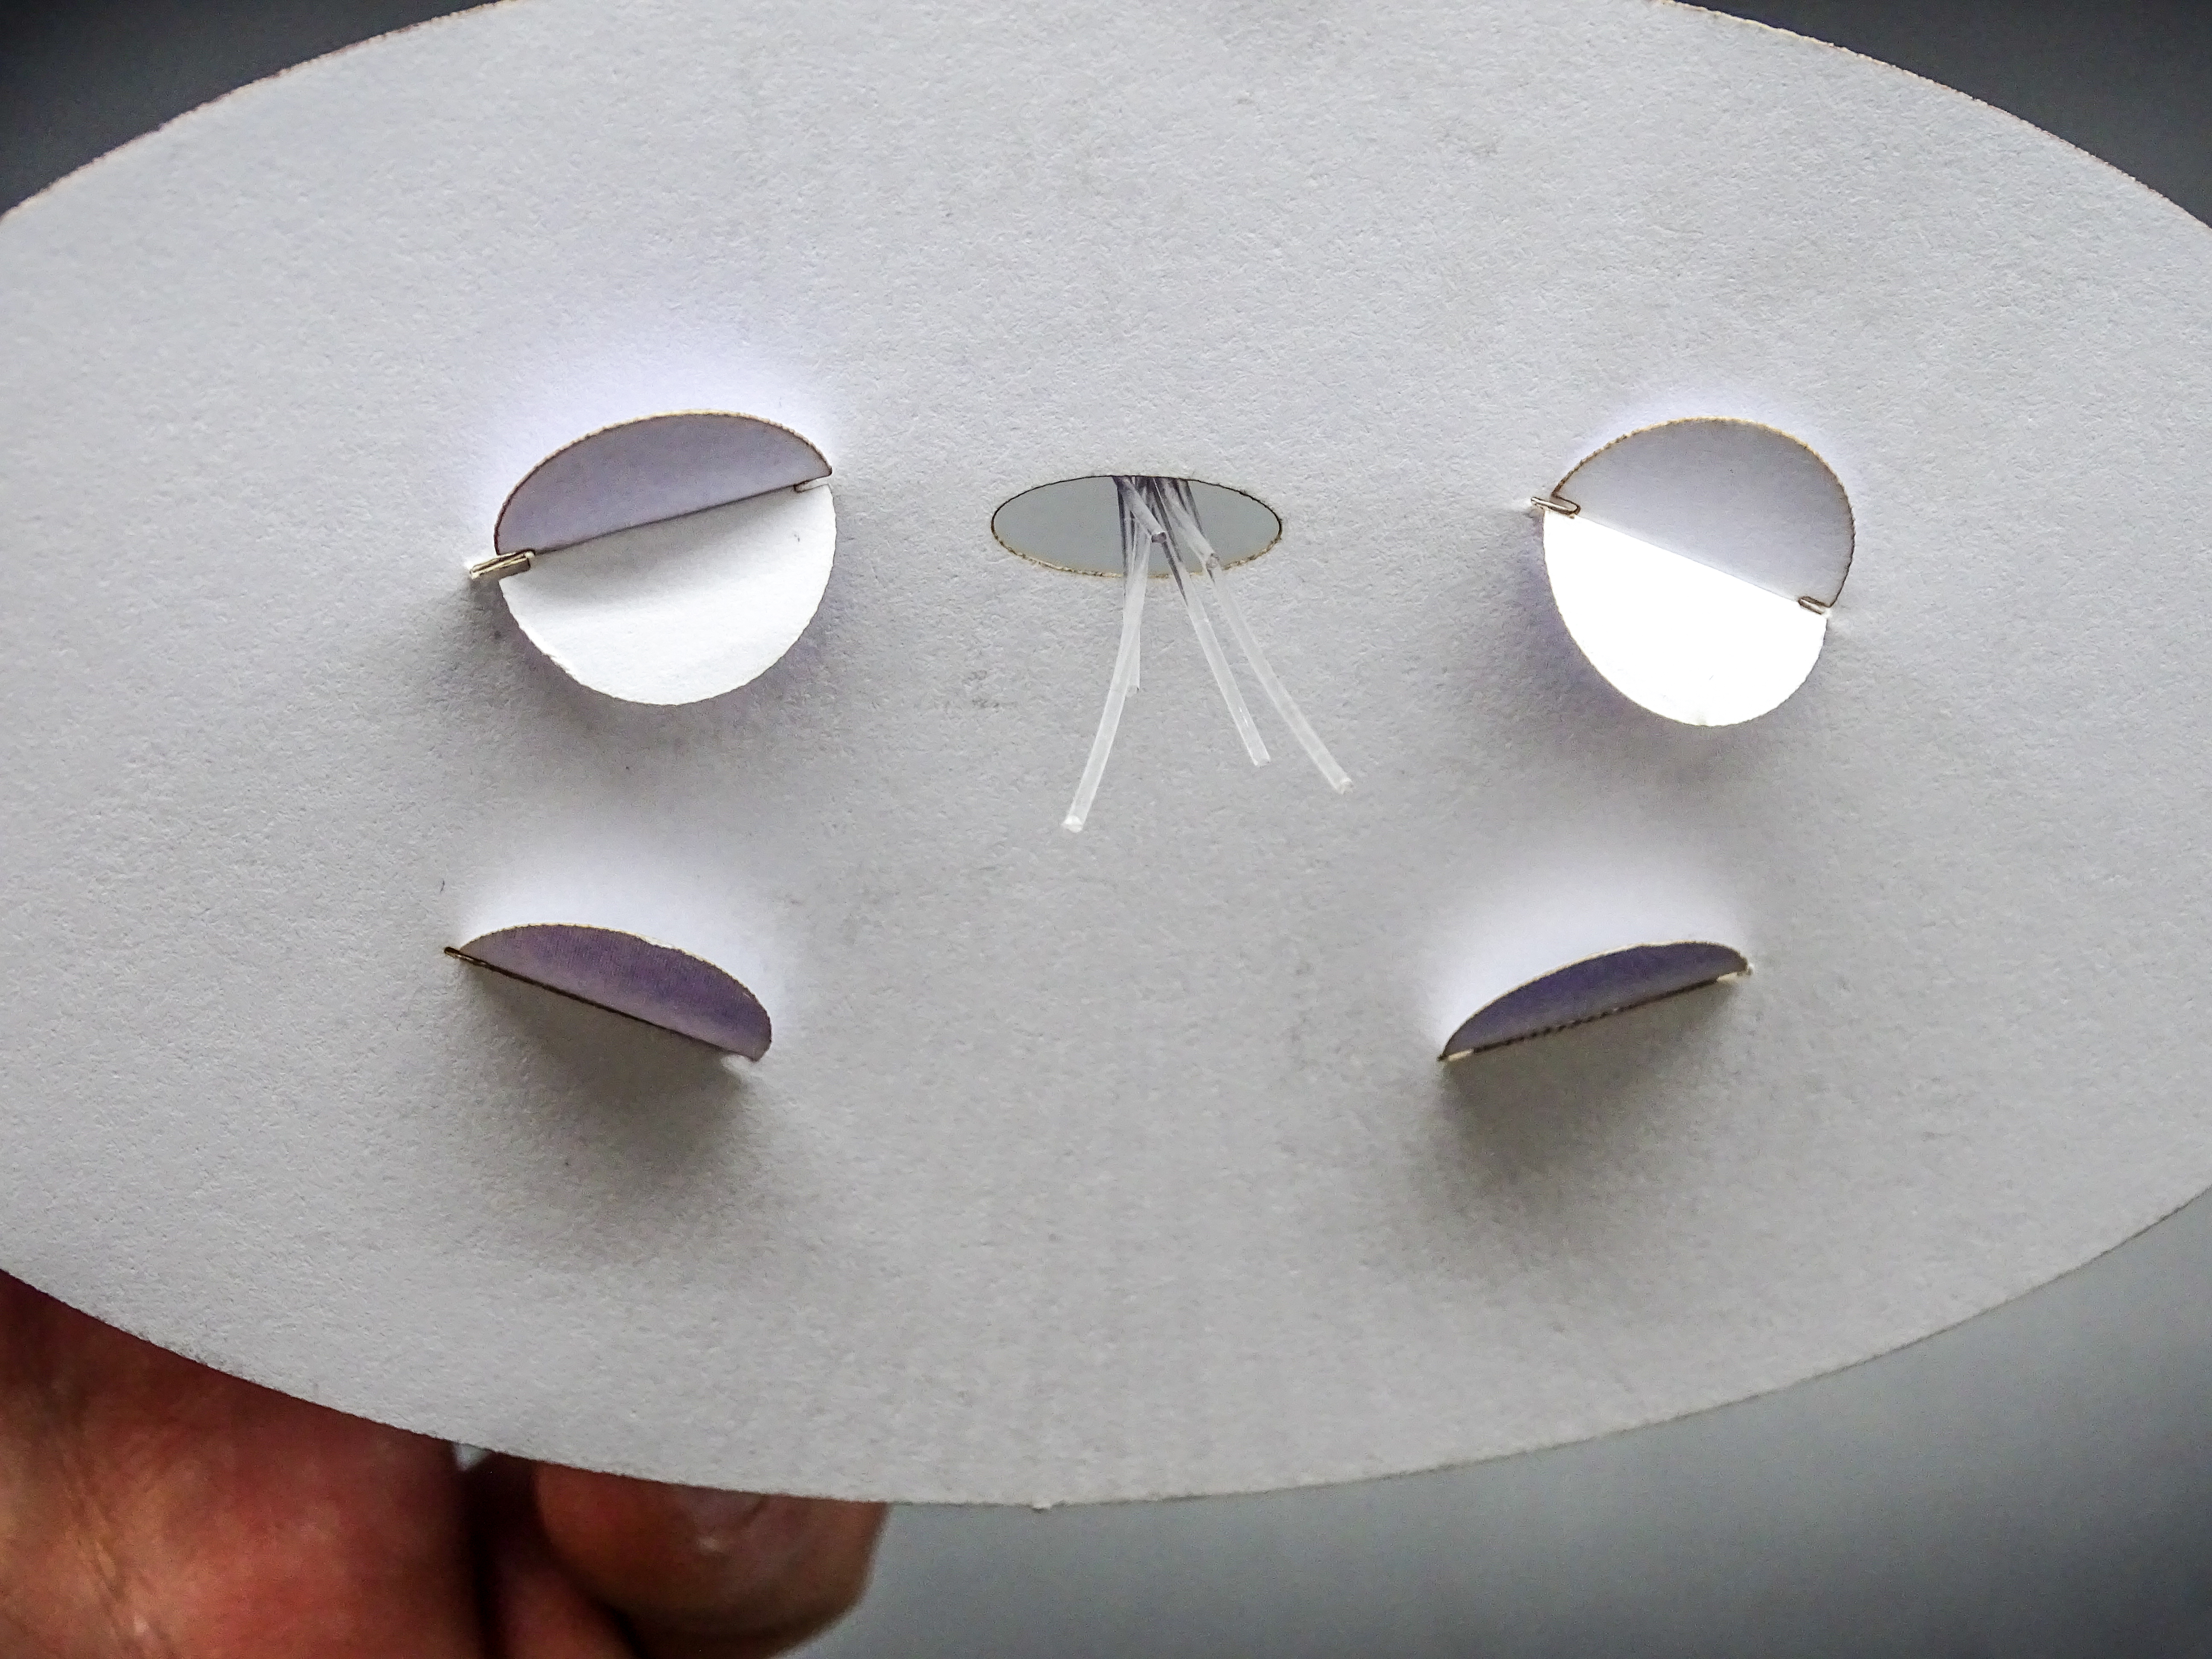
Before assembling the reindeer, we first need to separate all parts from the carrier sheet.
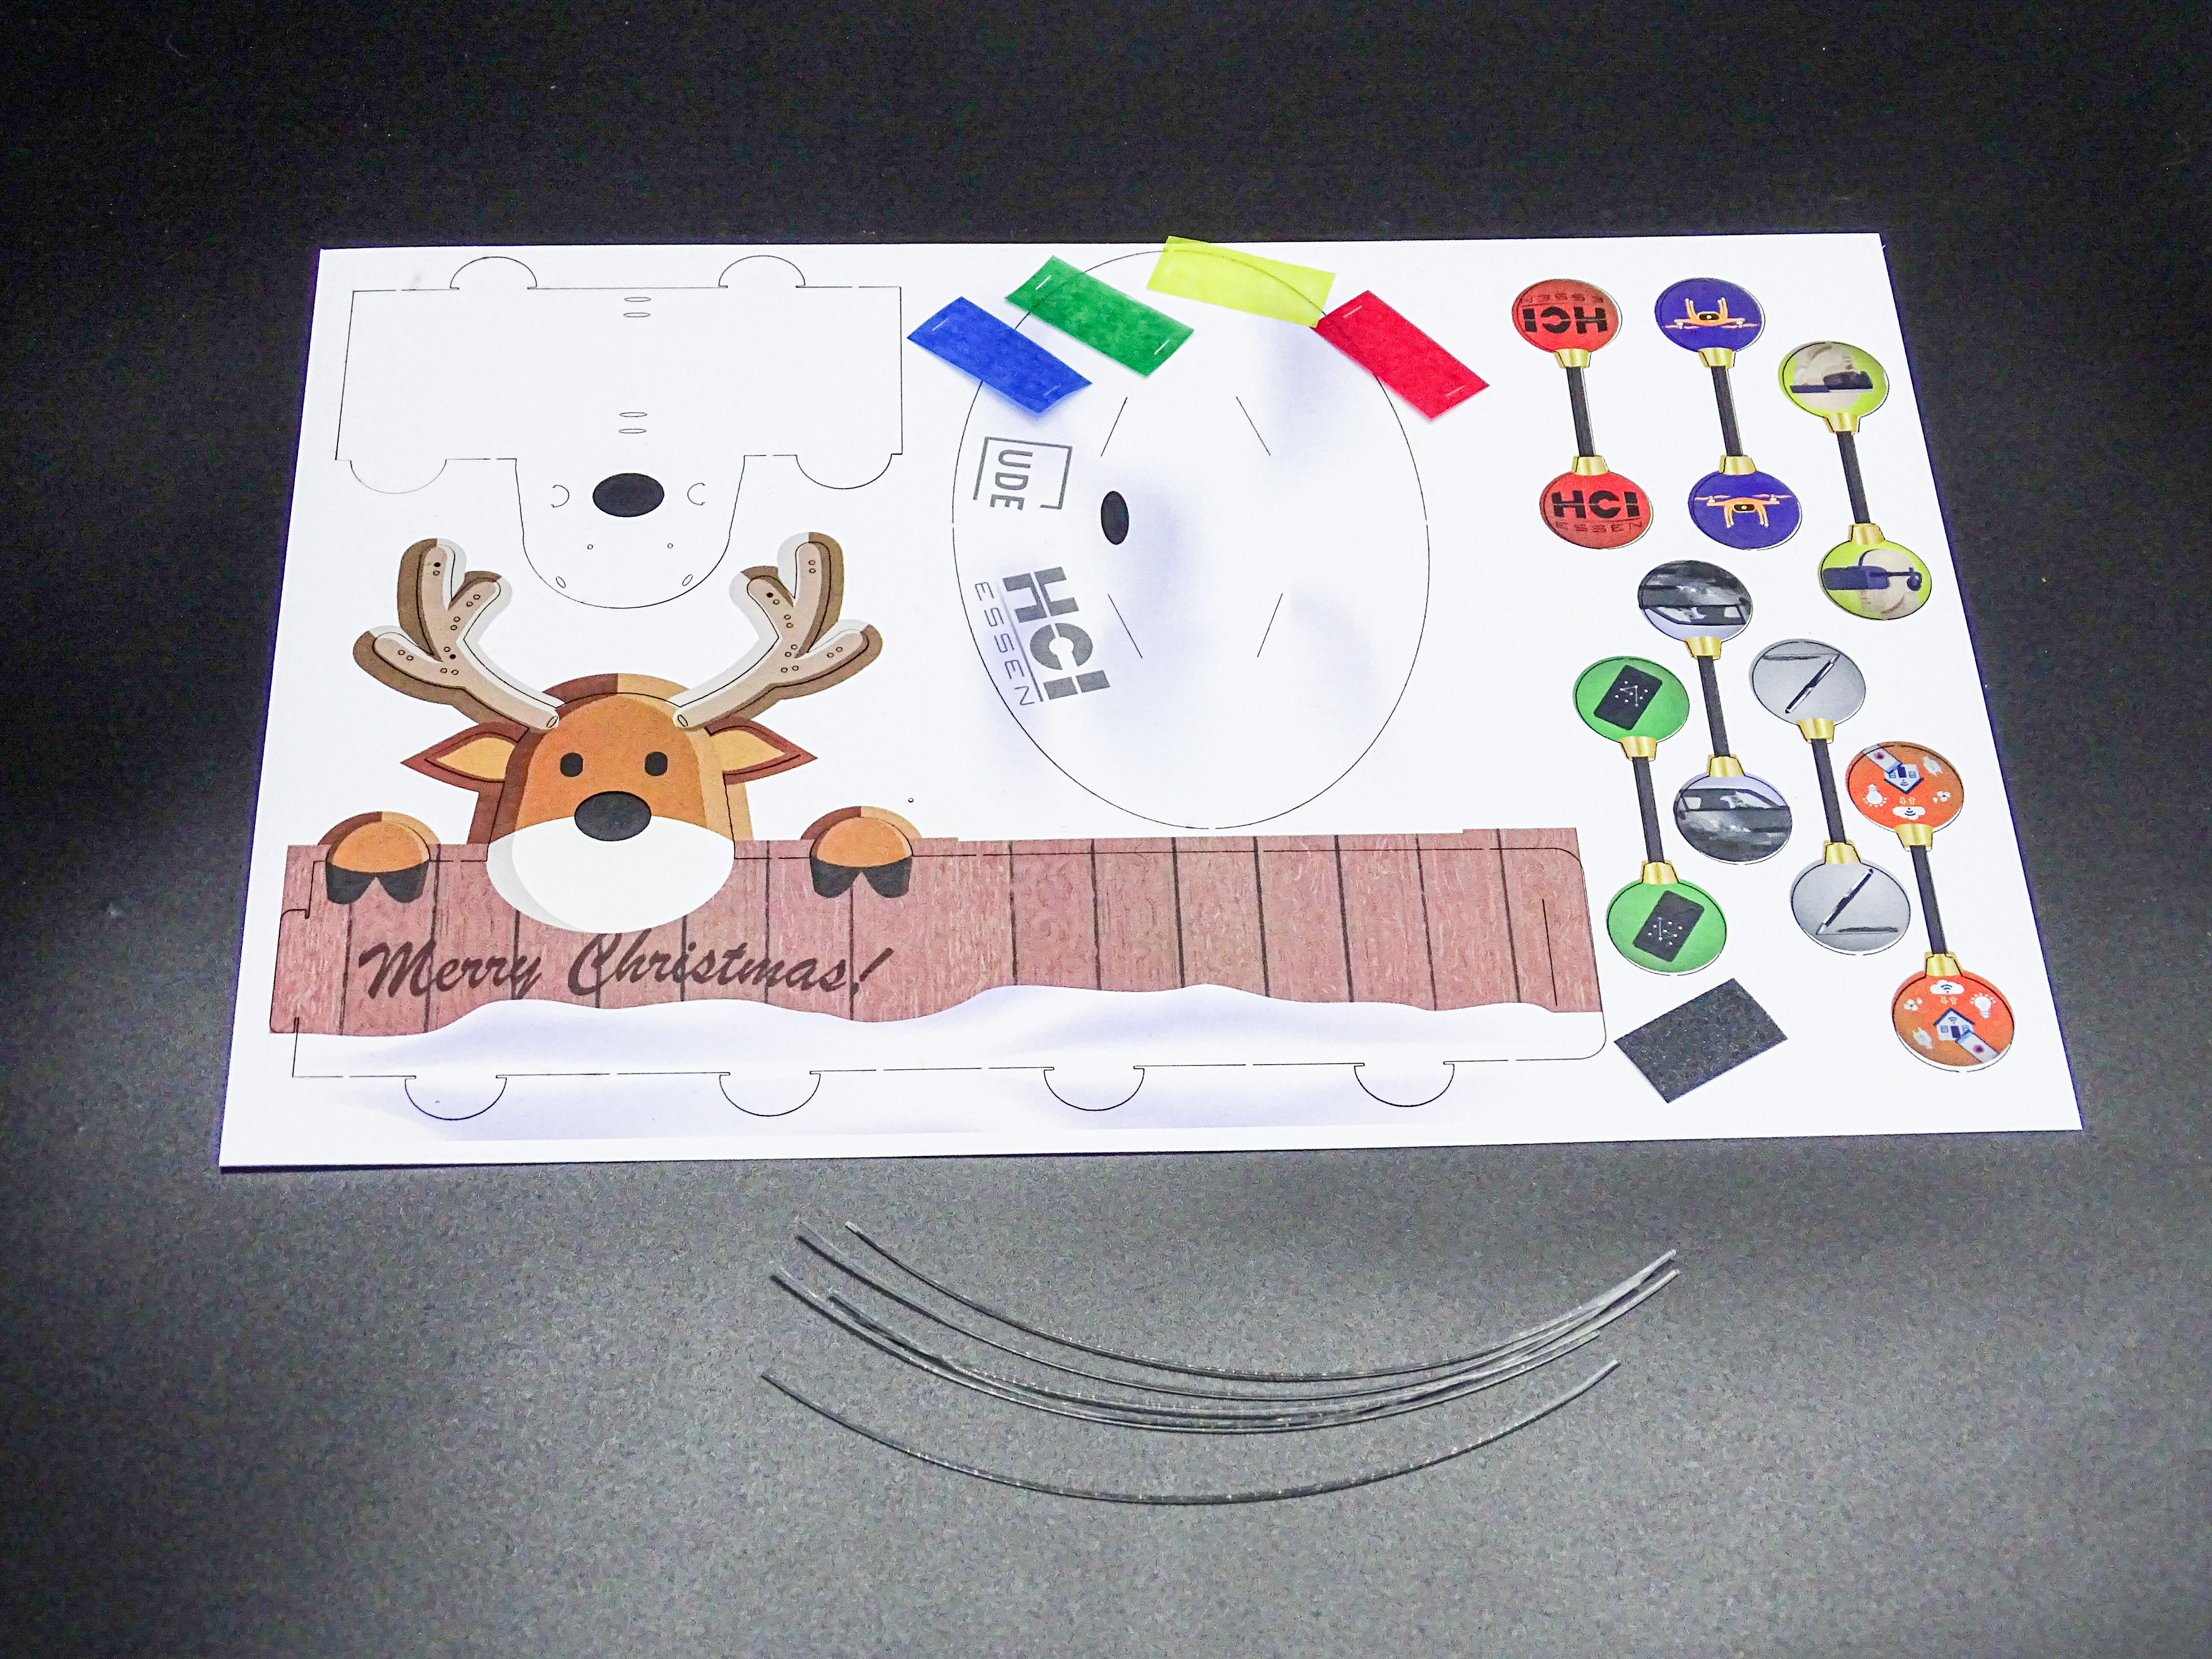
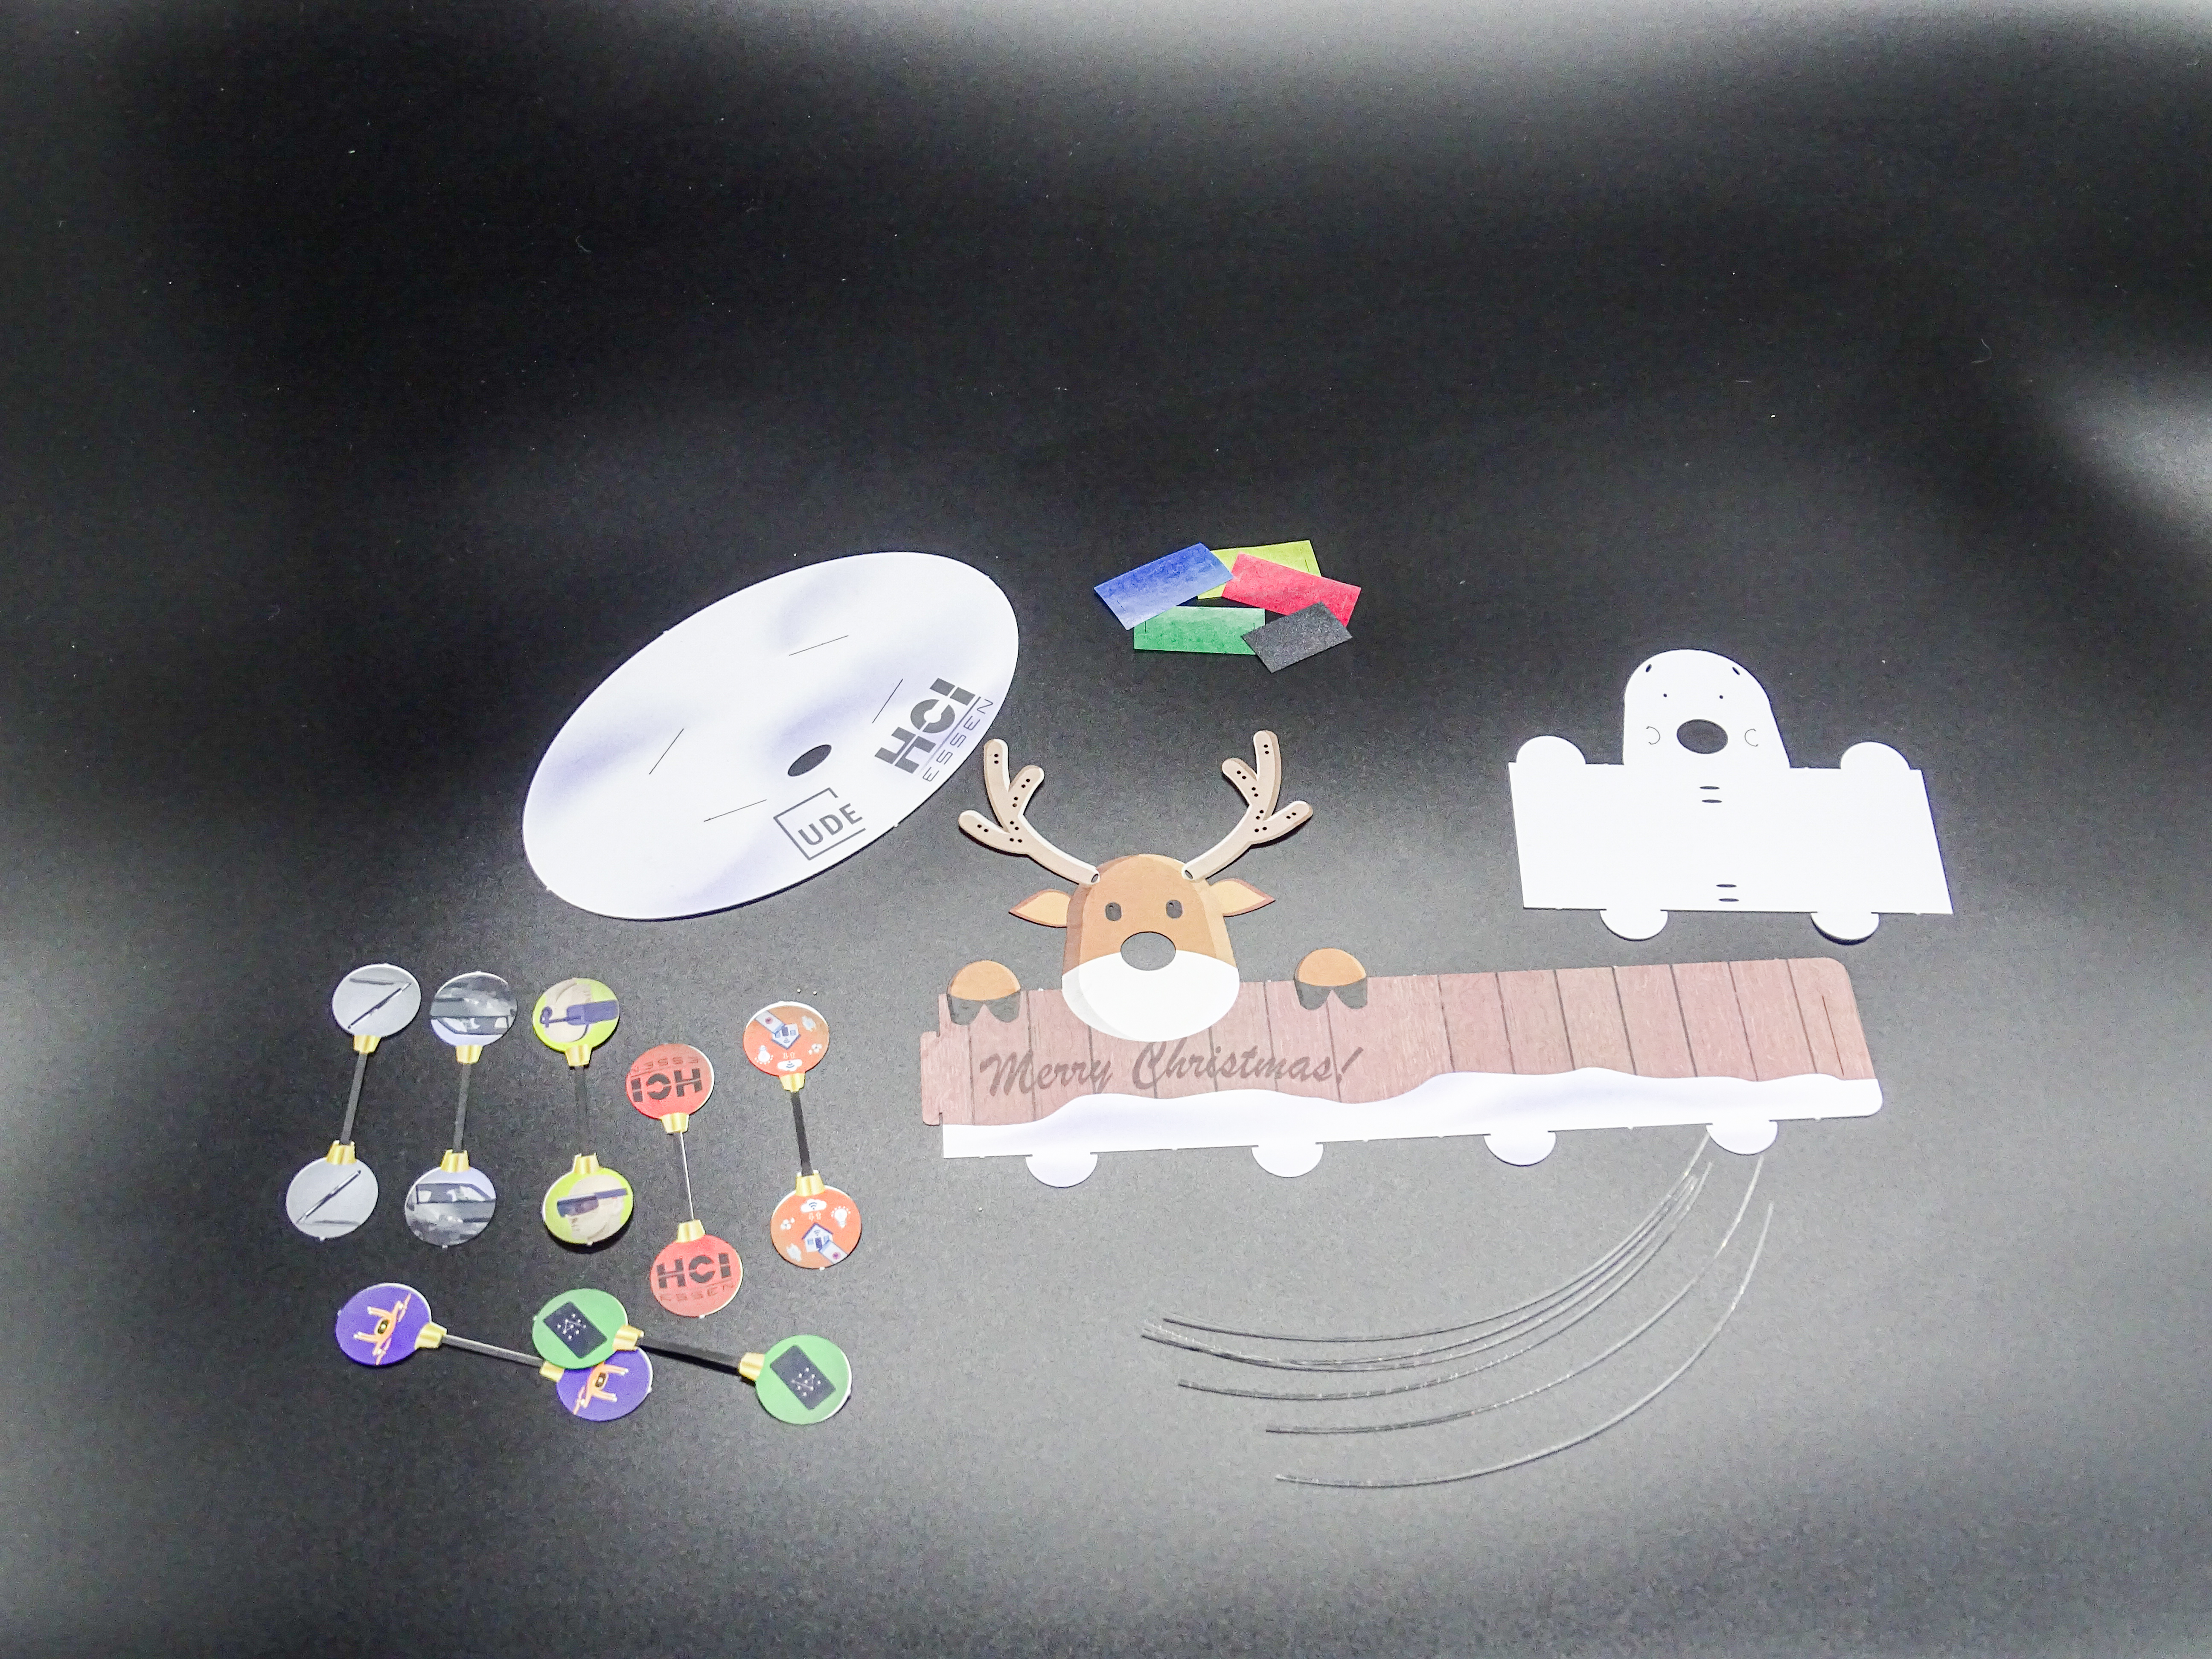
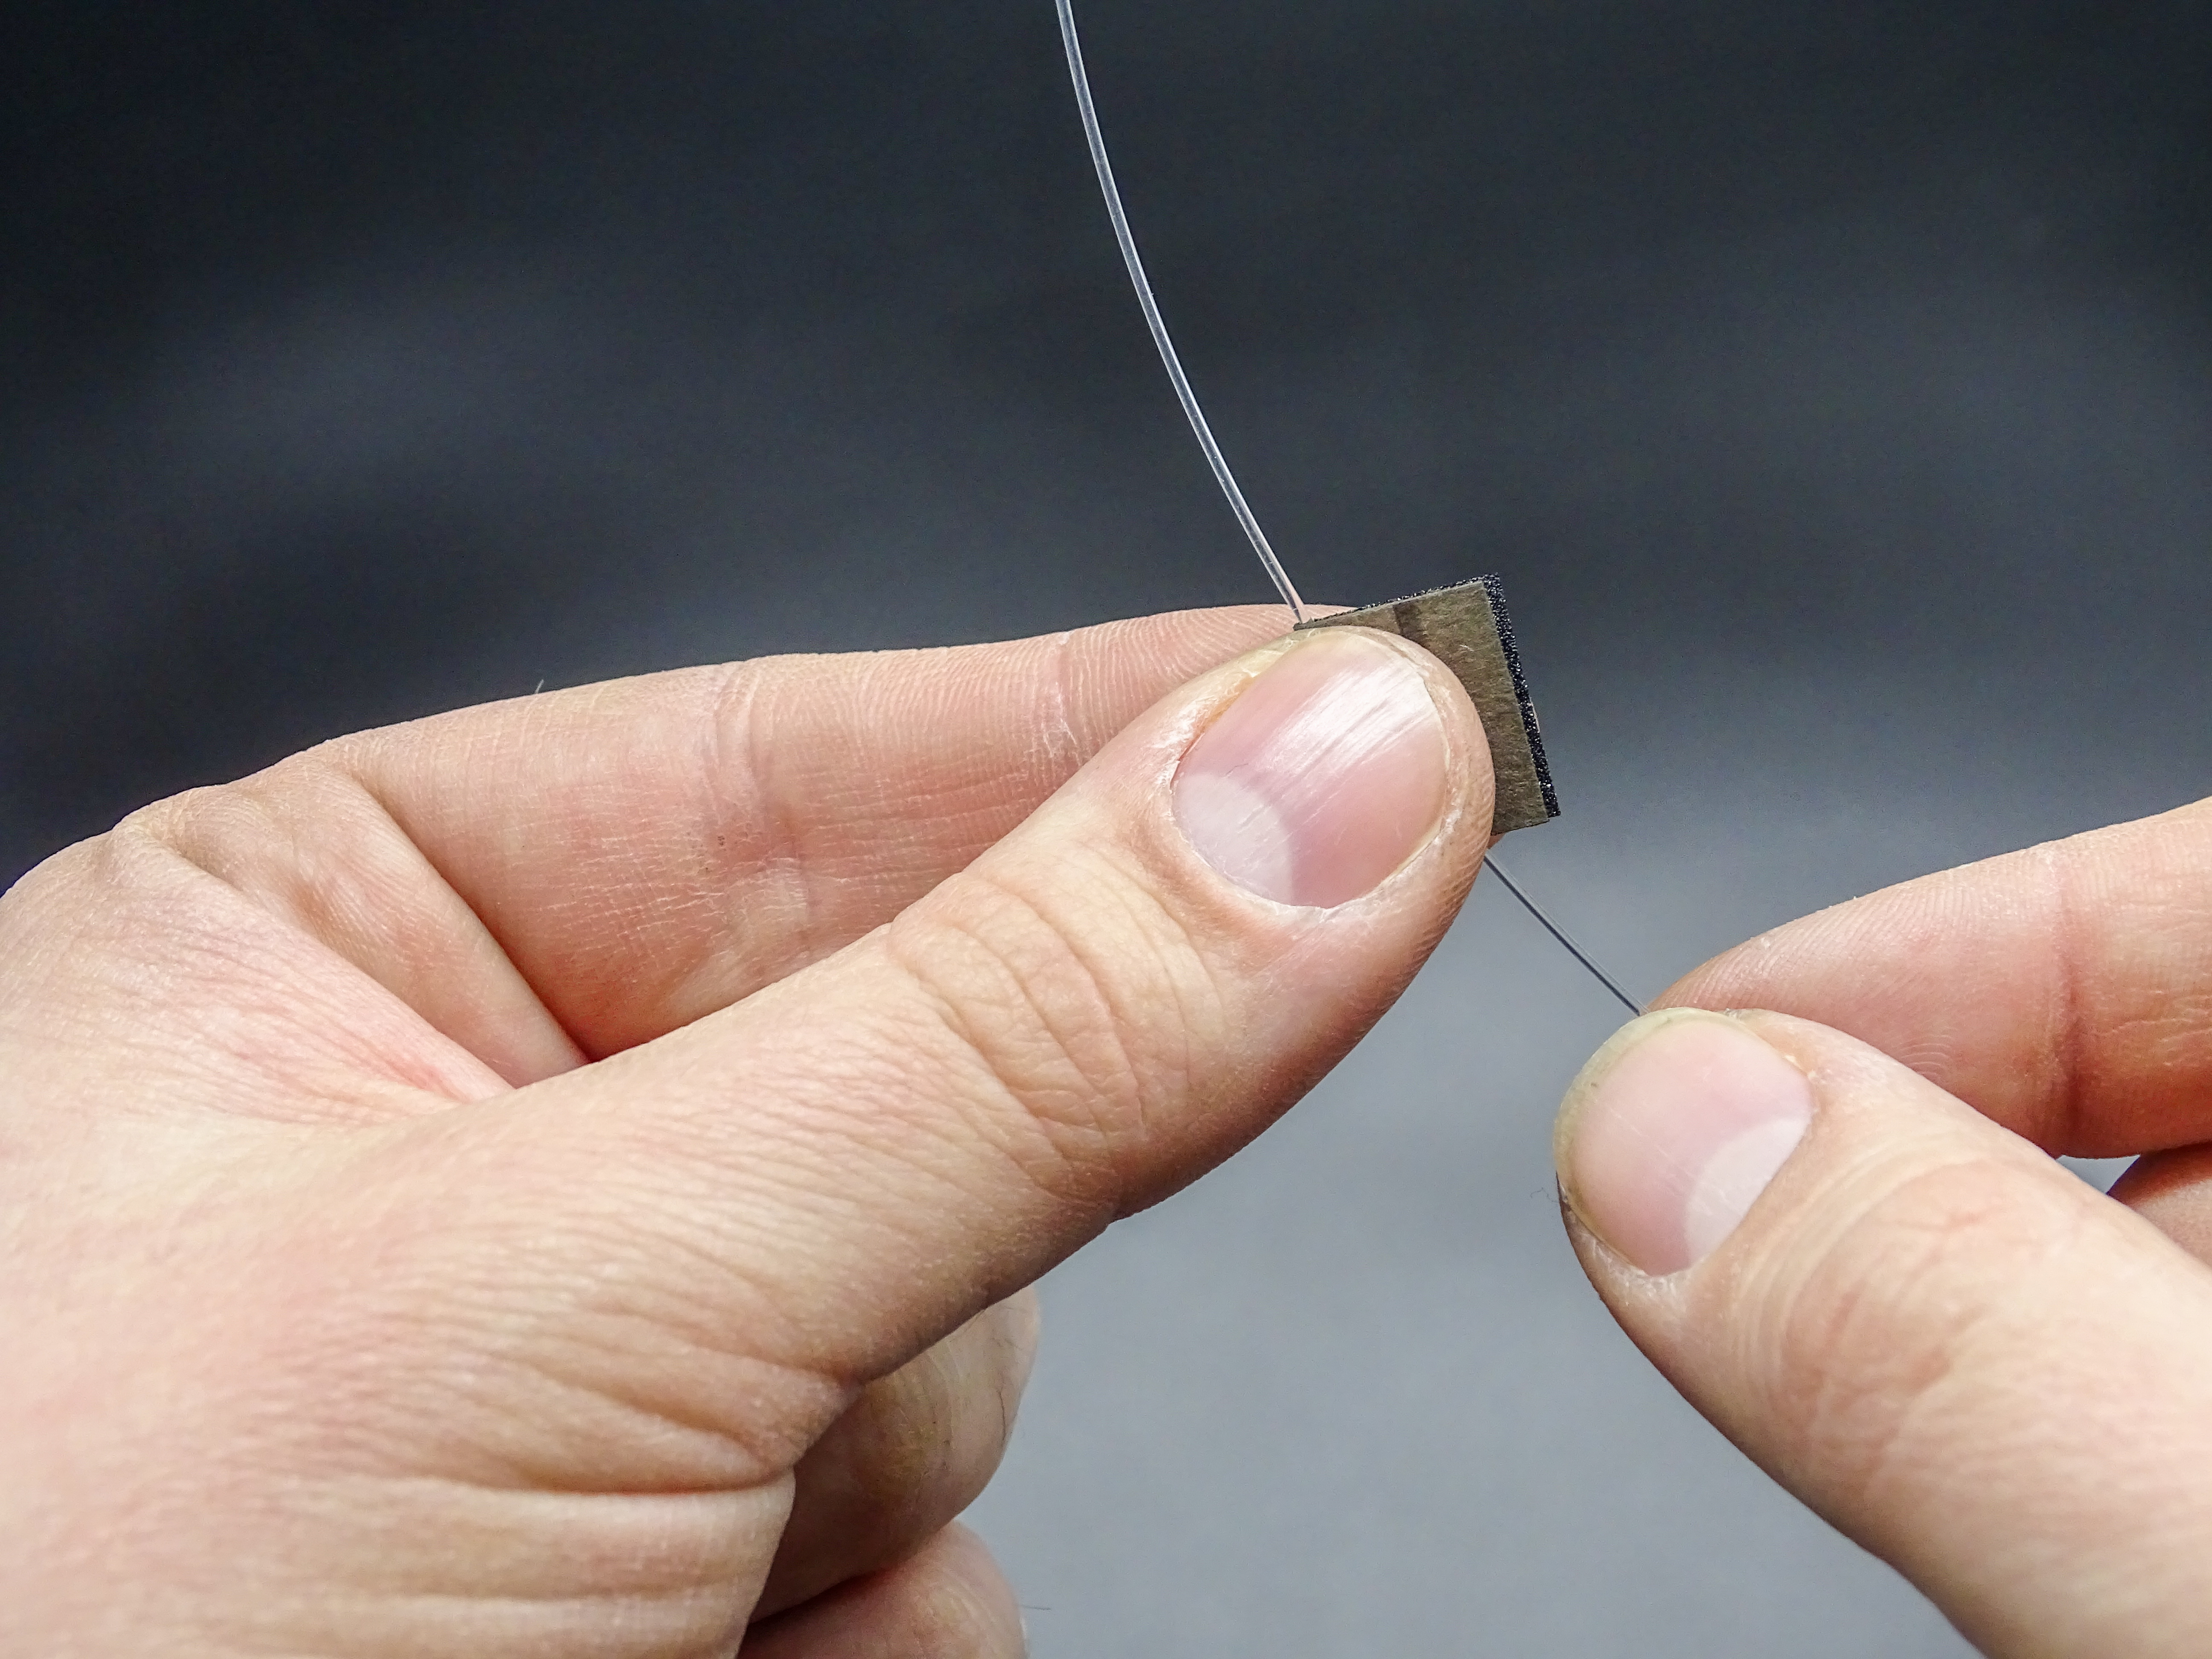
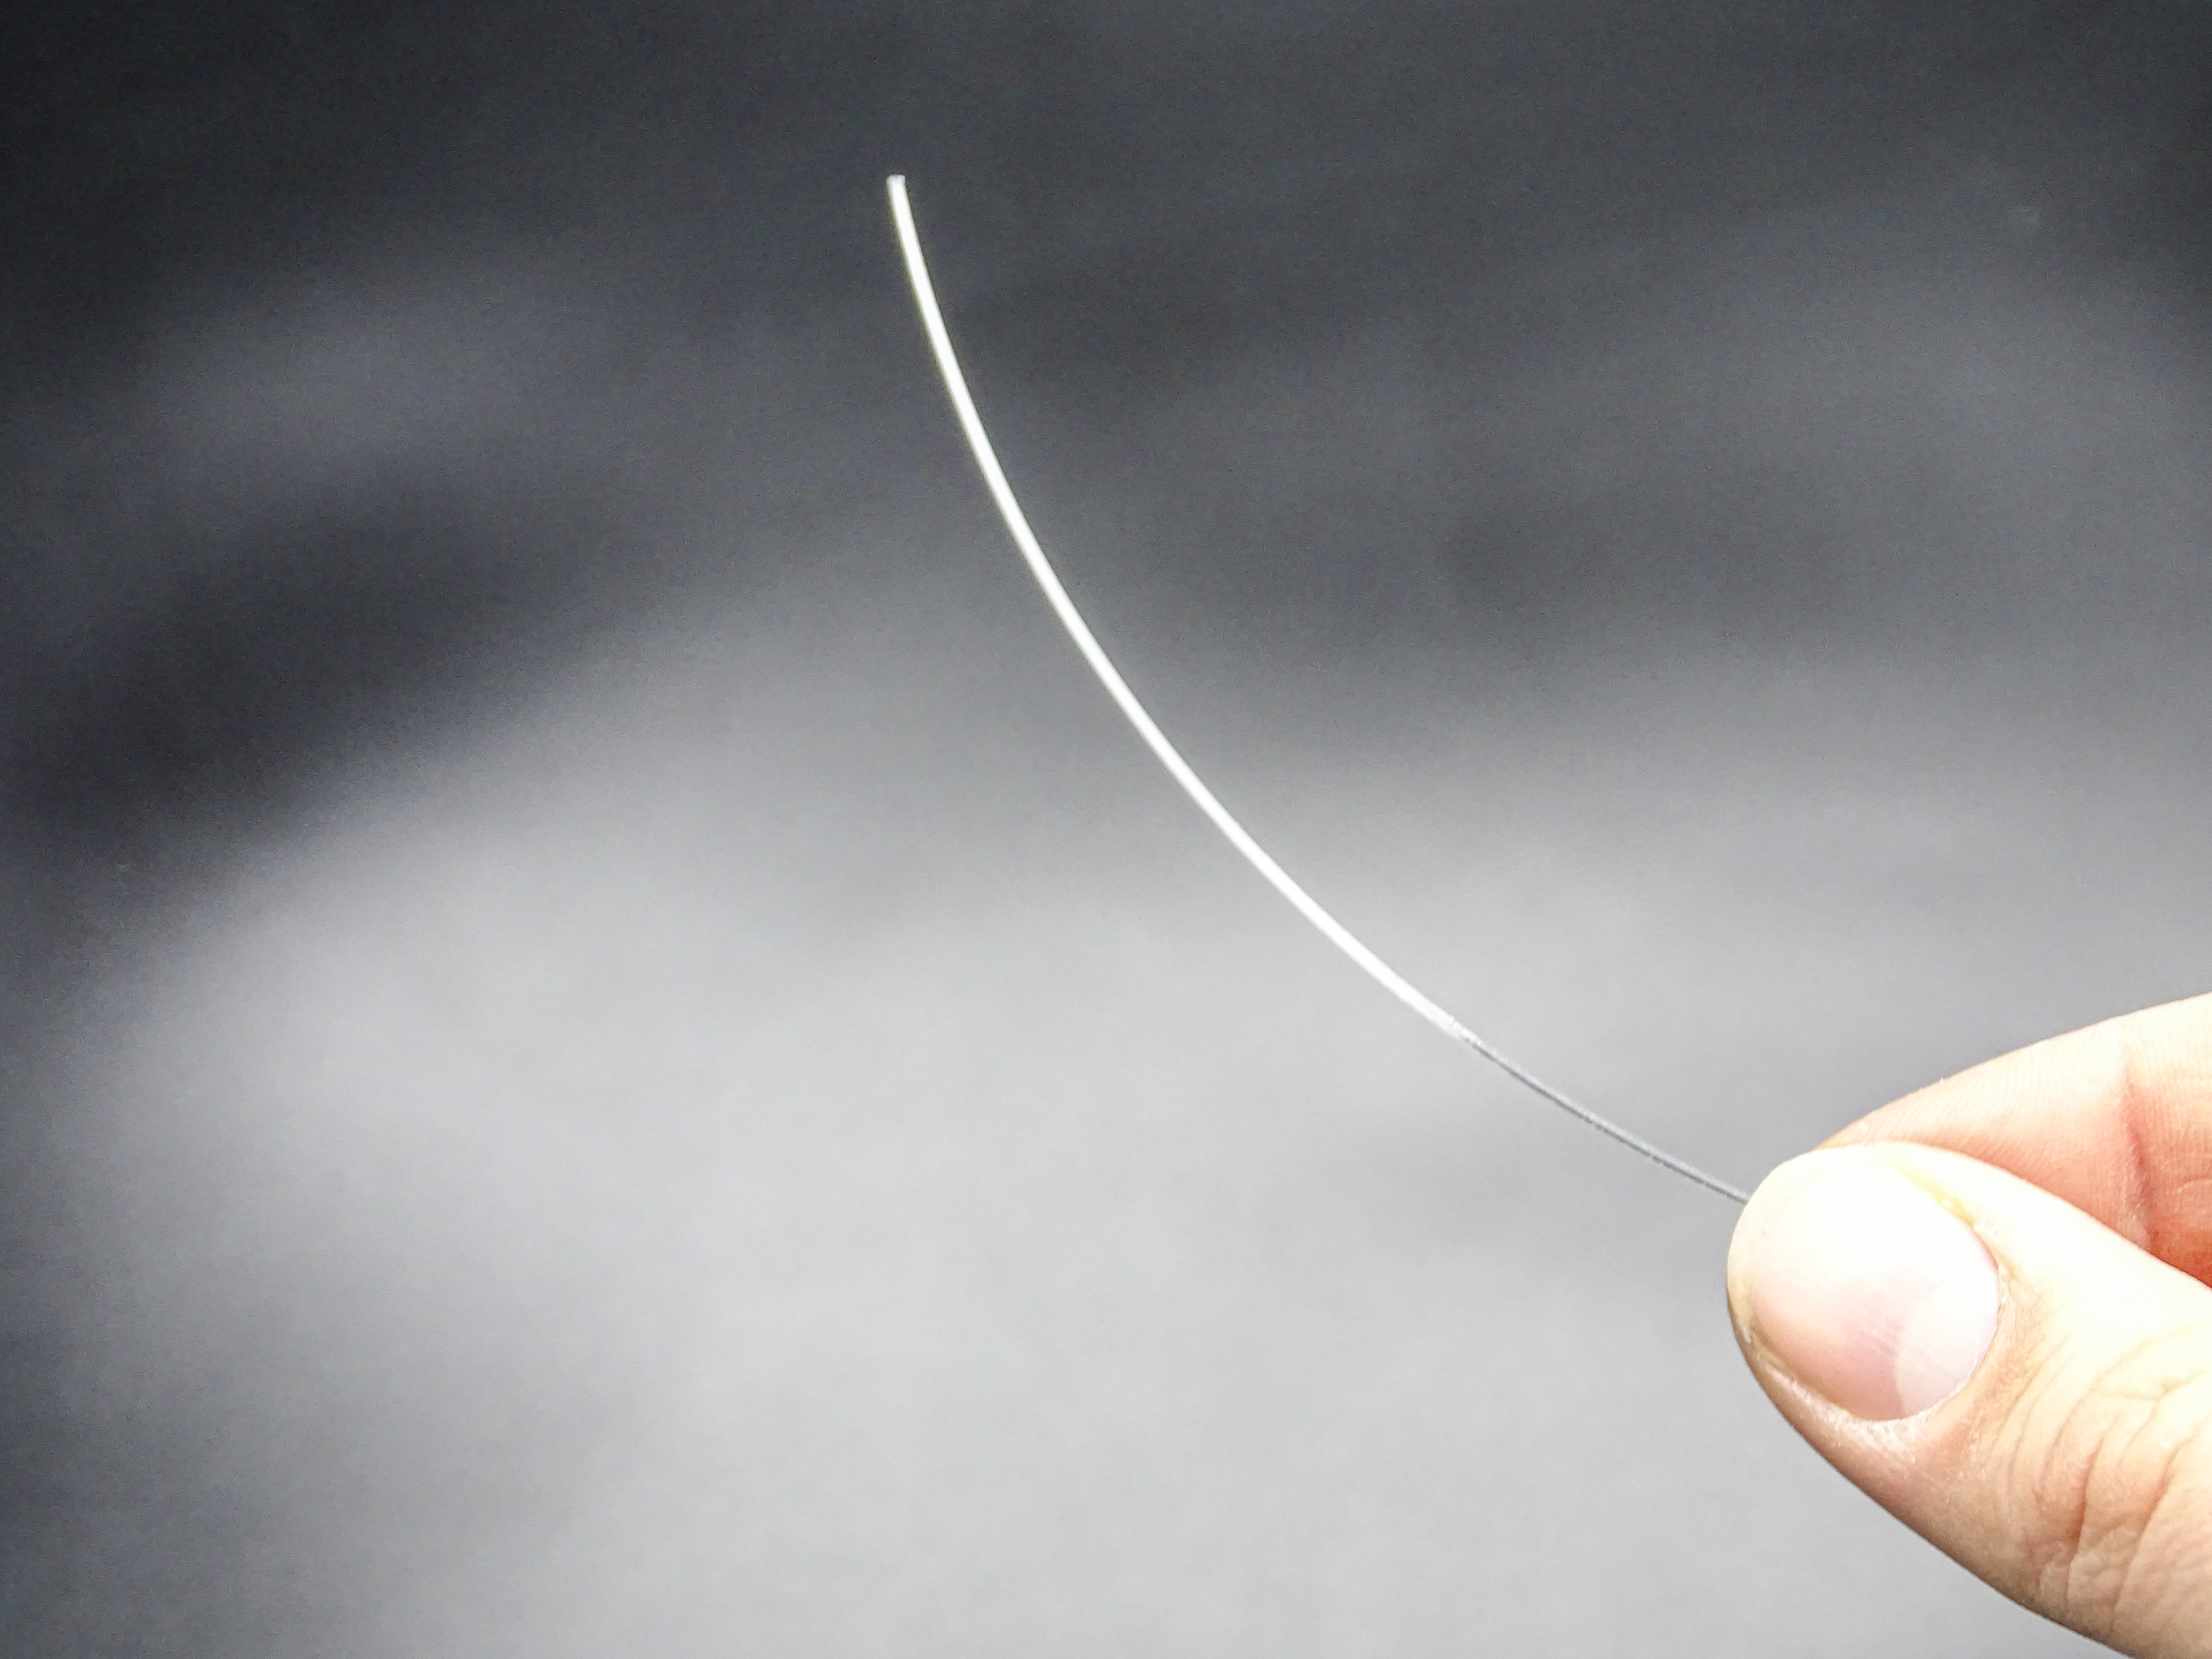
We further need to prepare the glass fibers: sand the first half of all six fibers until they become opaque using the sandpaper.
spacer
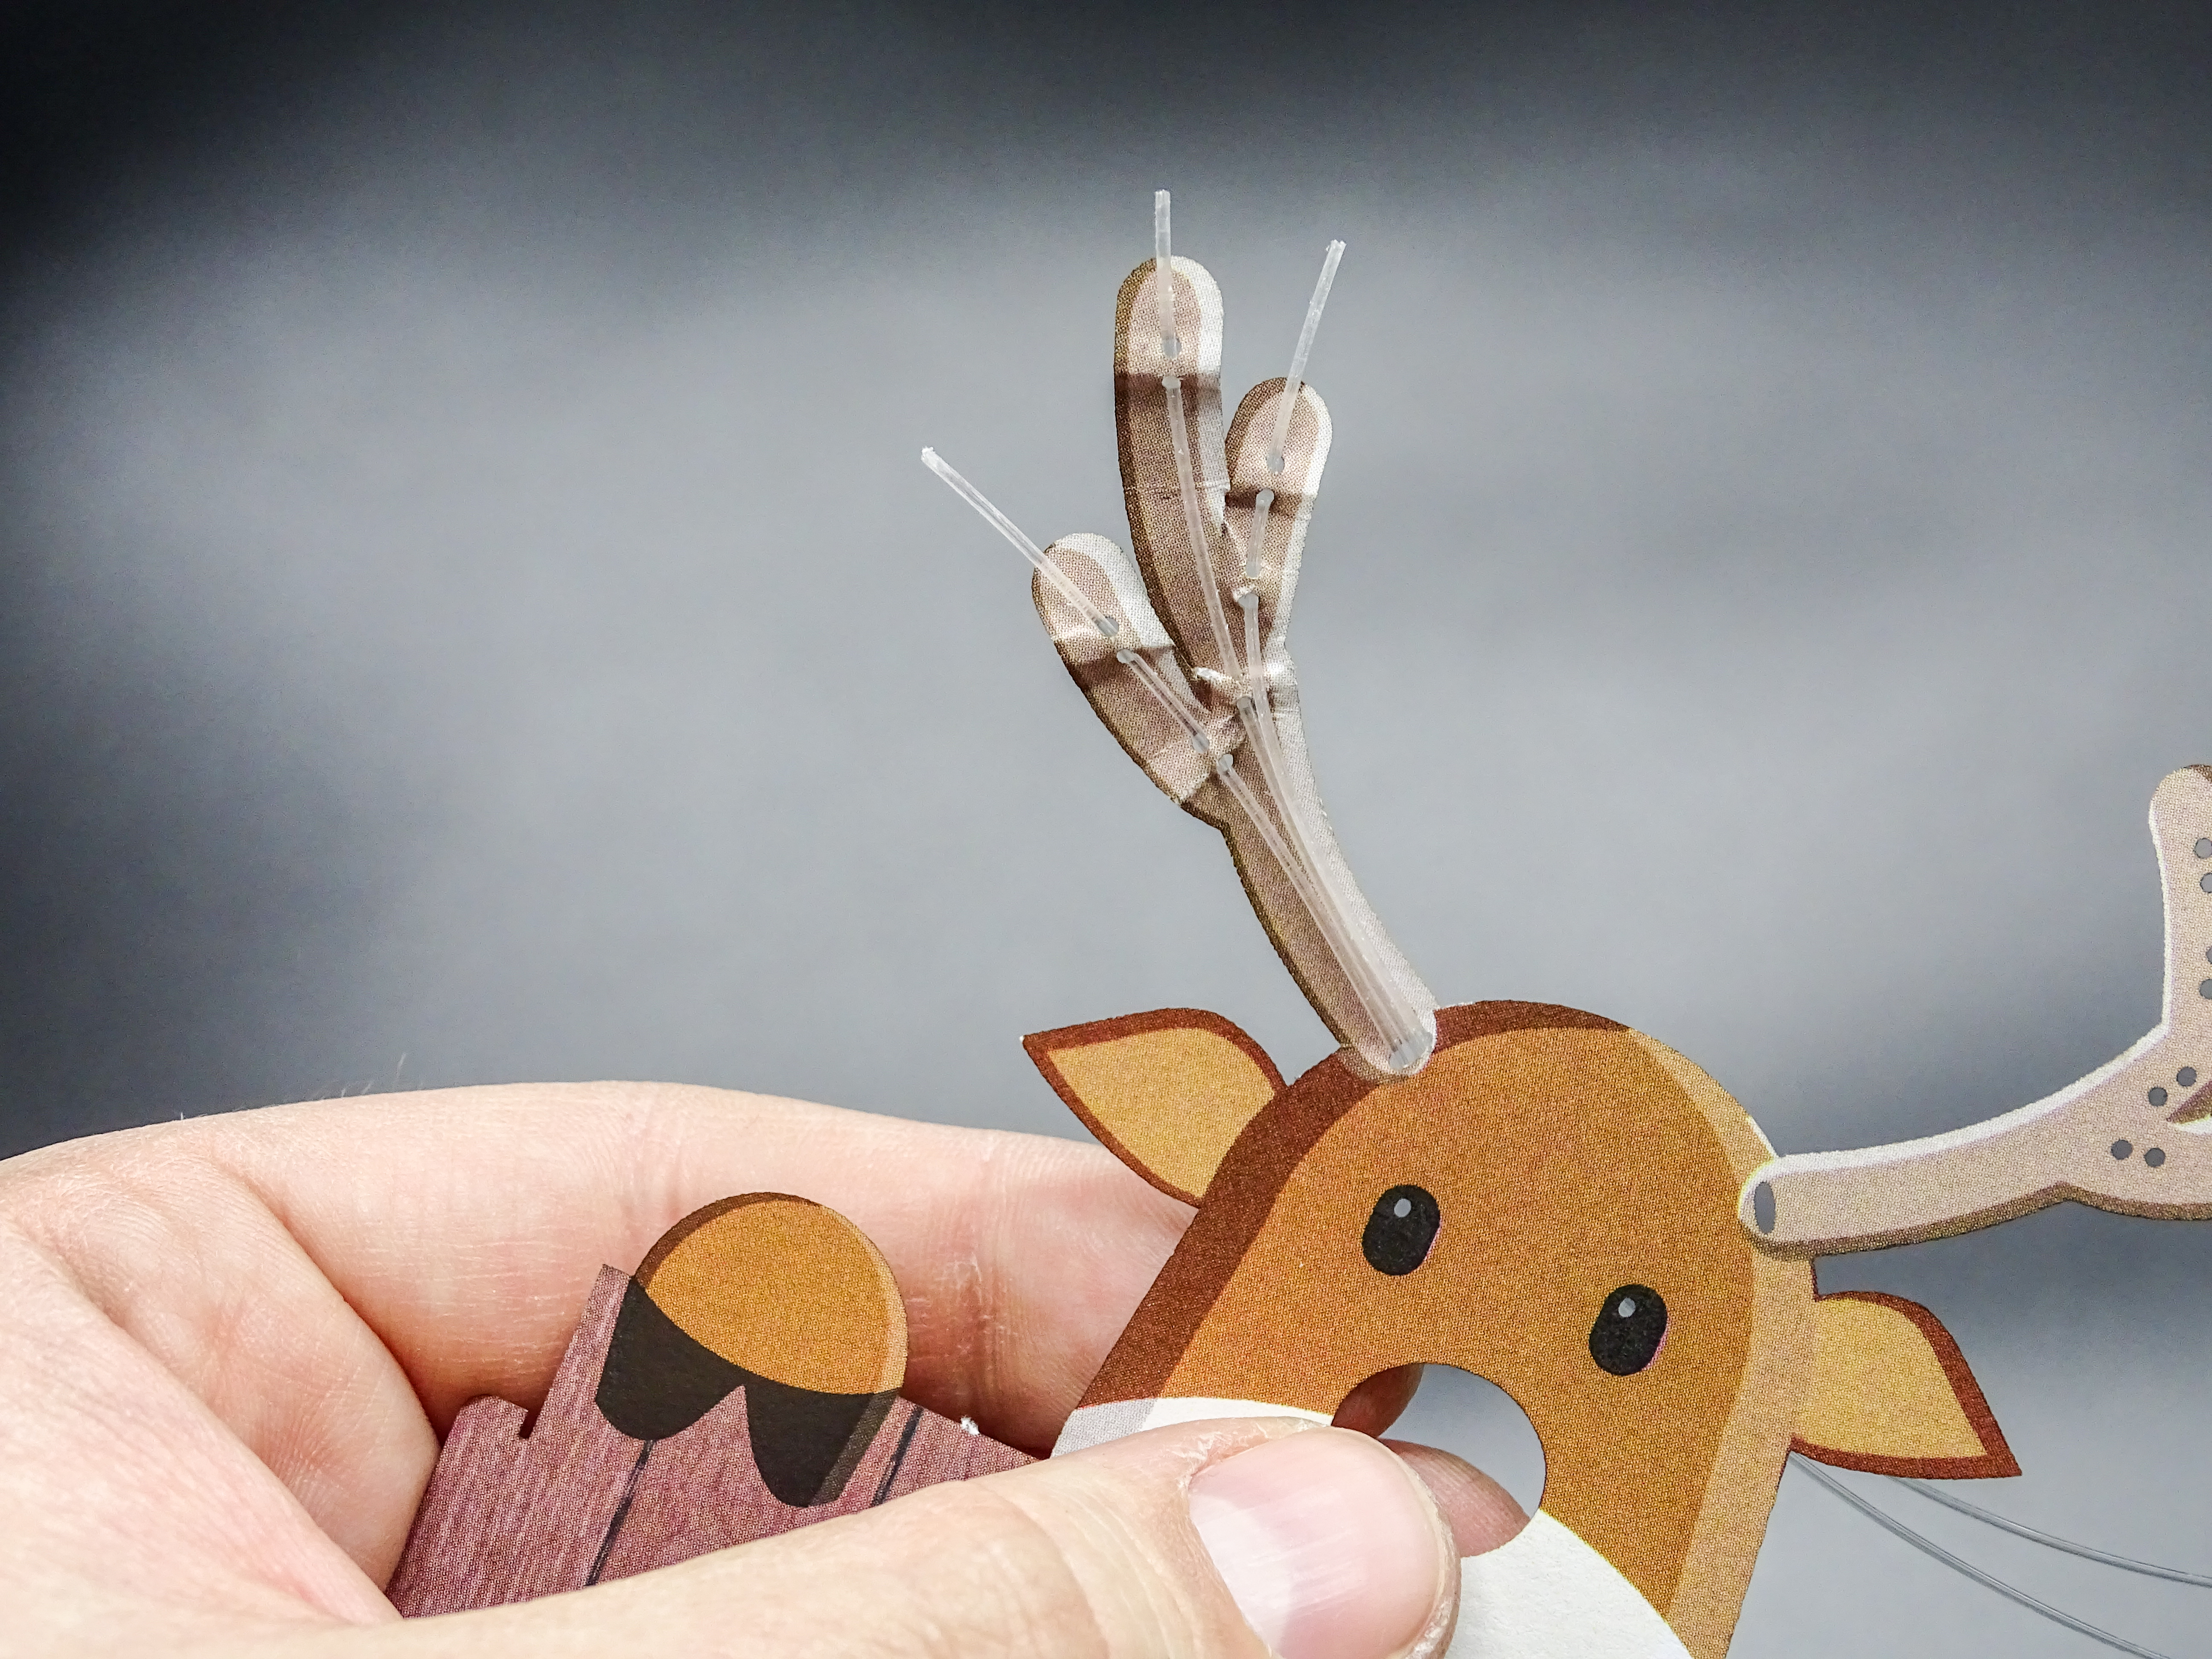
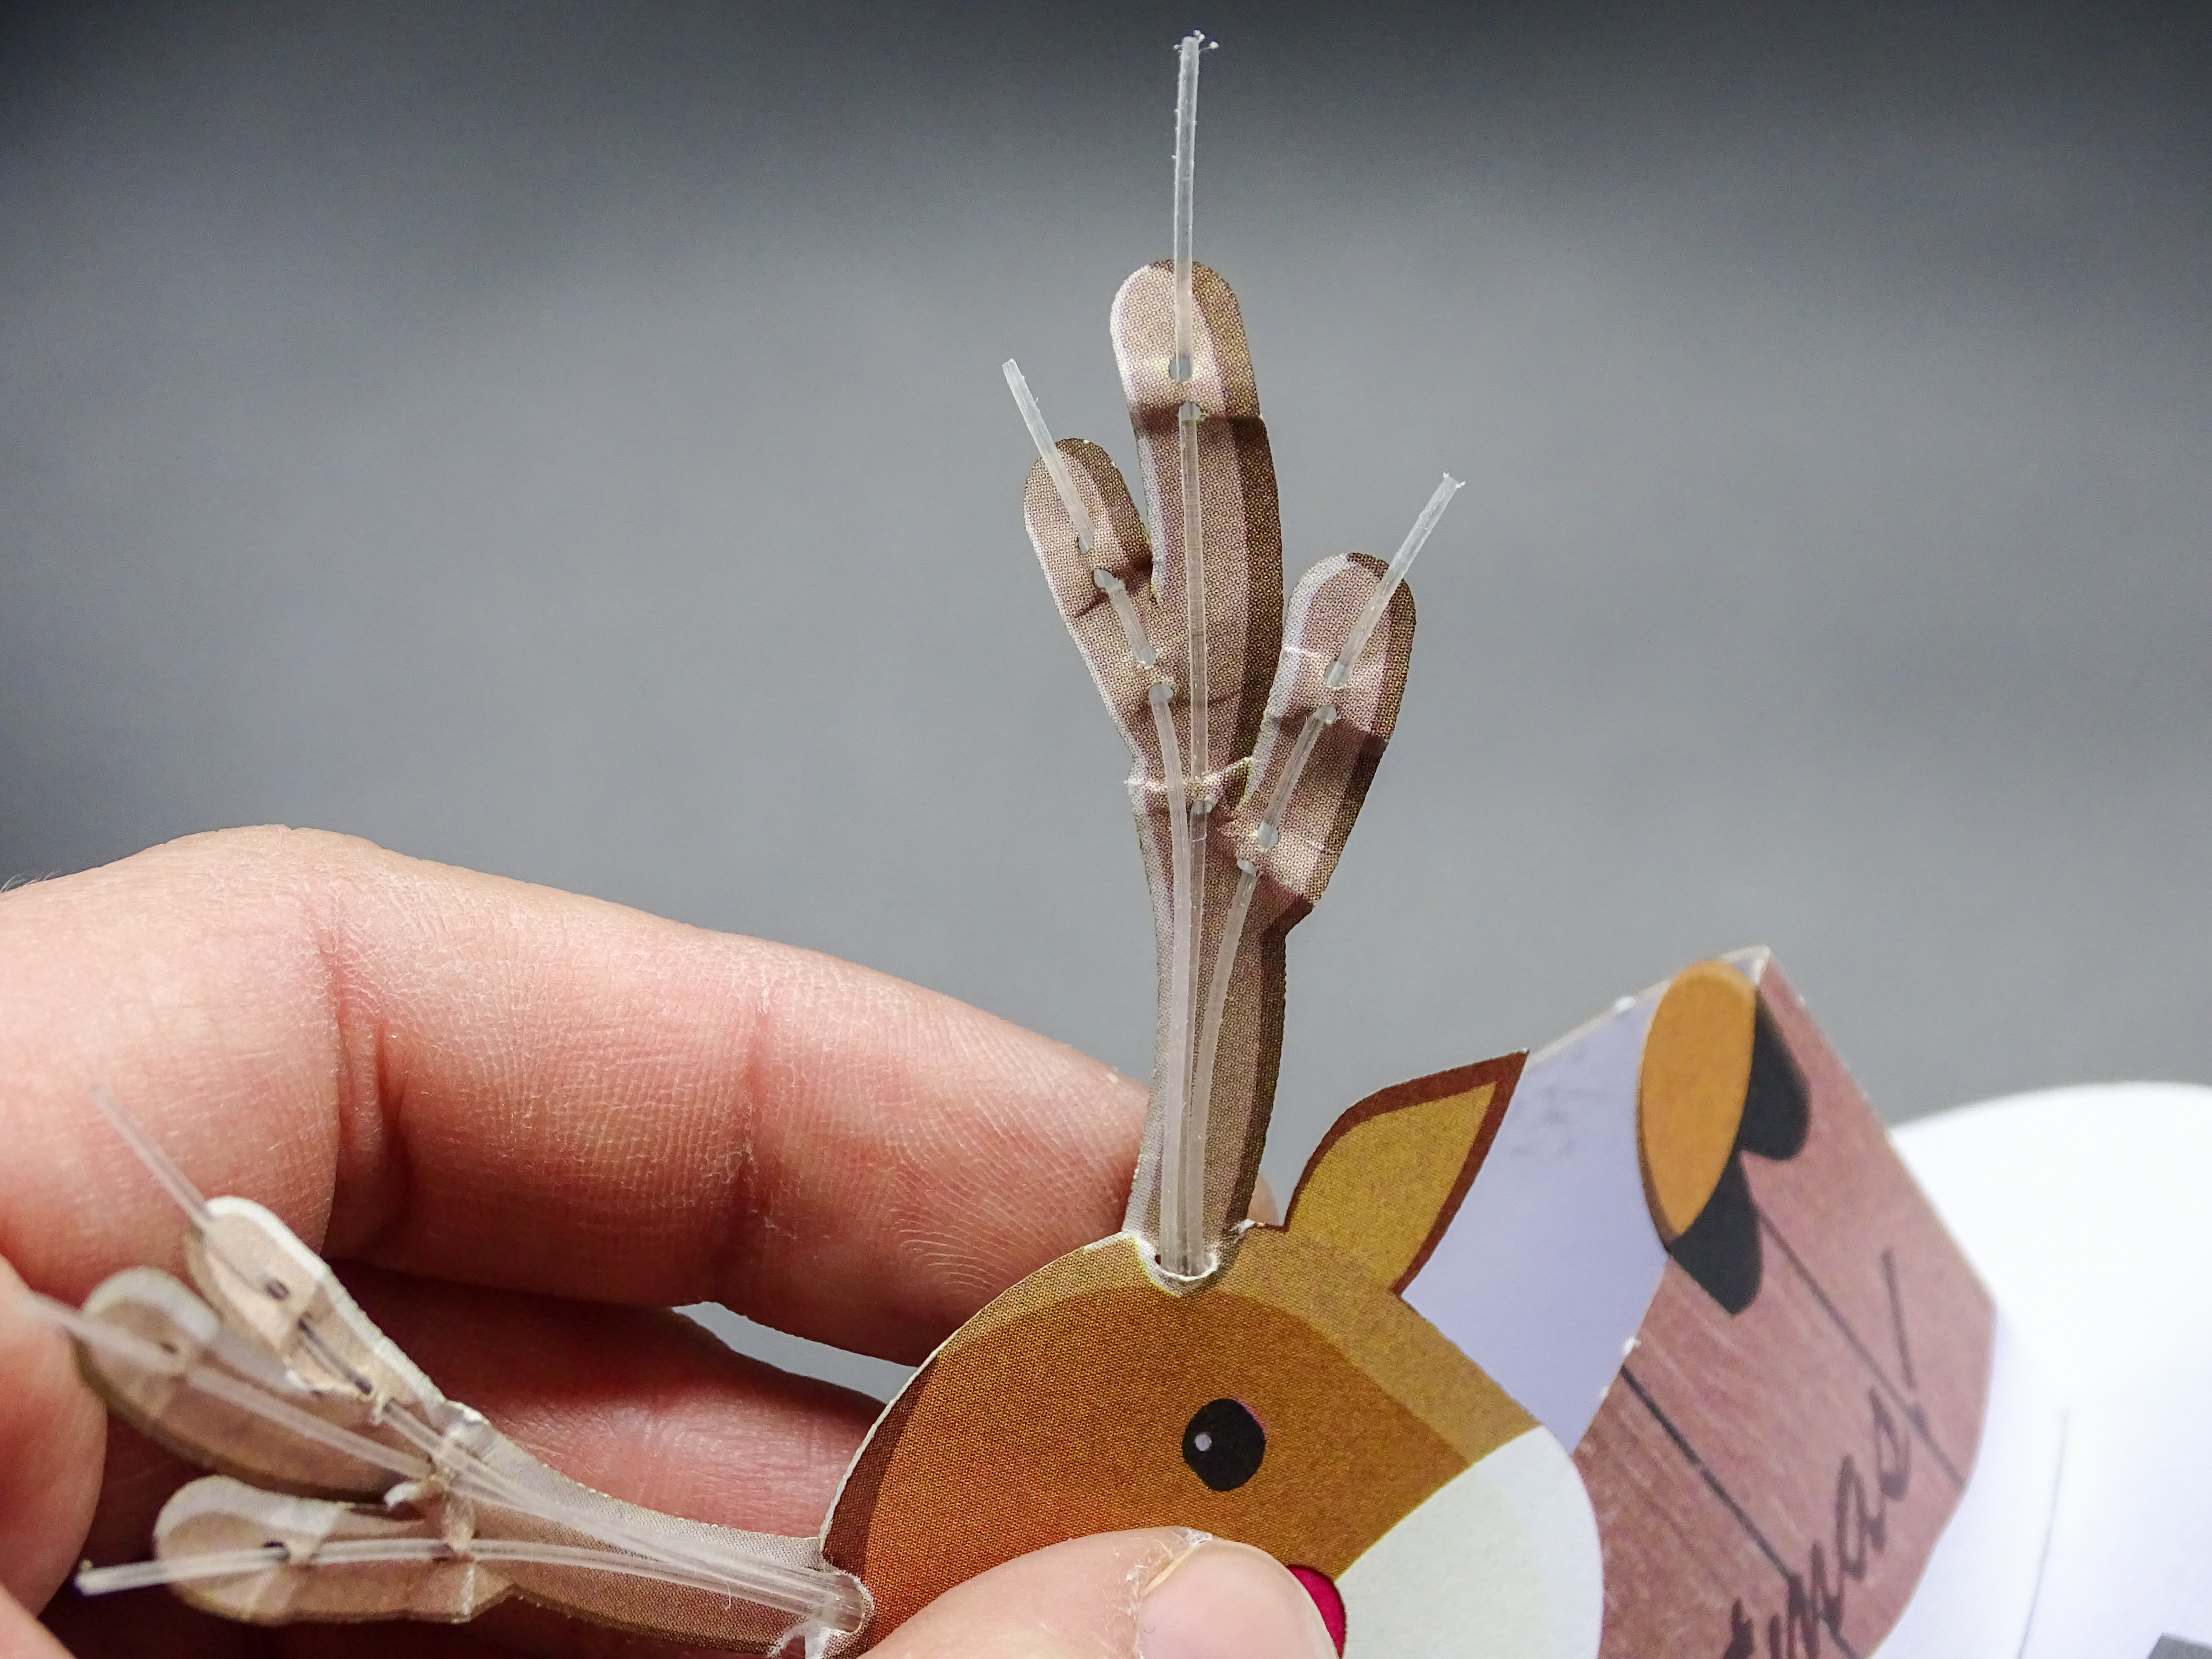
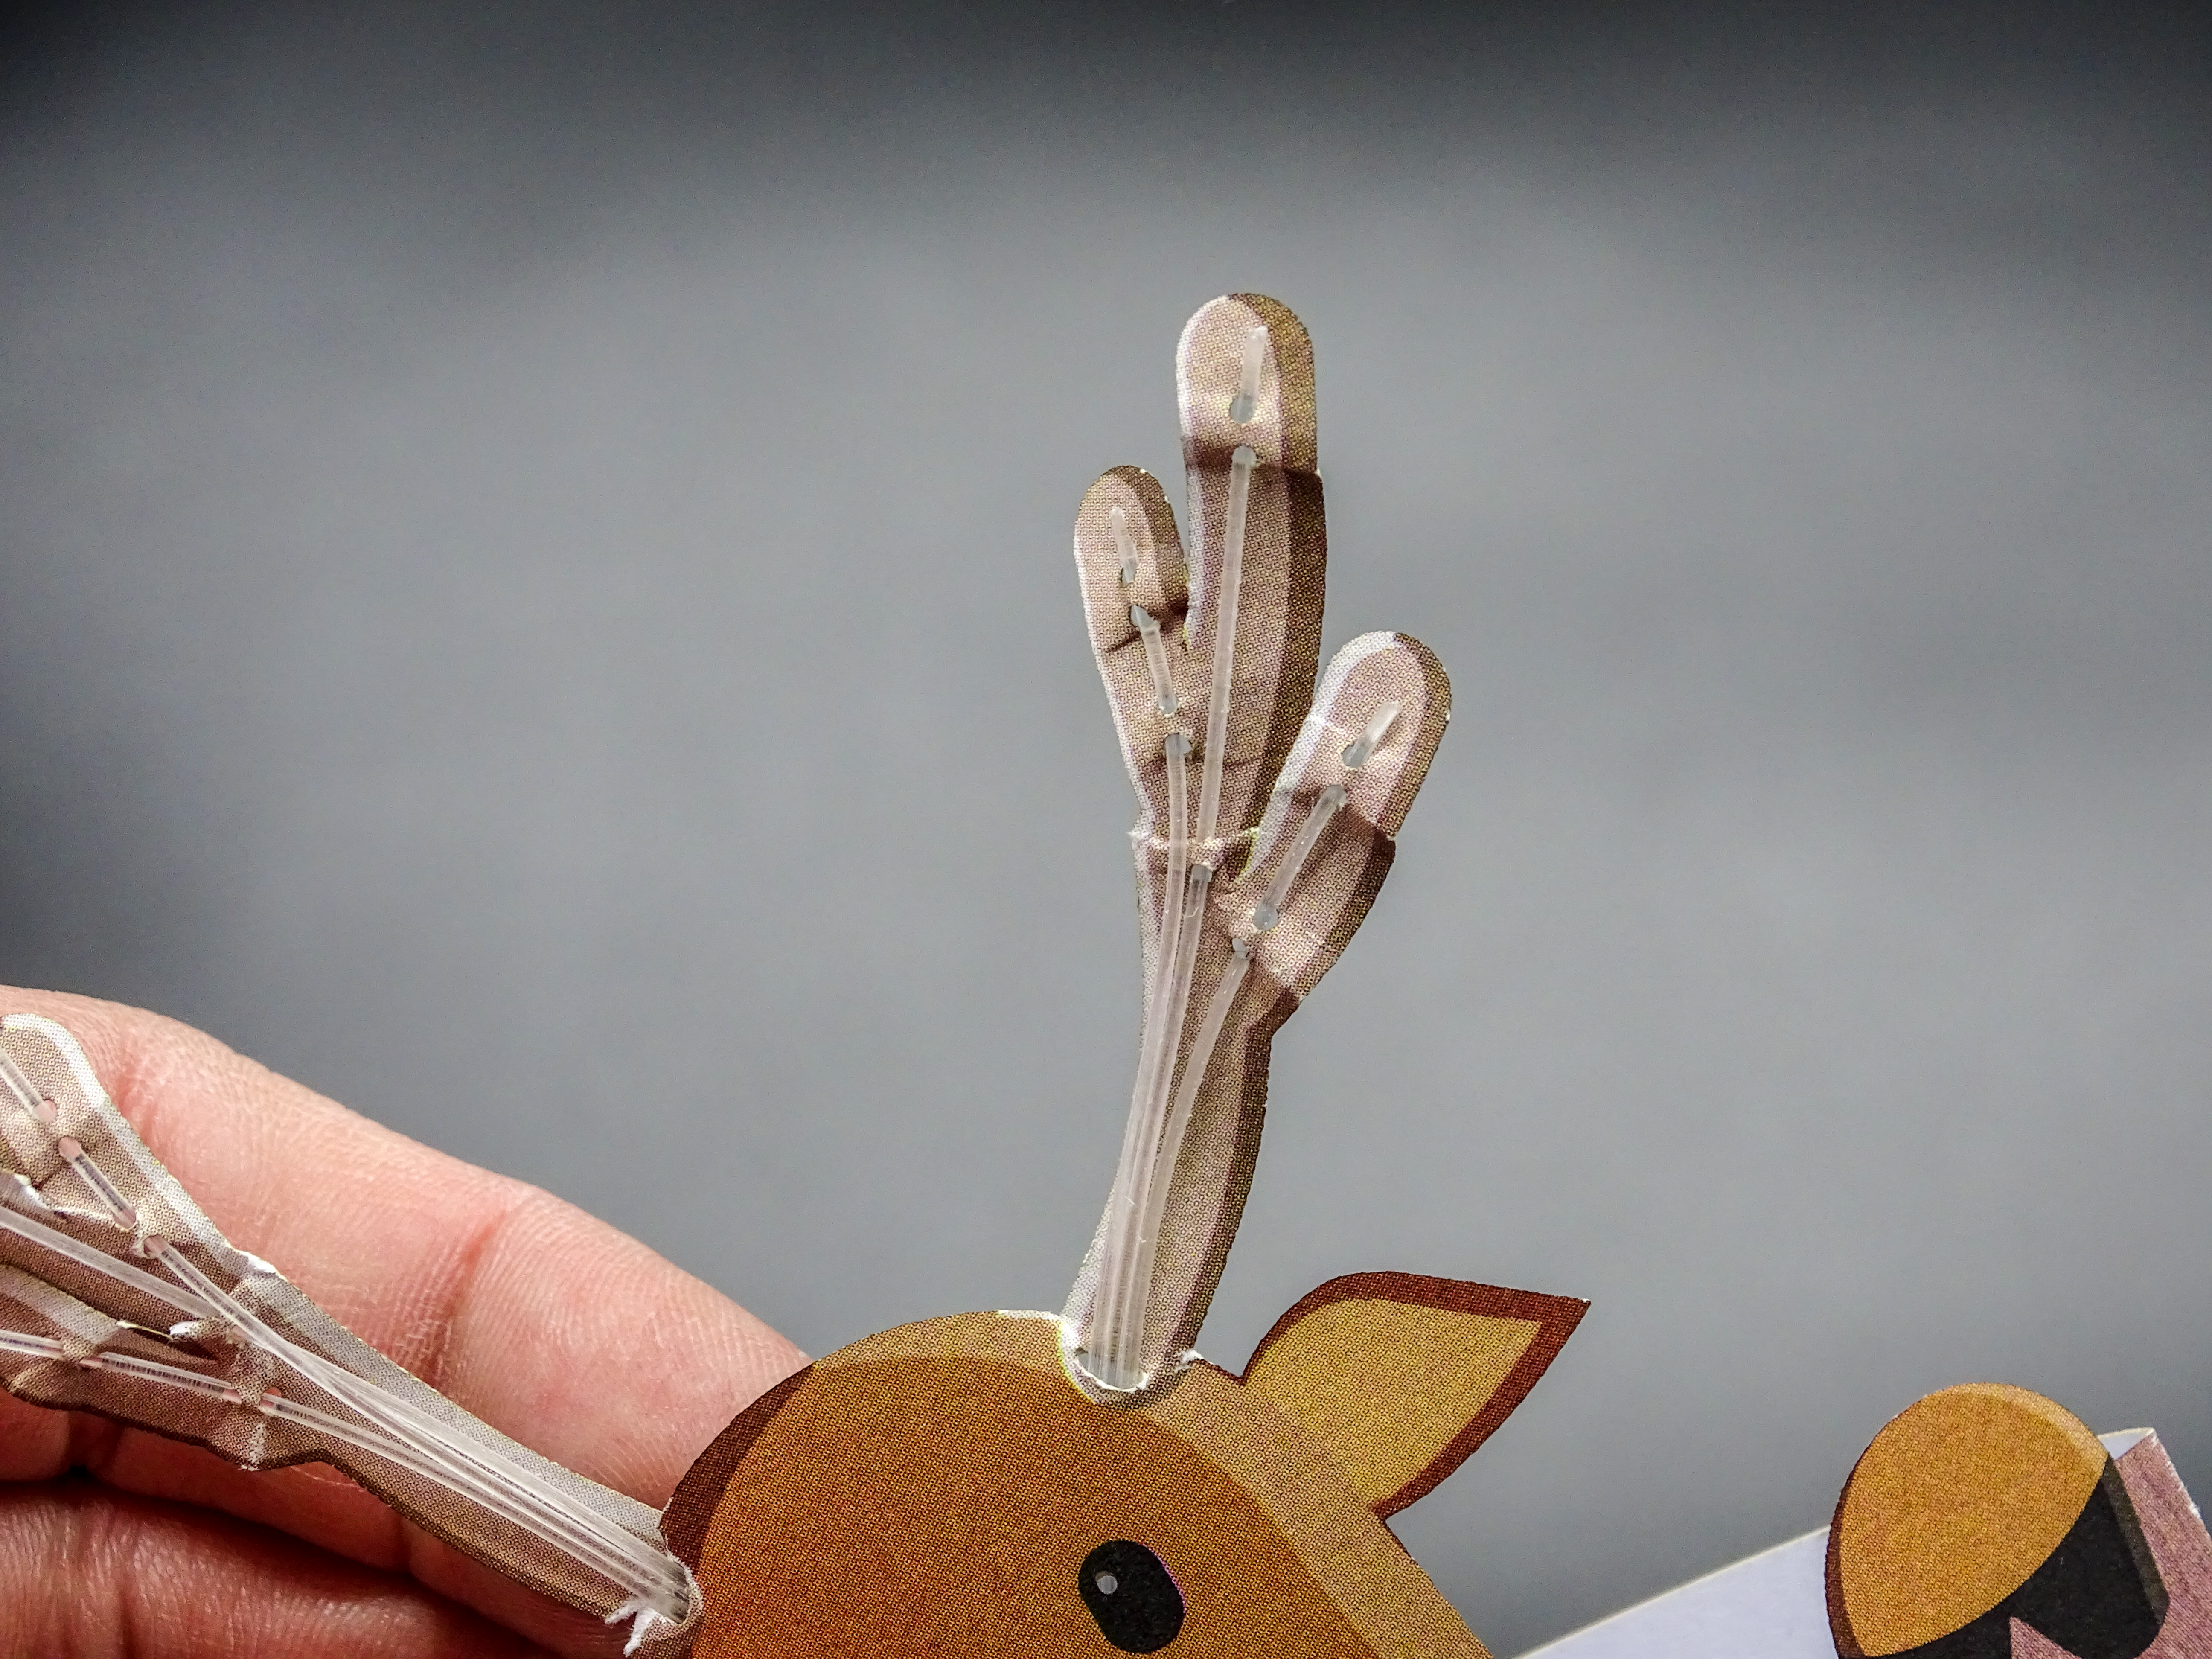
The Antlers
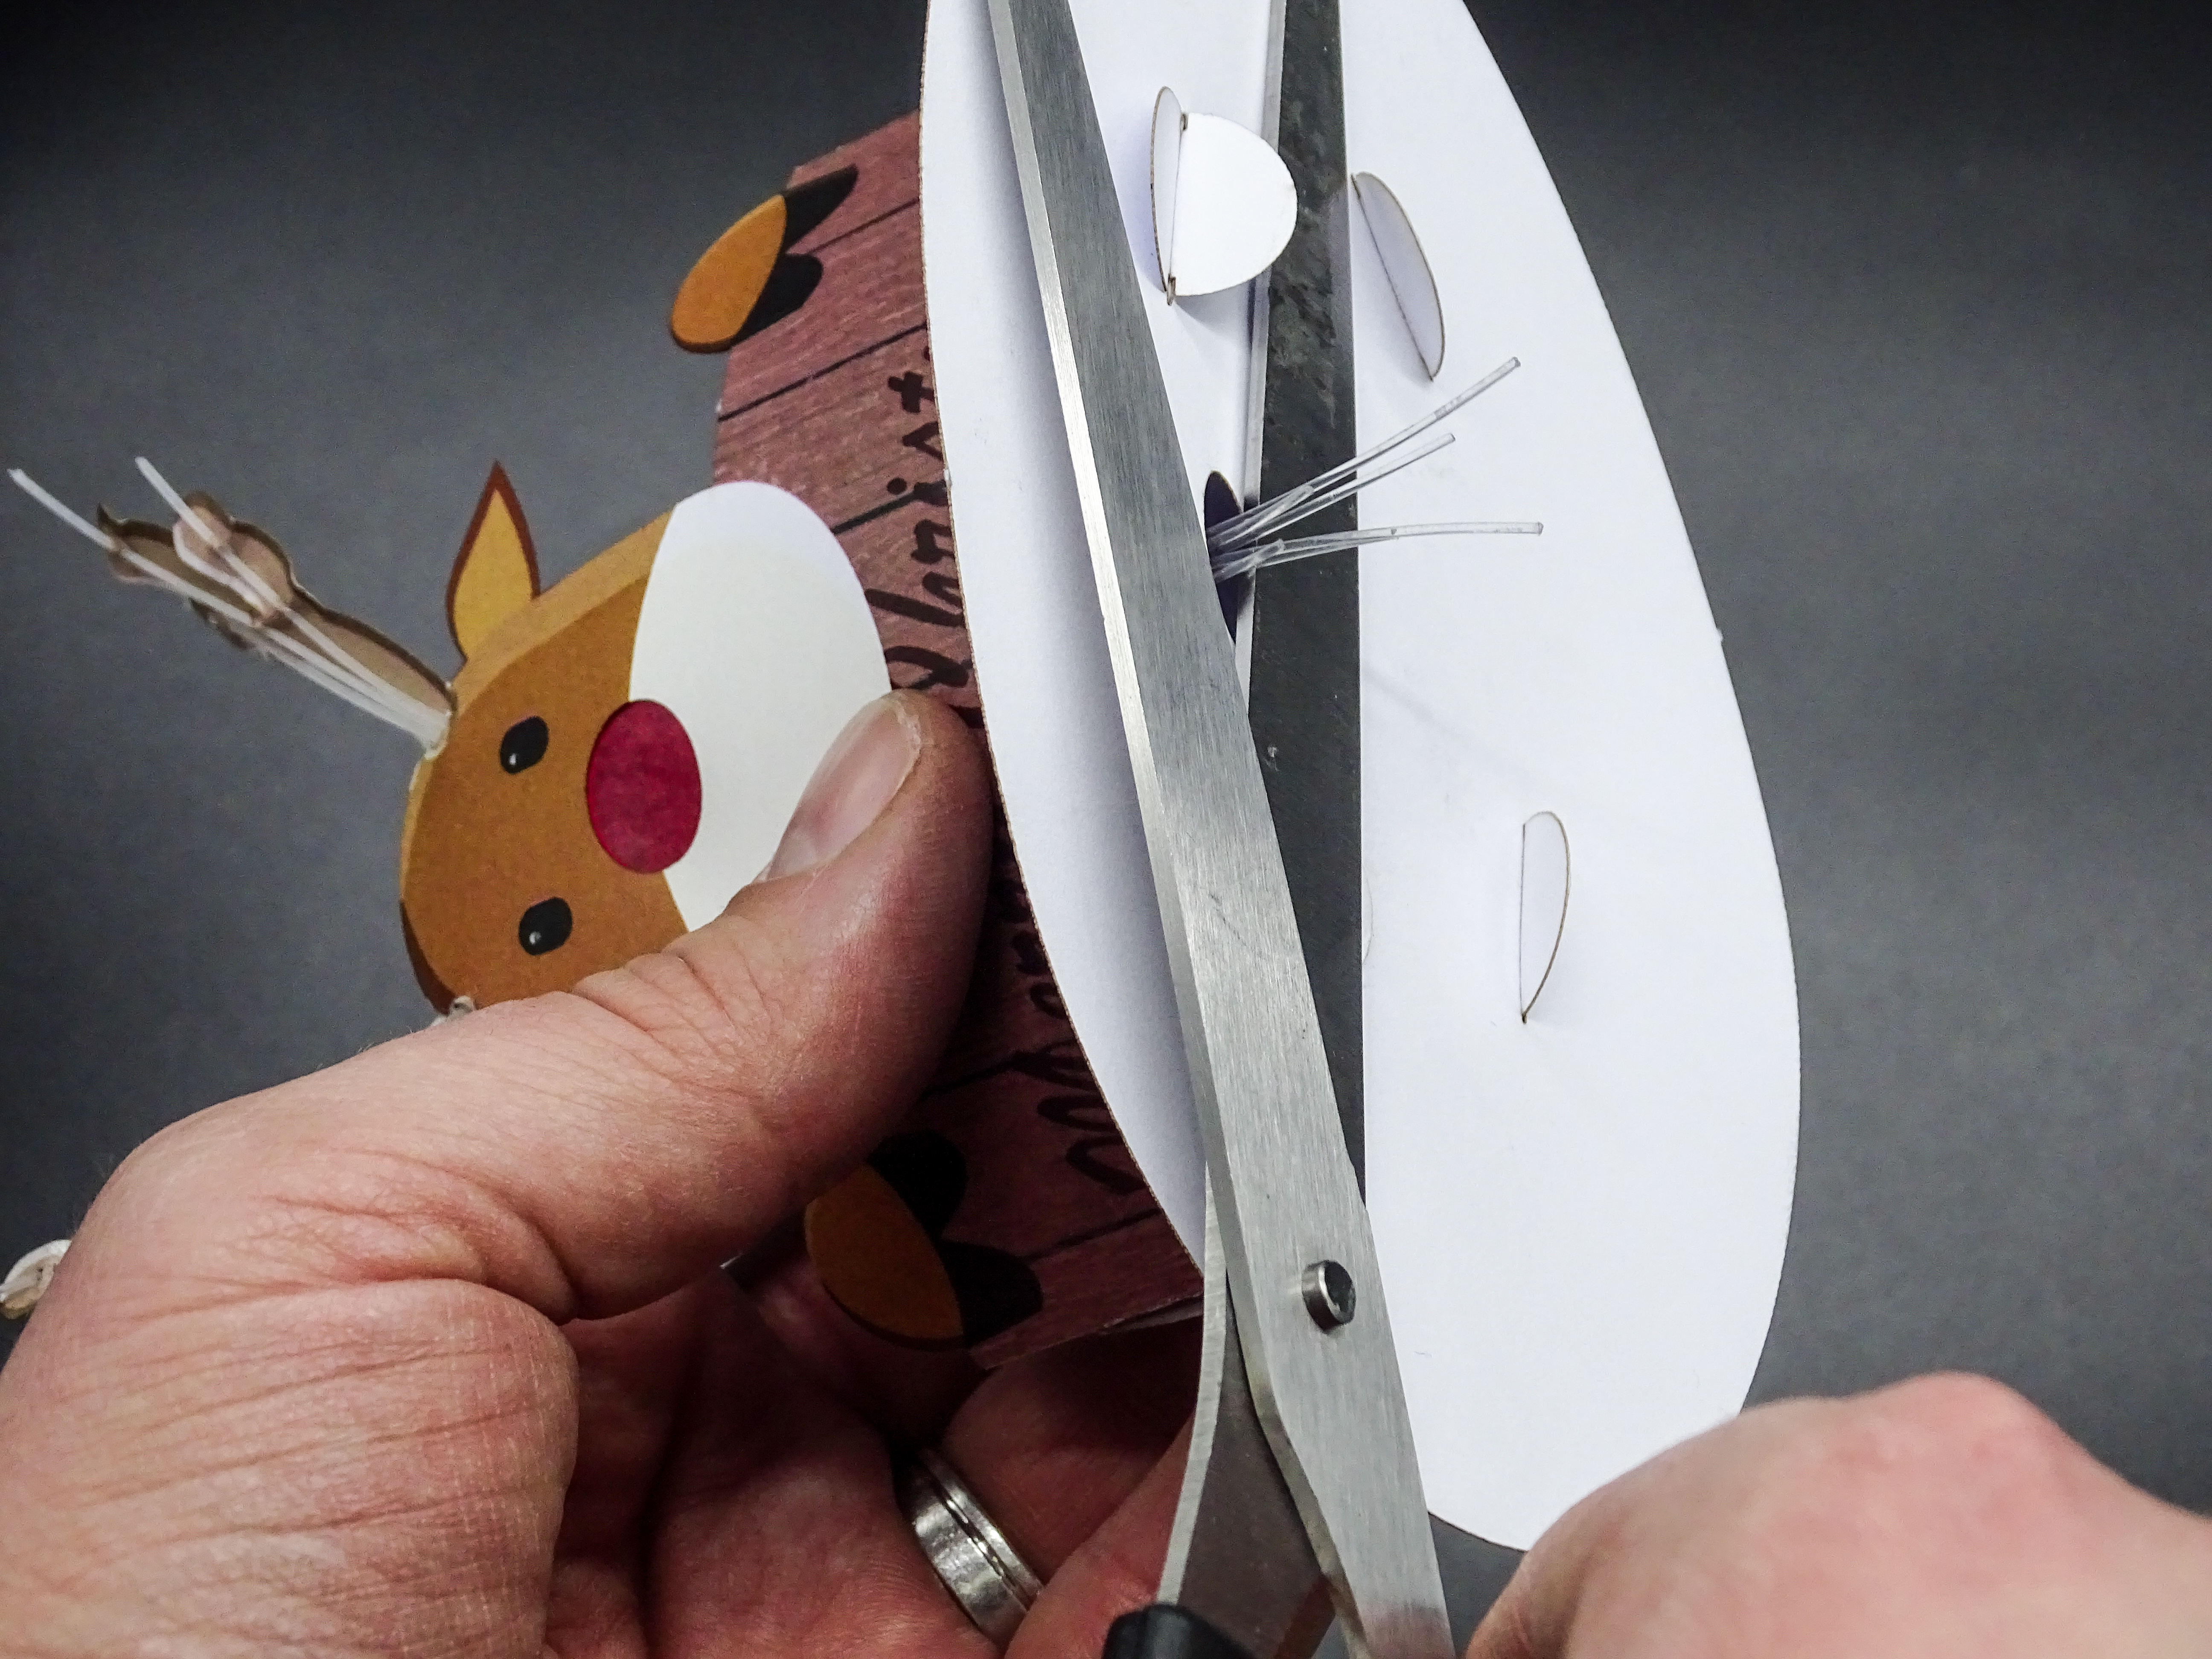
Afterwards, we can start with the reindeer. Start pushing the fibers with the non-sanded side into the first hole of the antler, as shown in the
pictures below. Keep pushing them through the pairs of holes until you reach the root of the antler. Thread the fiber through the hole at the root and then keep on pushing the fiber until it sticks out only a bit.
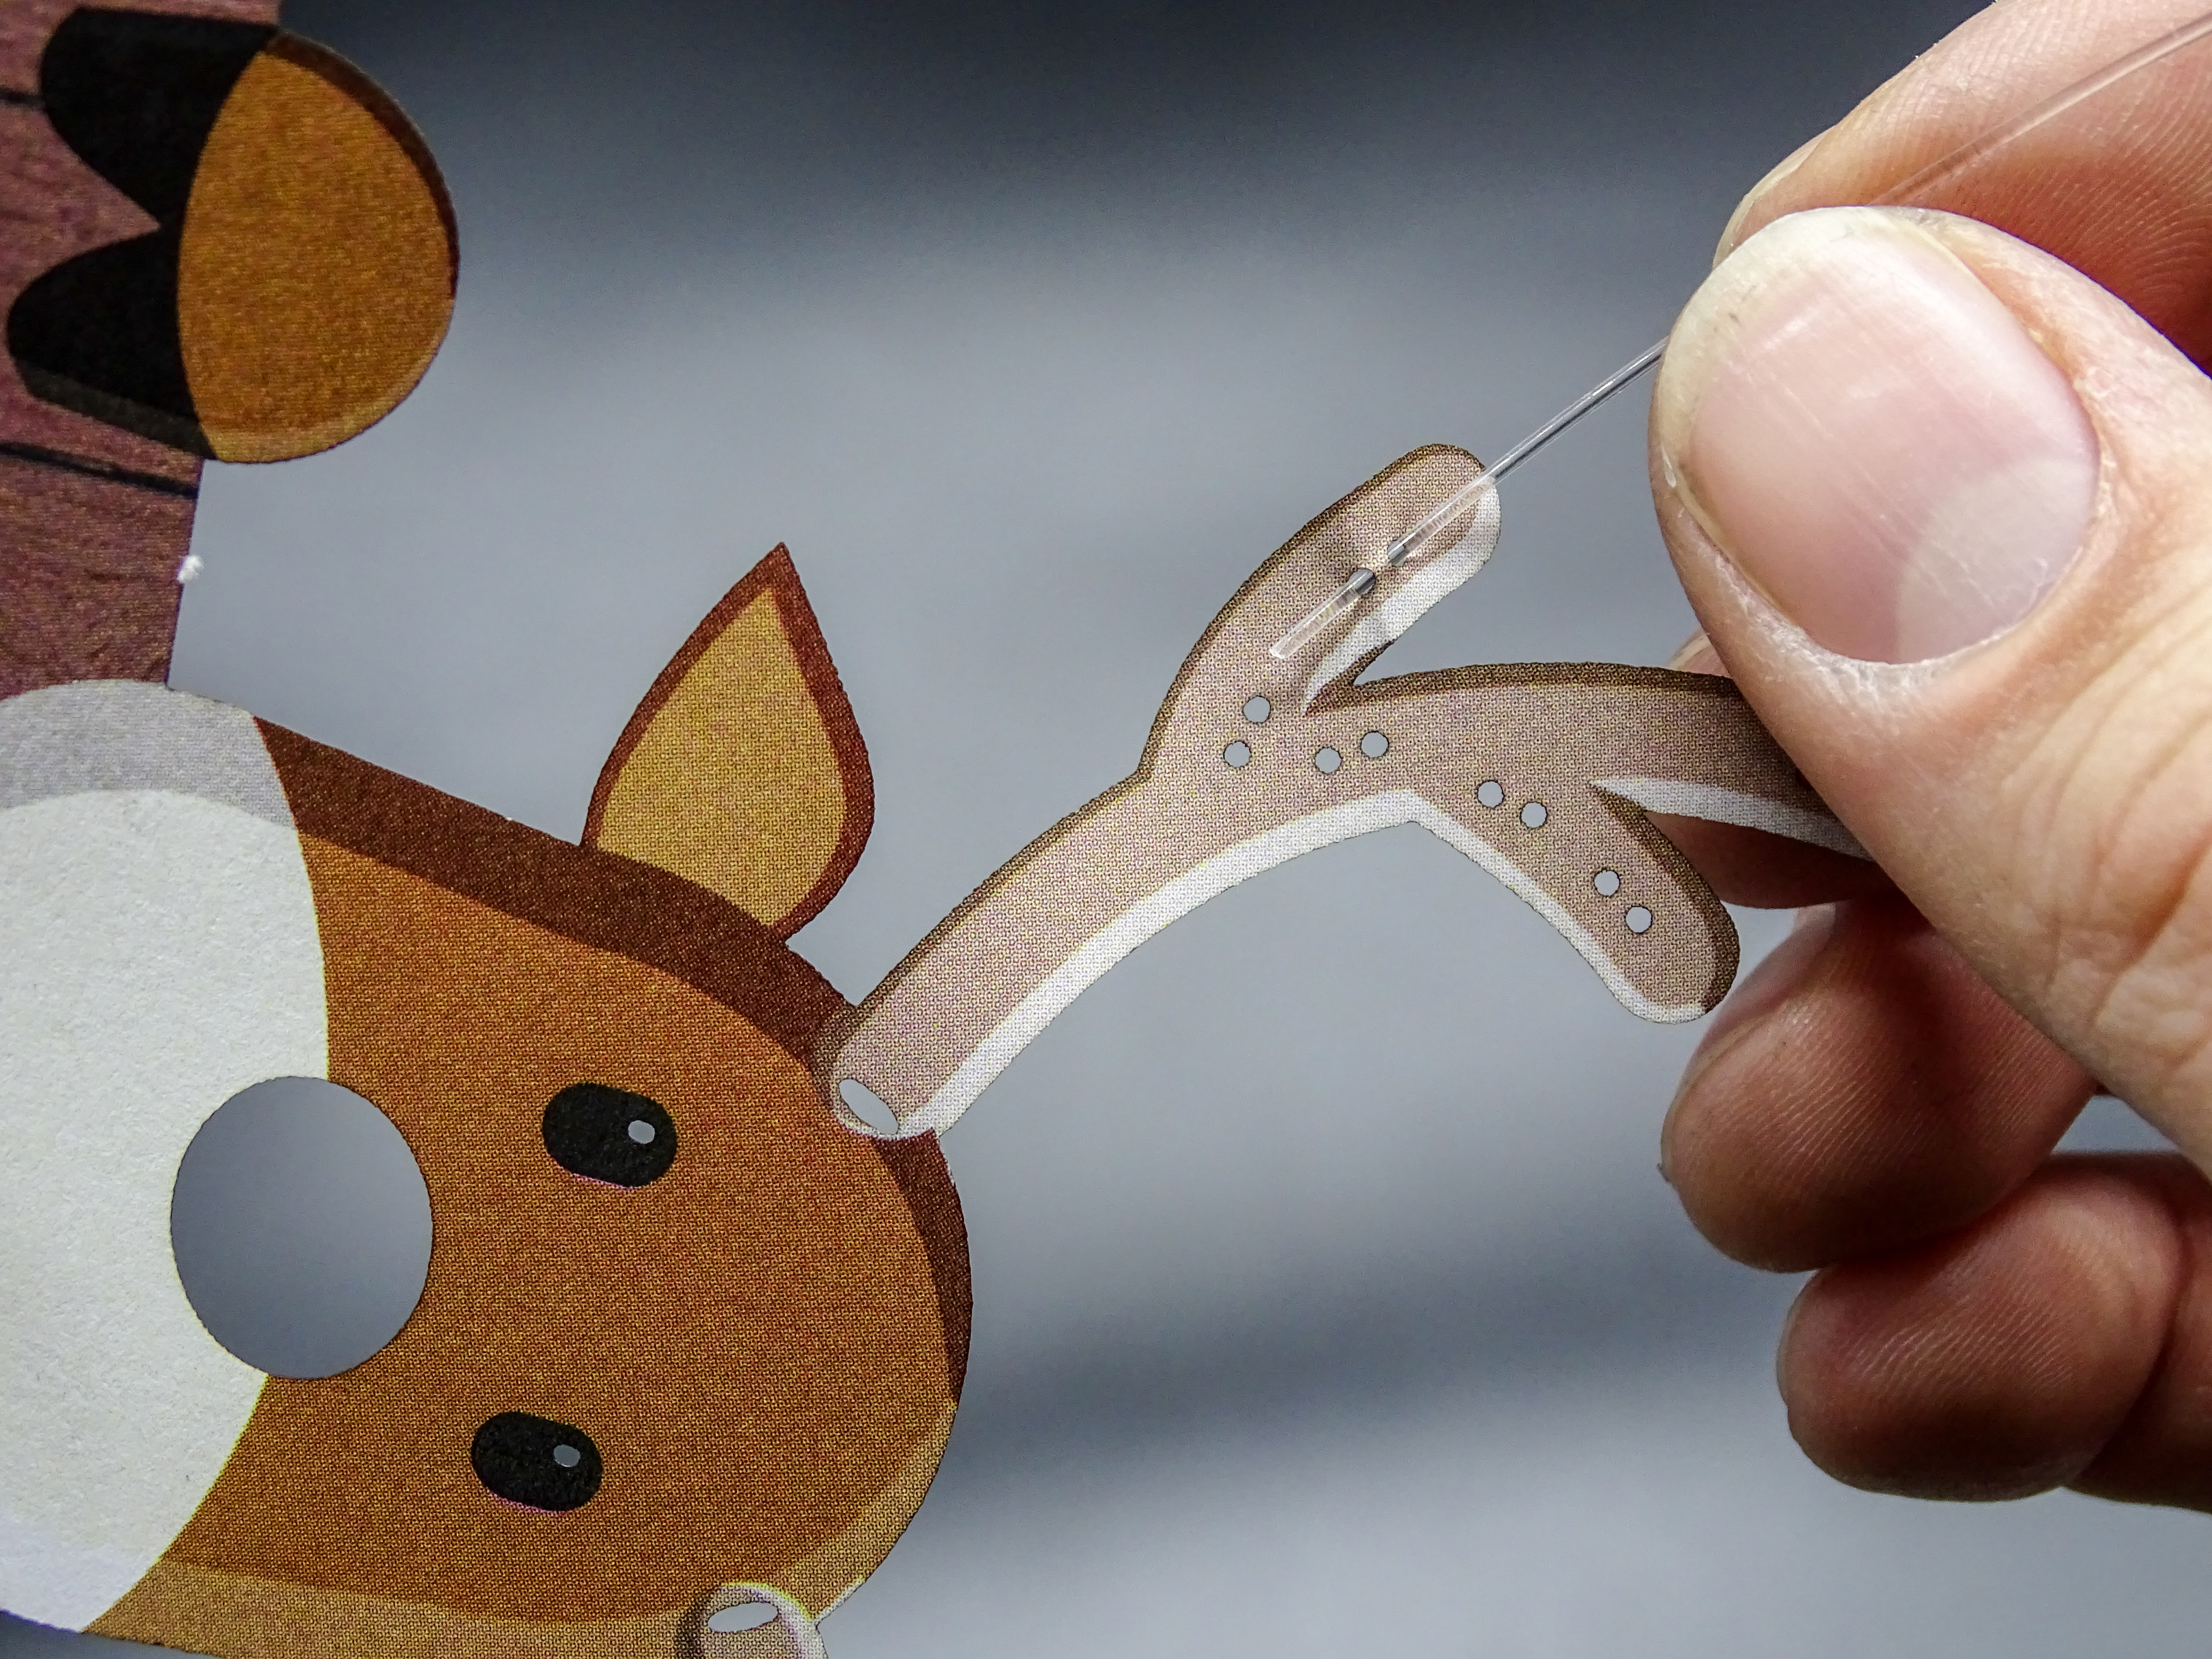
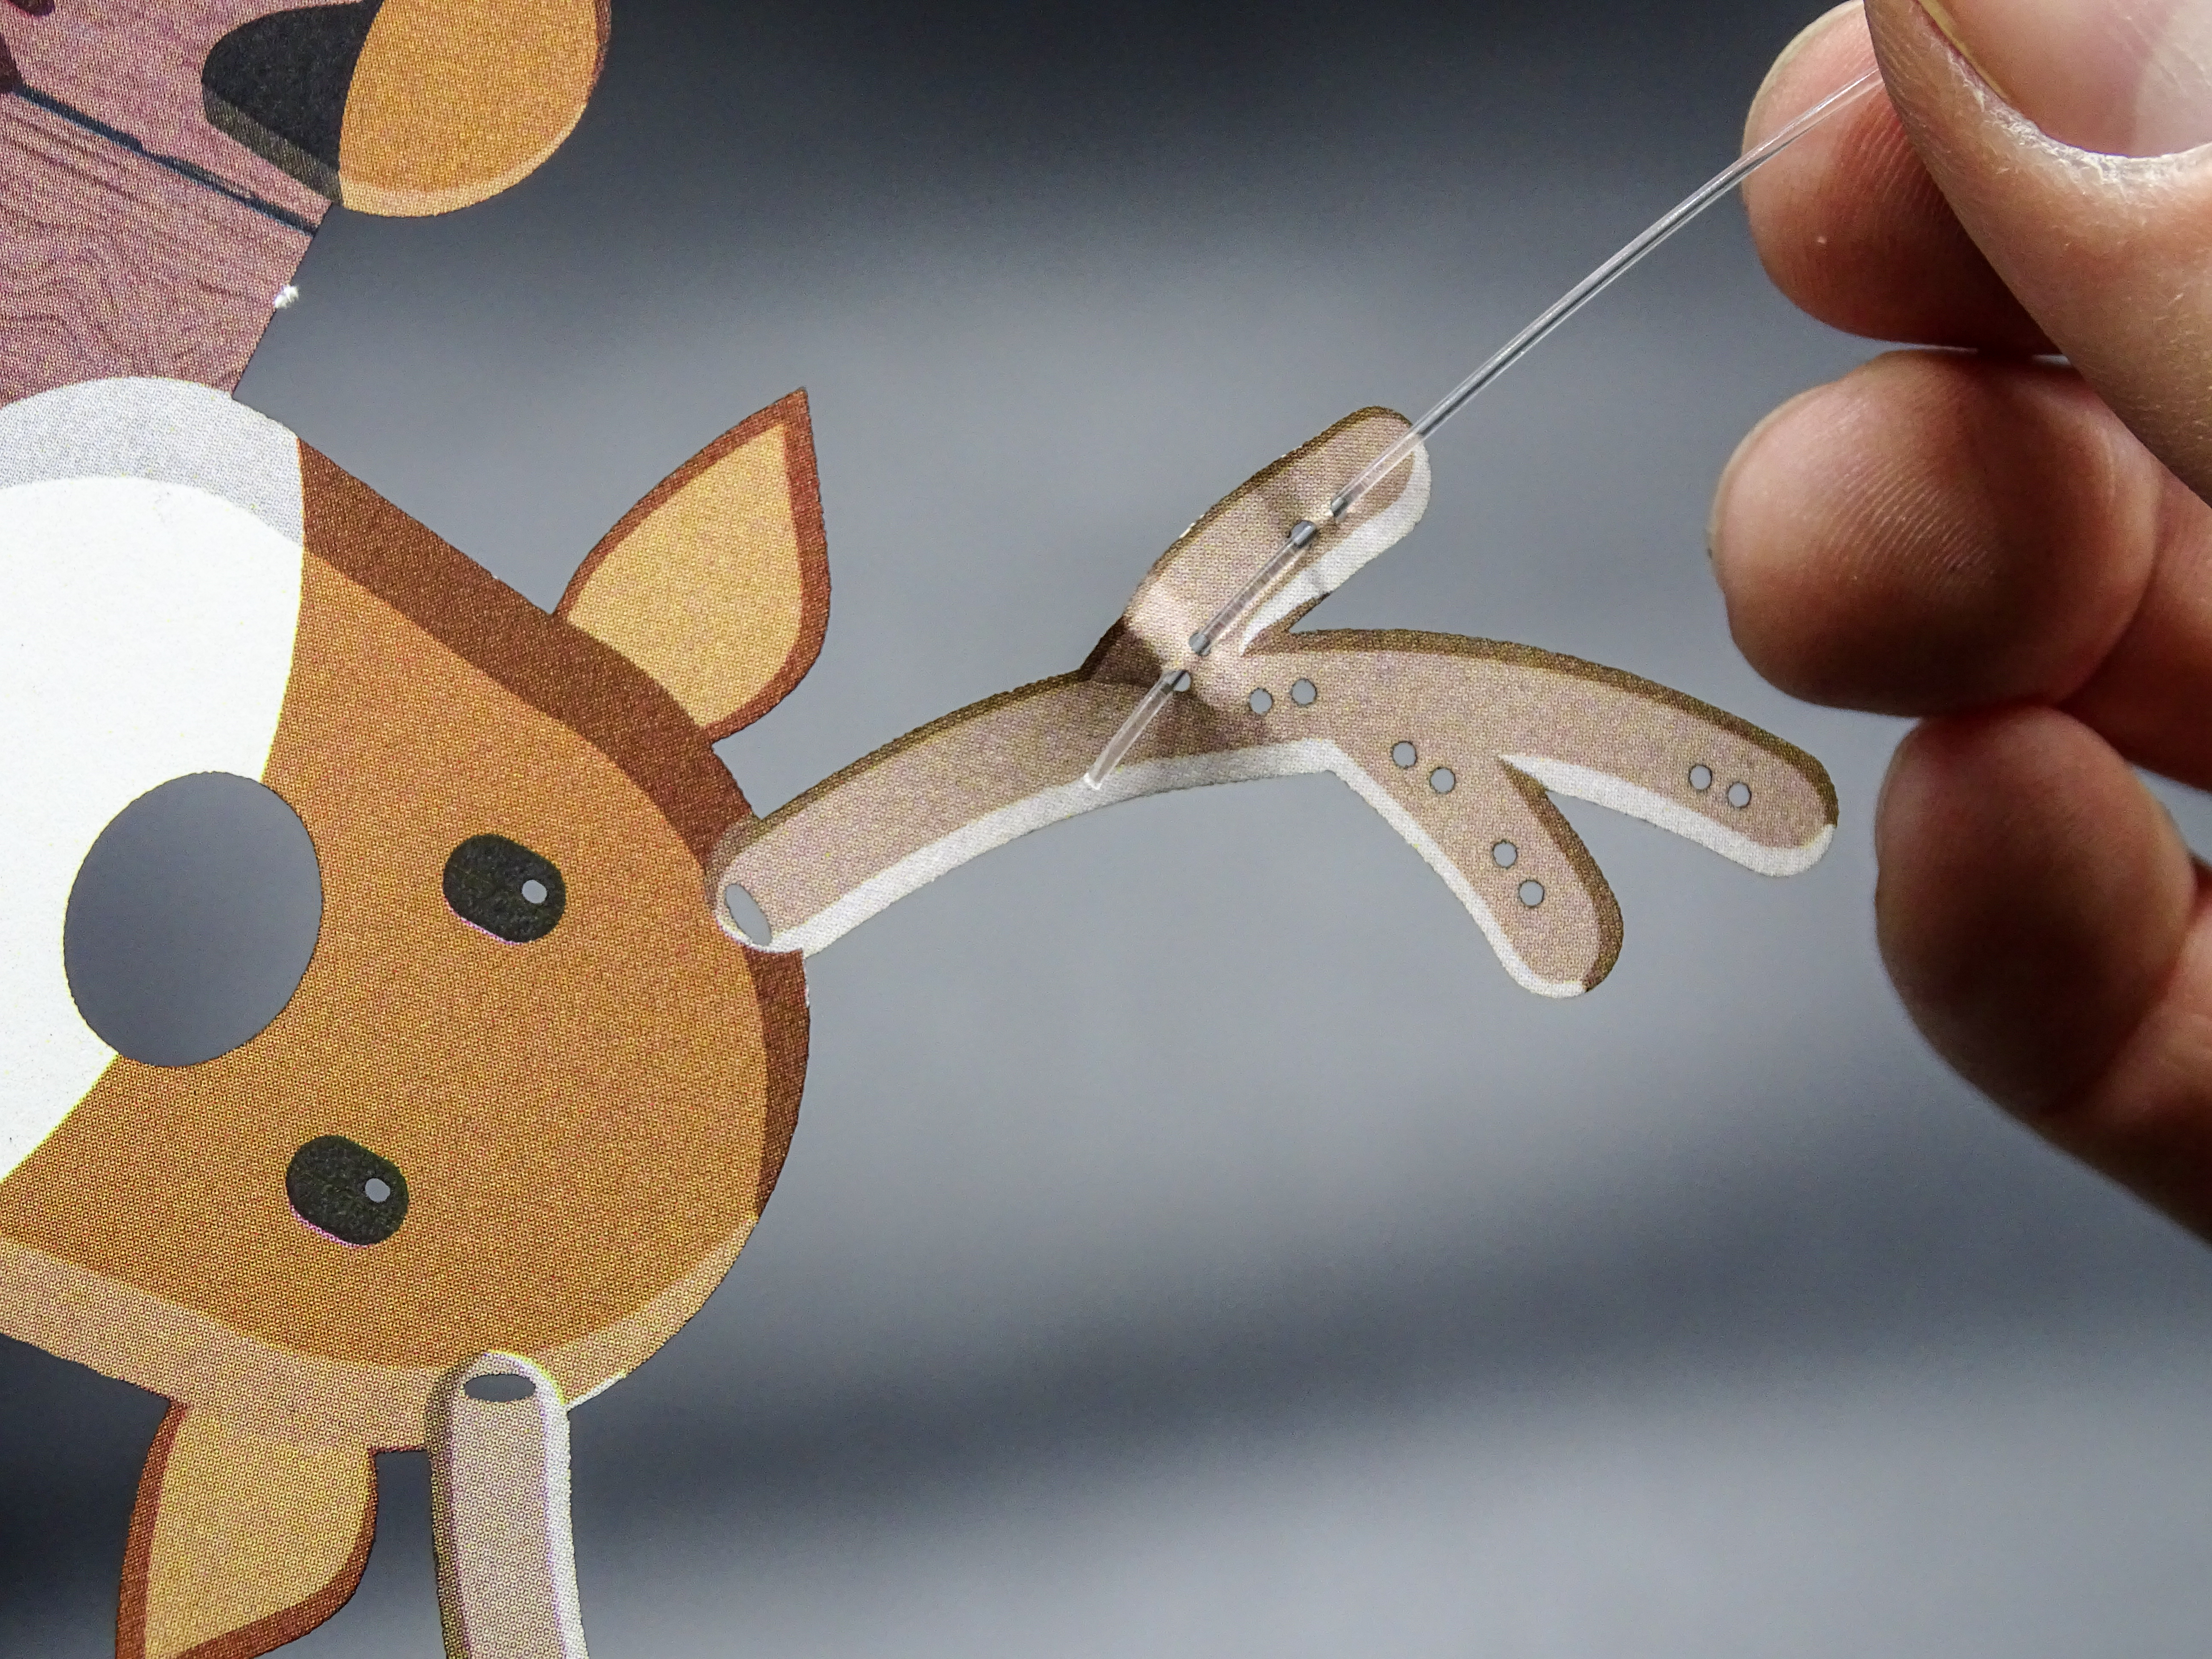

Repeat this process with all fibers on both sides of the antler.
spacer
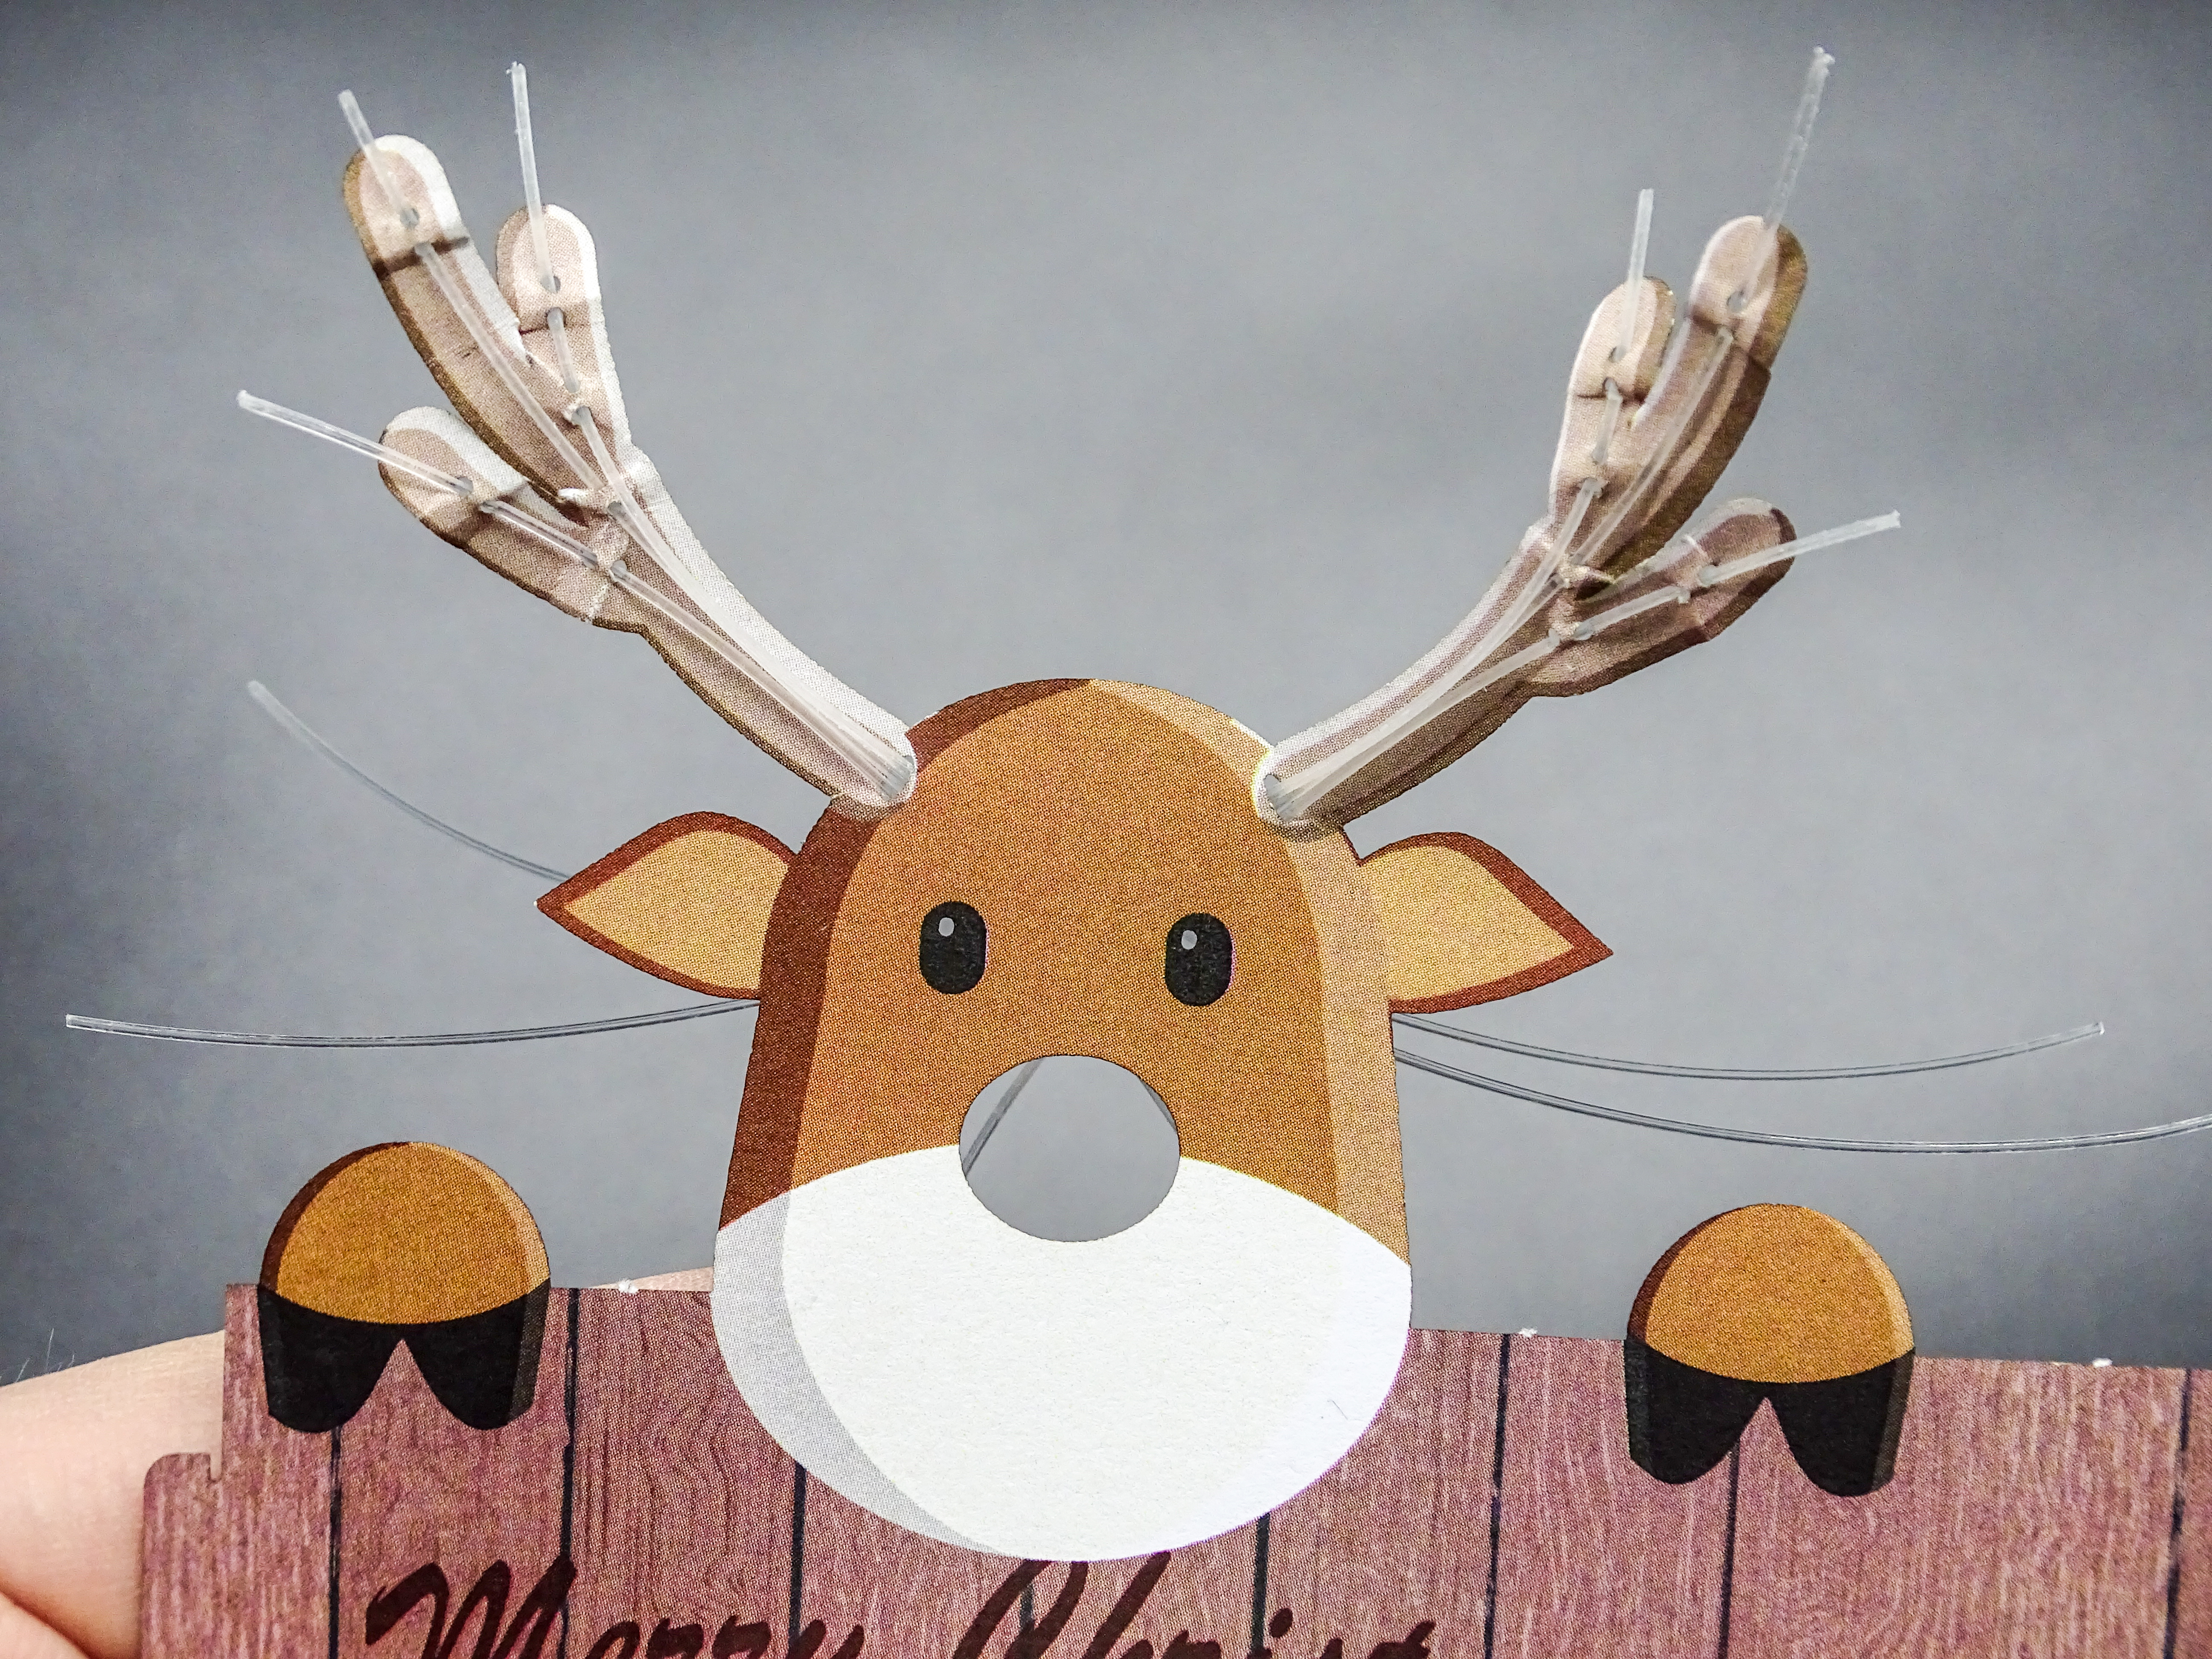
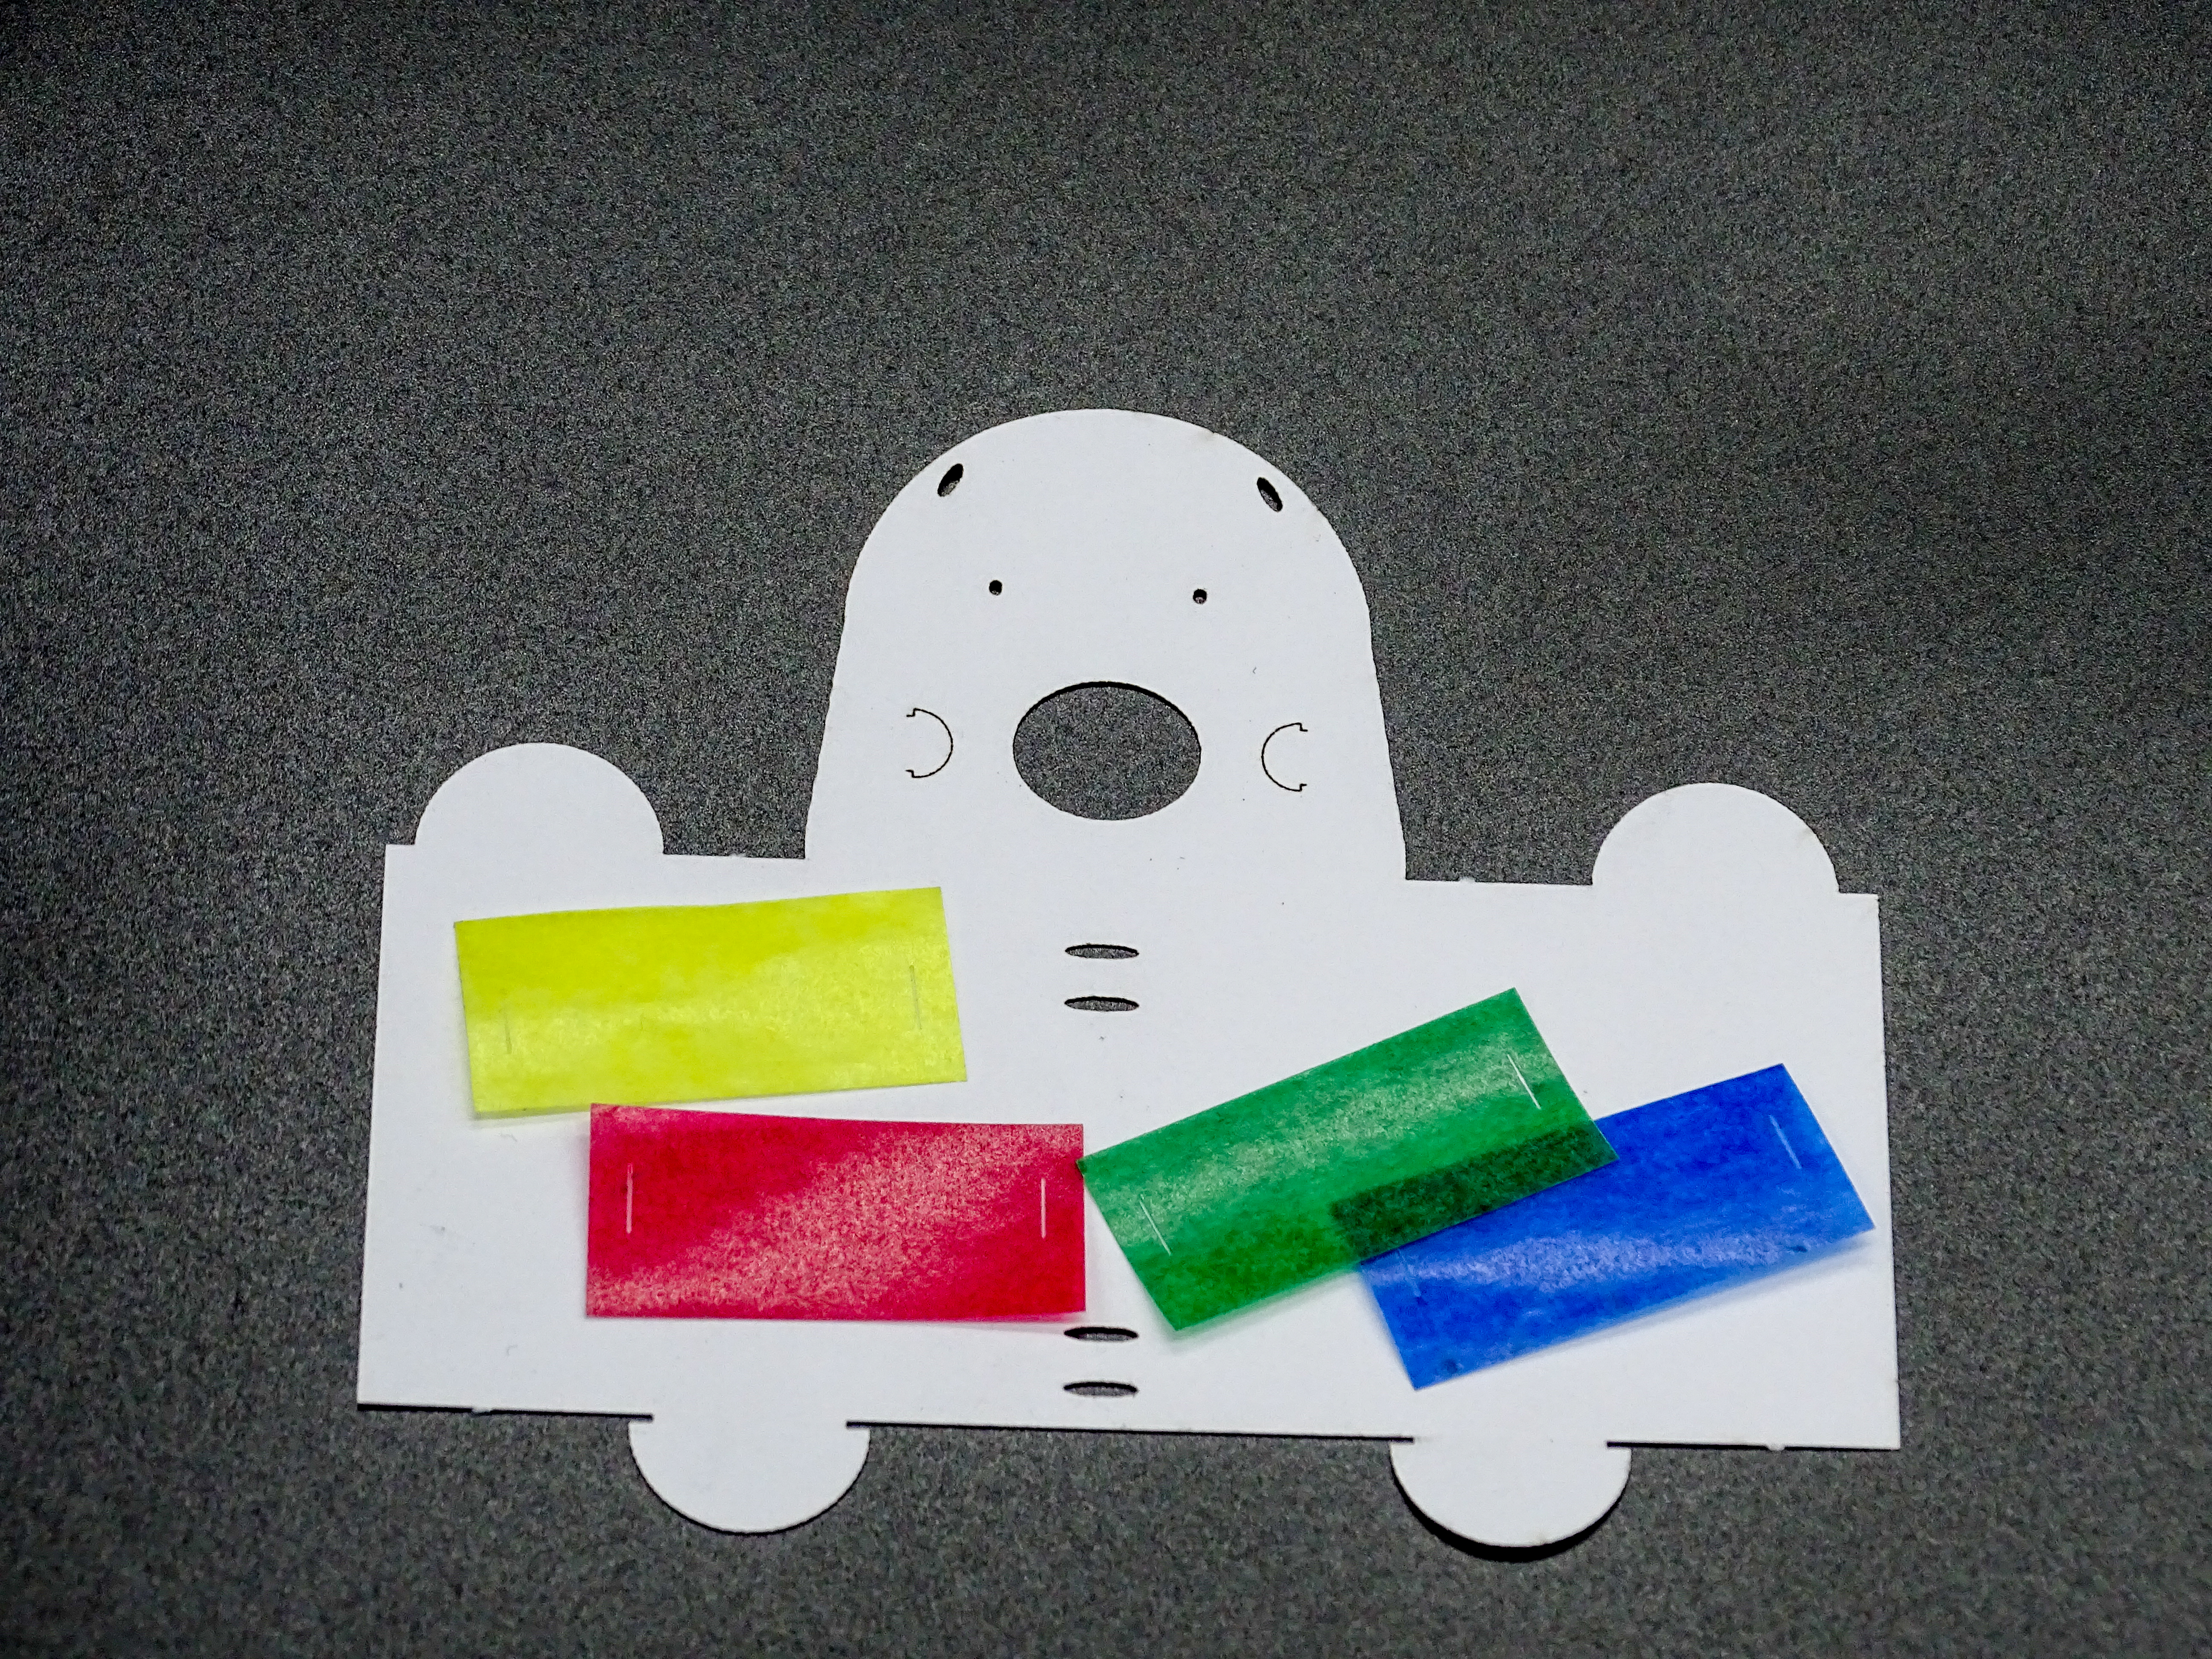
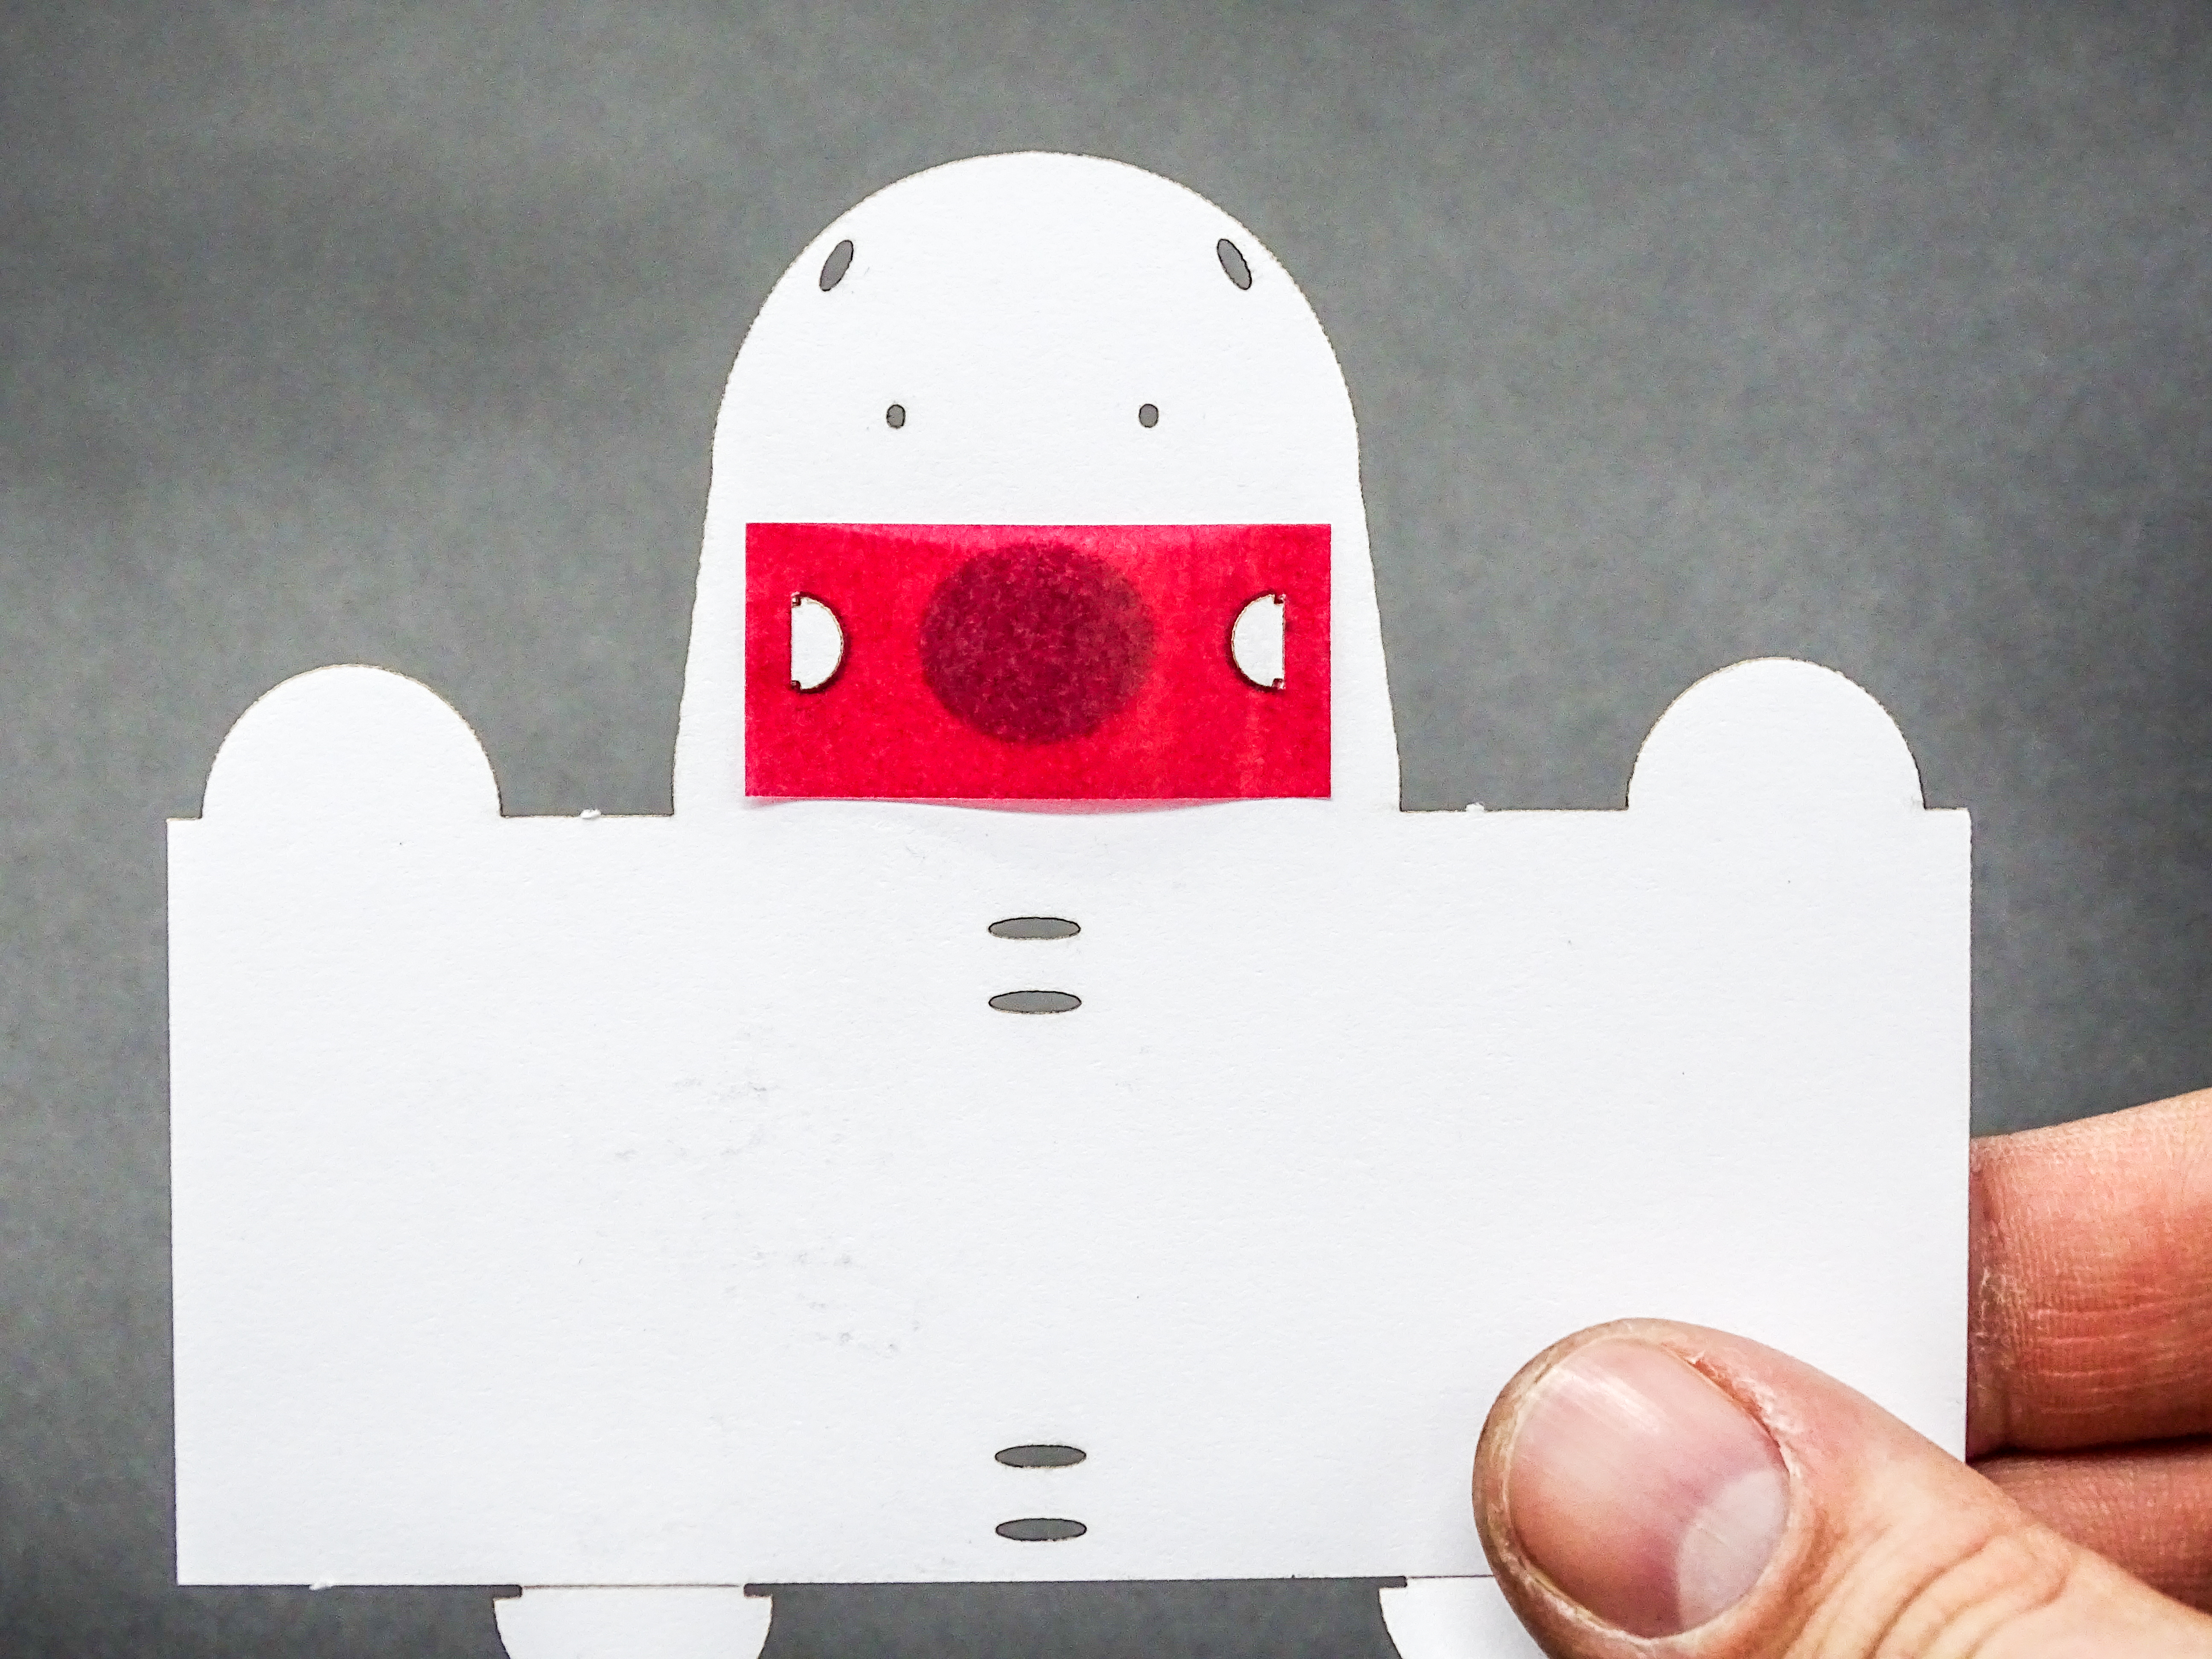
The Nose
Now it's time to take care of the reindeer's nose. Therefore, you need to decide on a color. Either go with the classical Rudolph-red or take one of the other three
colors. Clip the paper onto the backplate of the reindeer like depicted below.
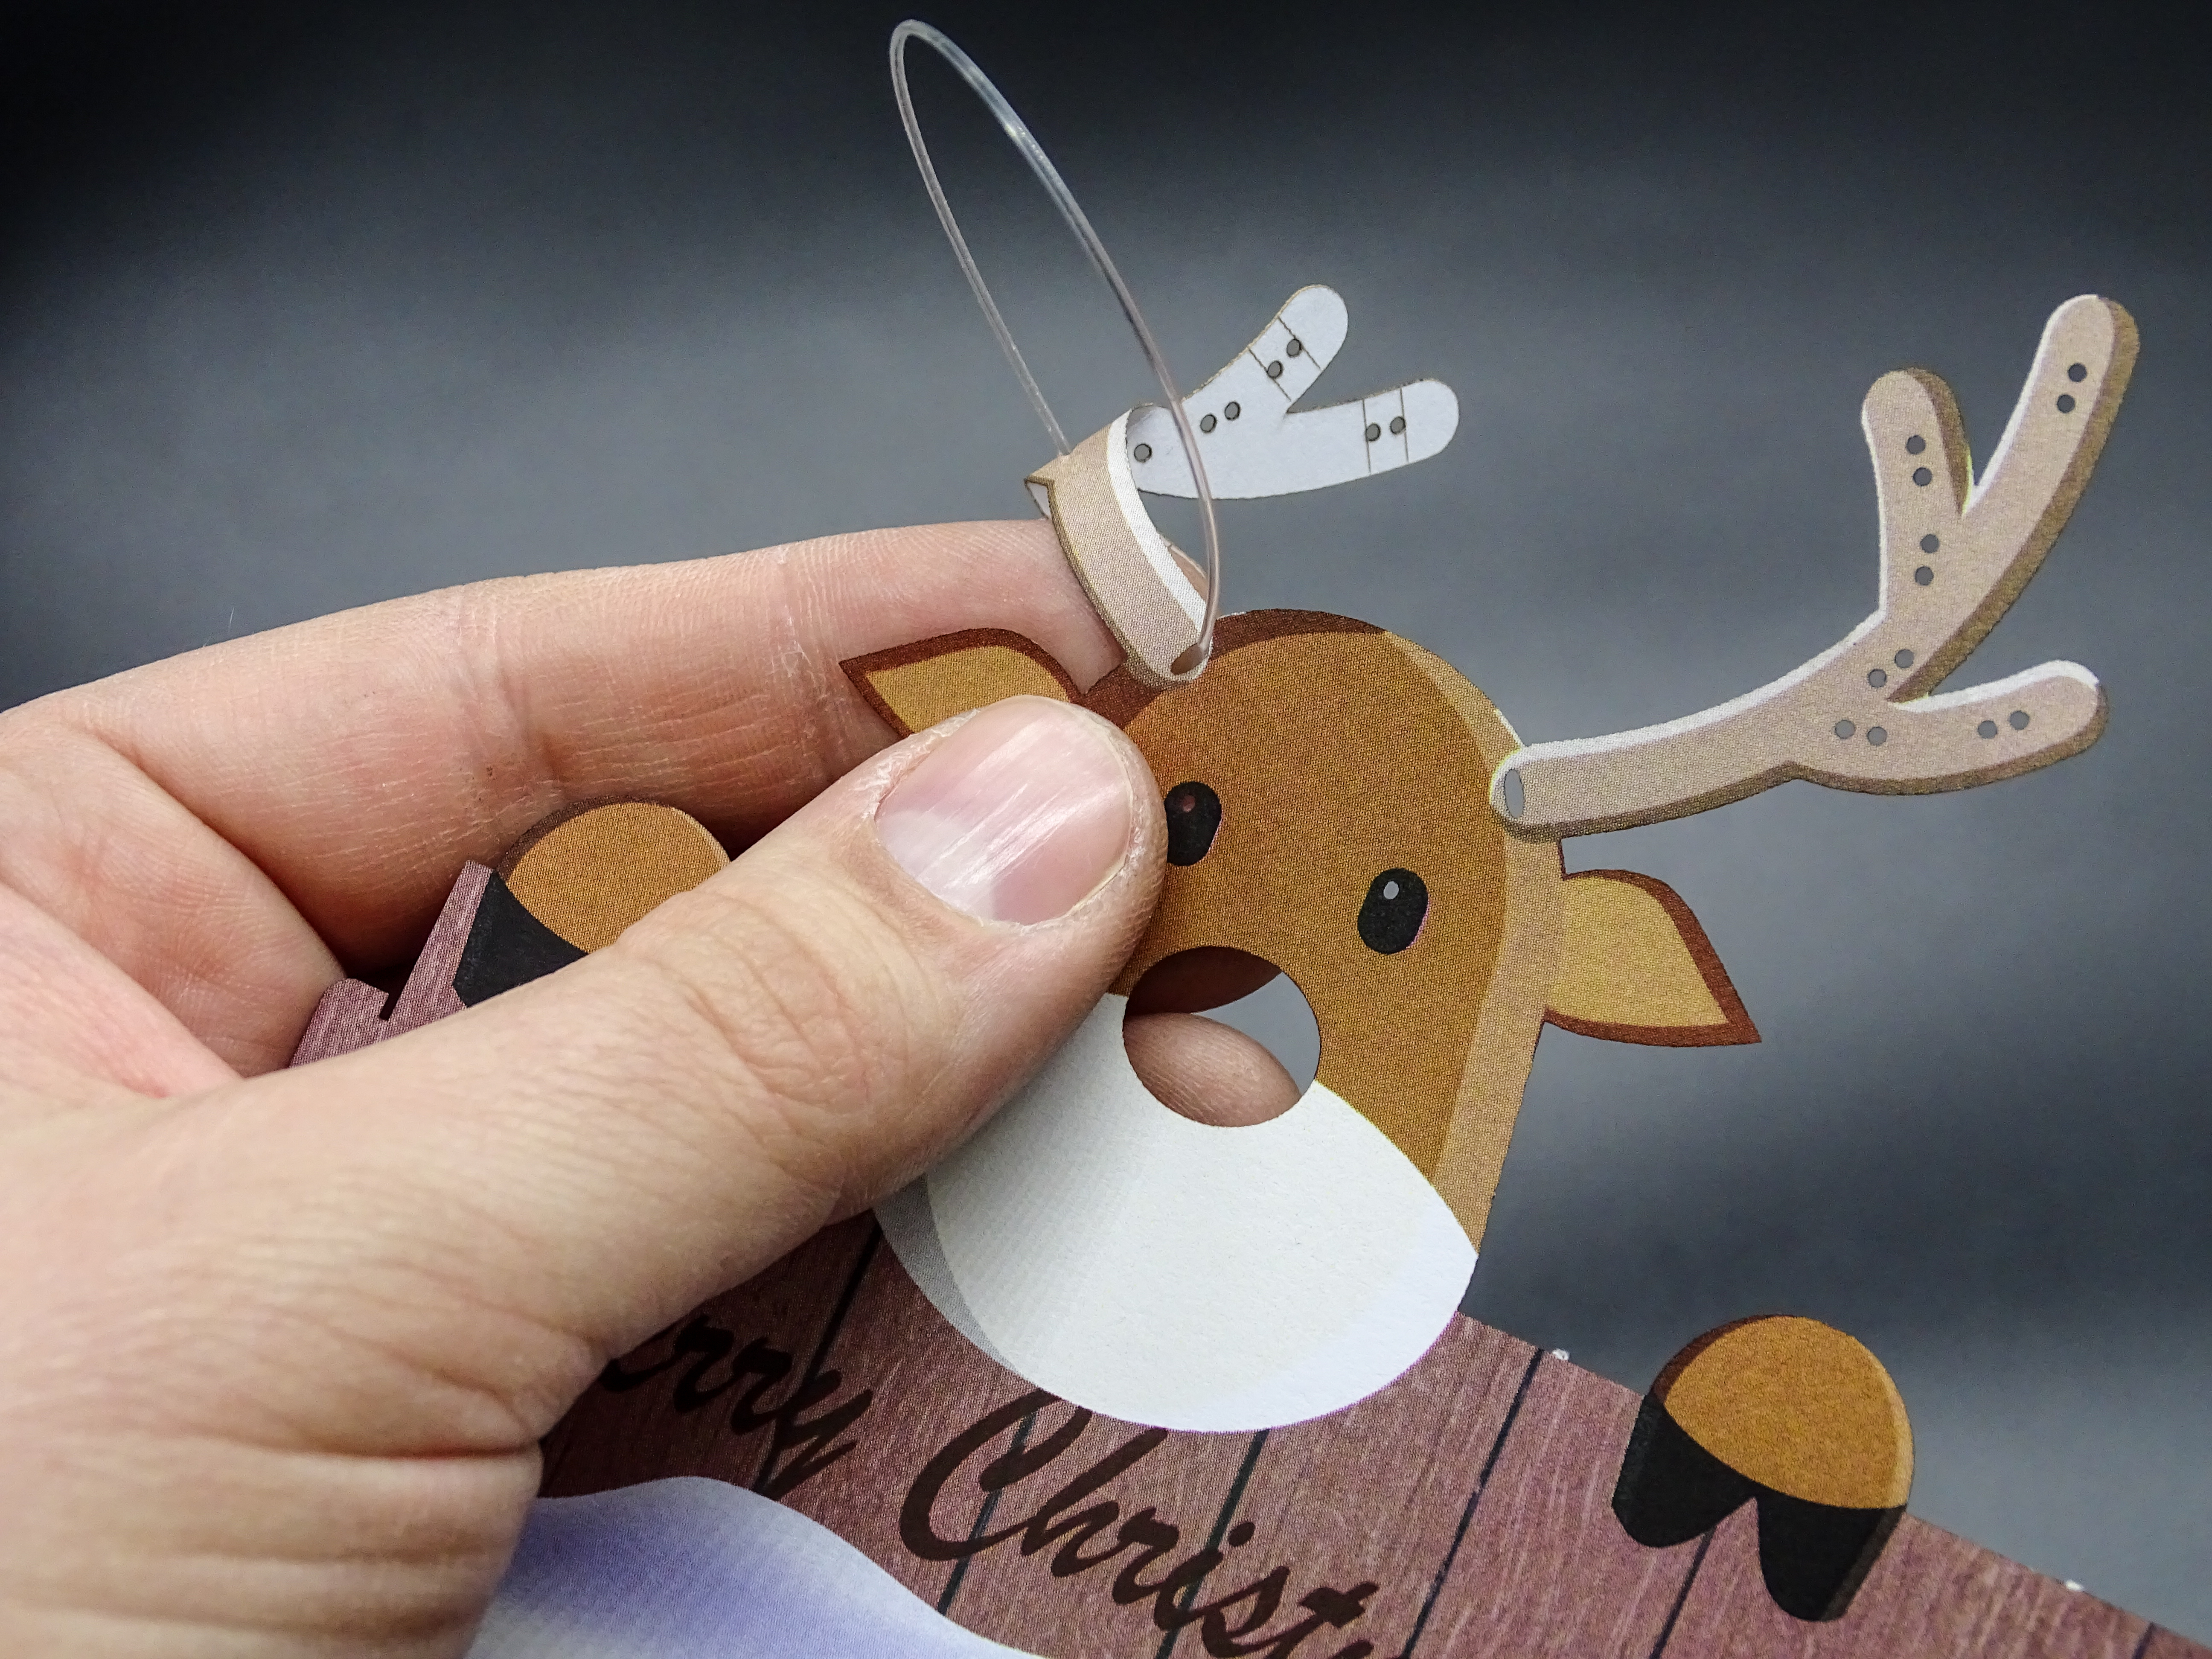
After preparing the nose, we now thread the fibers from the front through the upper holes of the backplate. Thereby take care of the backplate's orientation as the reindeer is not symmetrical! The front and the backplate have to match!

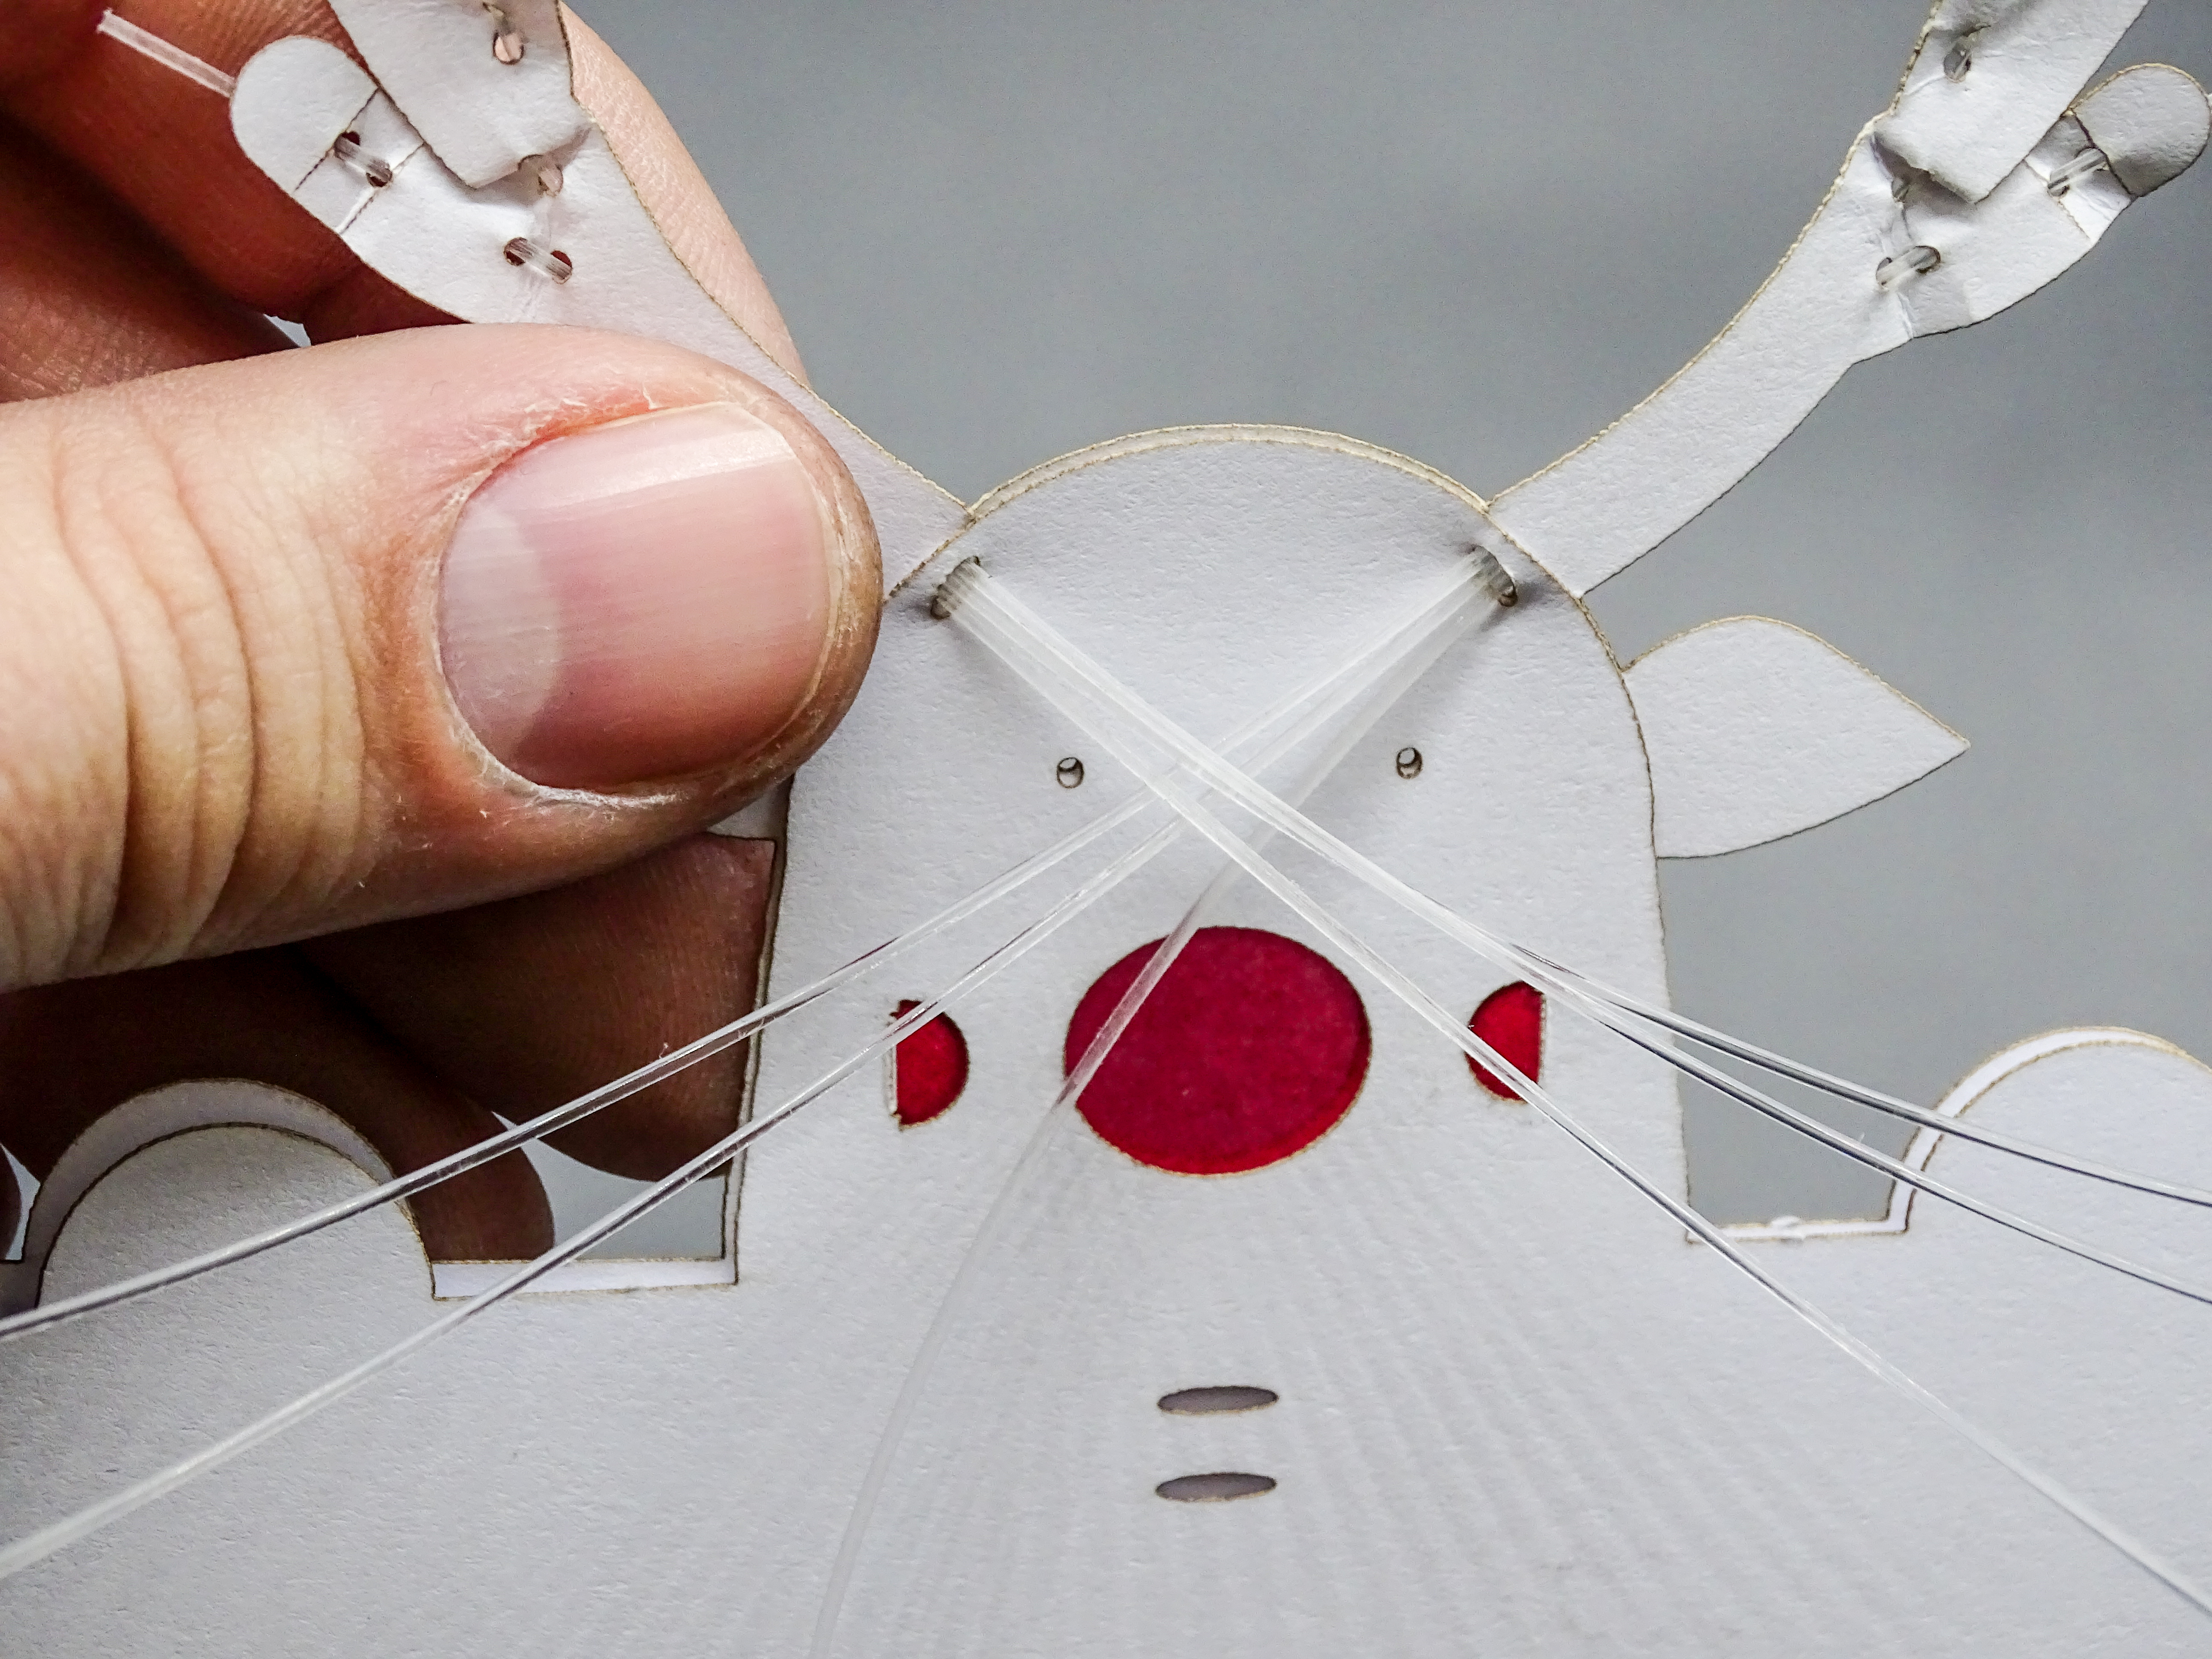
When all 6 fibers are threaded through the backplate, guide the fibers along the center through the pairs of holes to fix them in place.


spacer
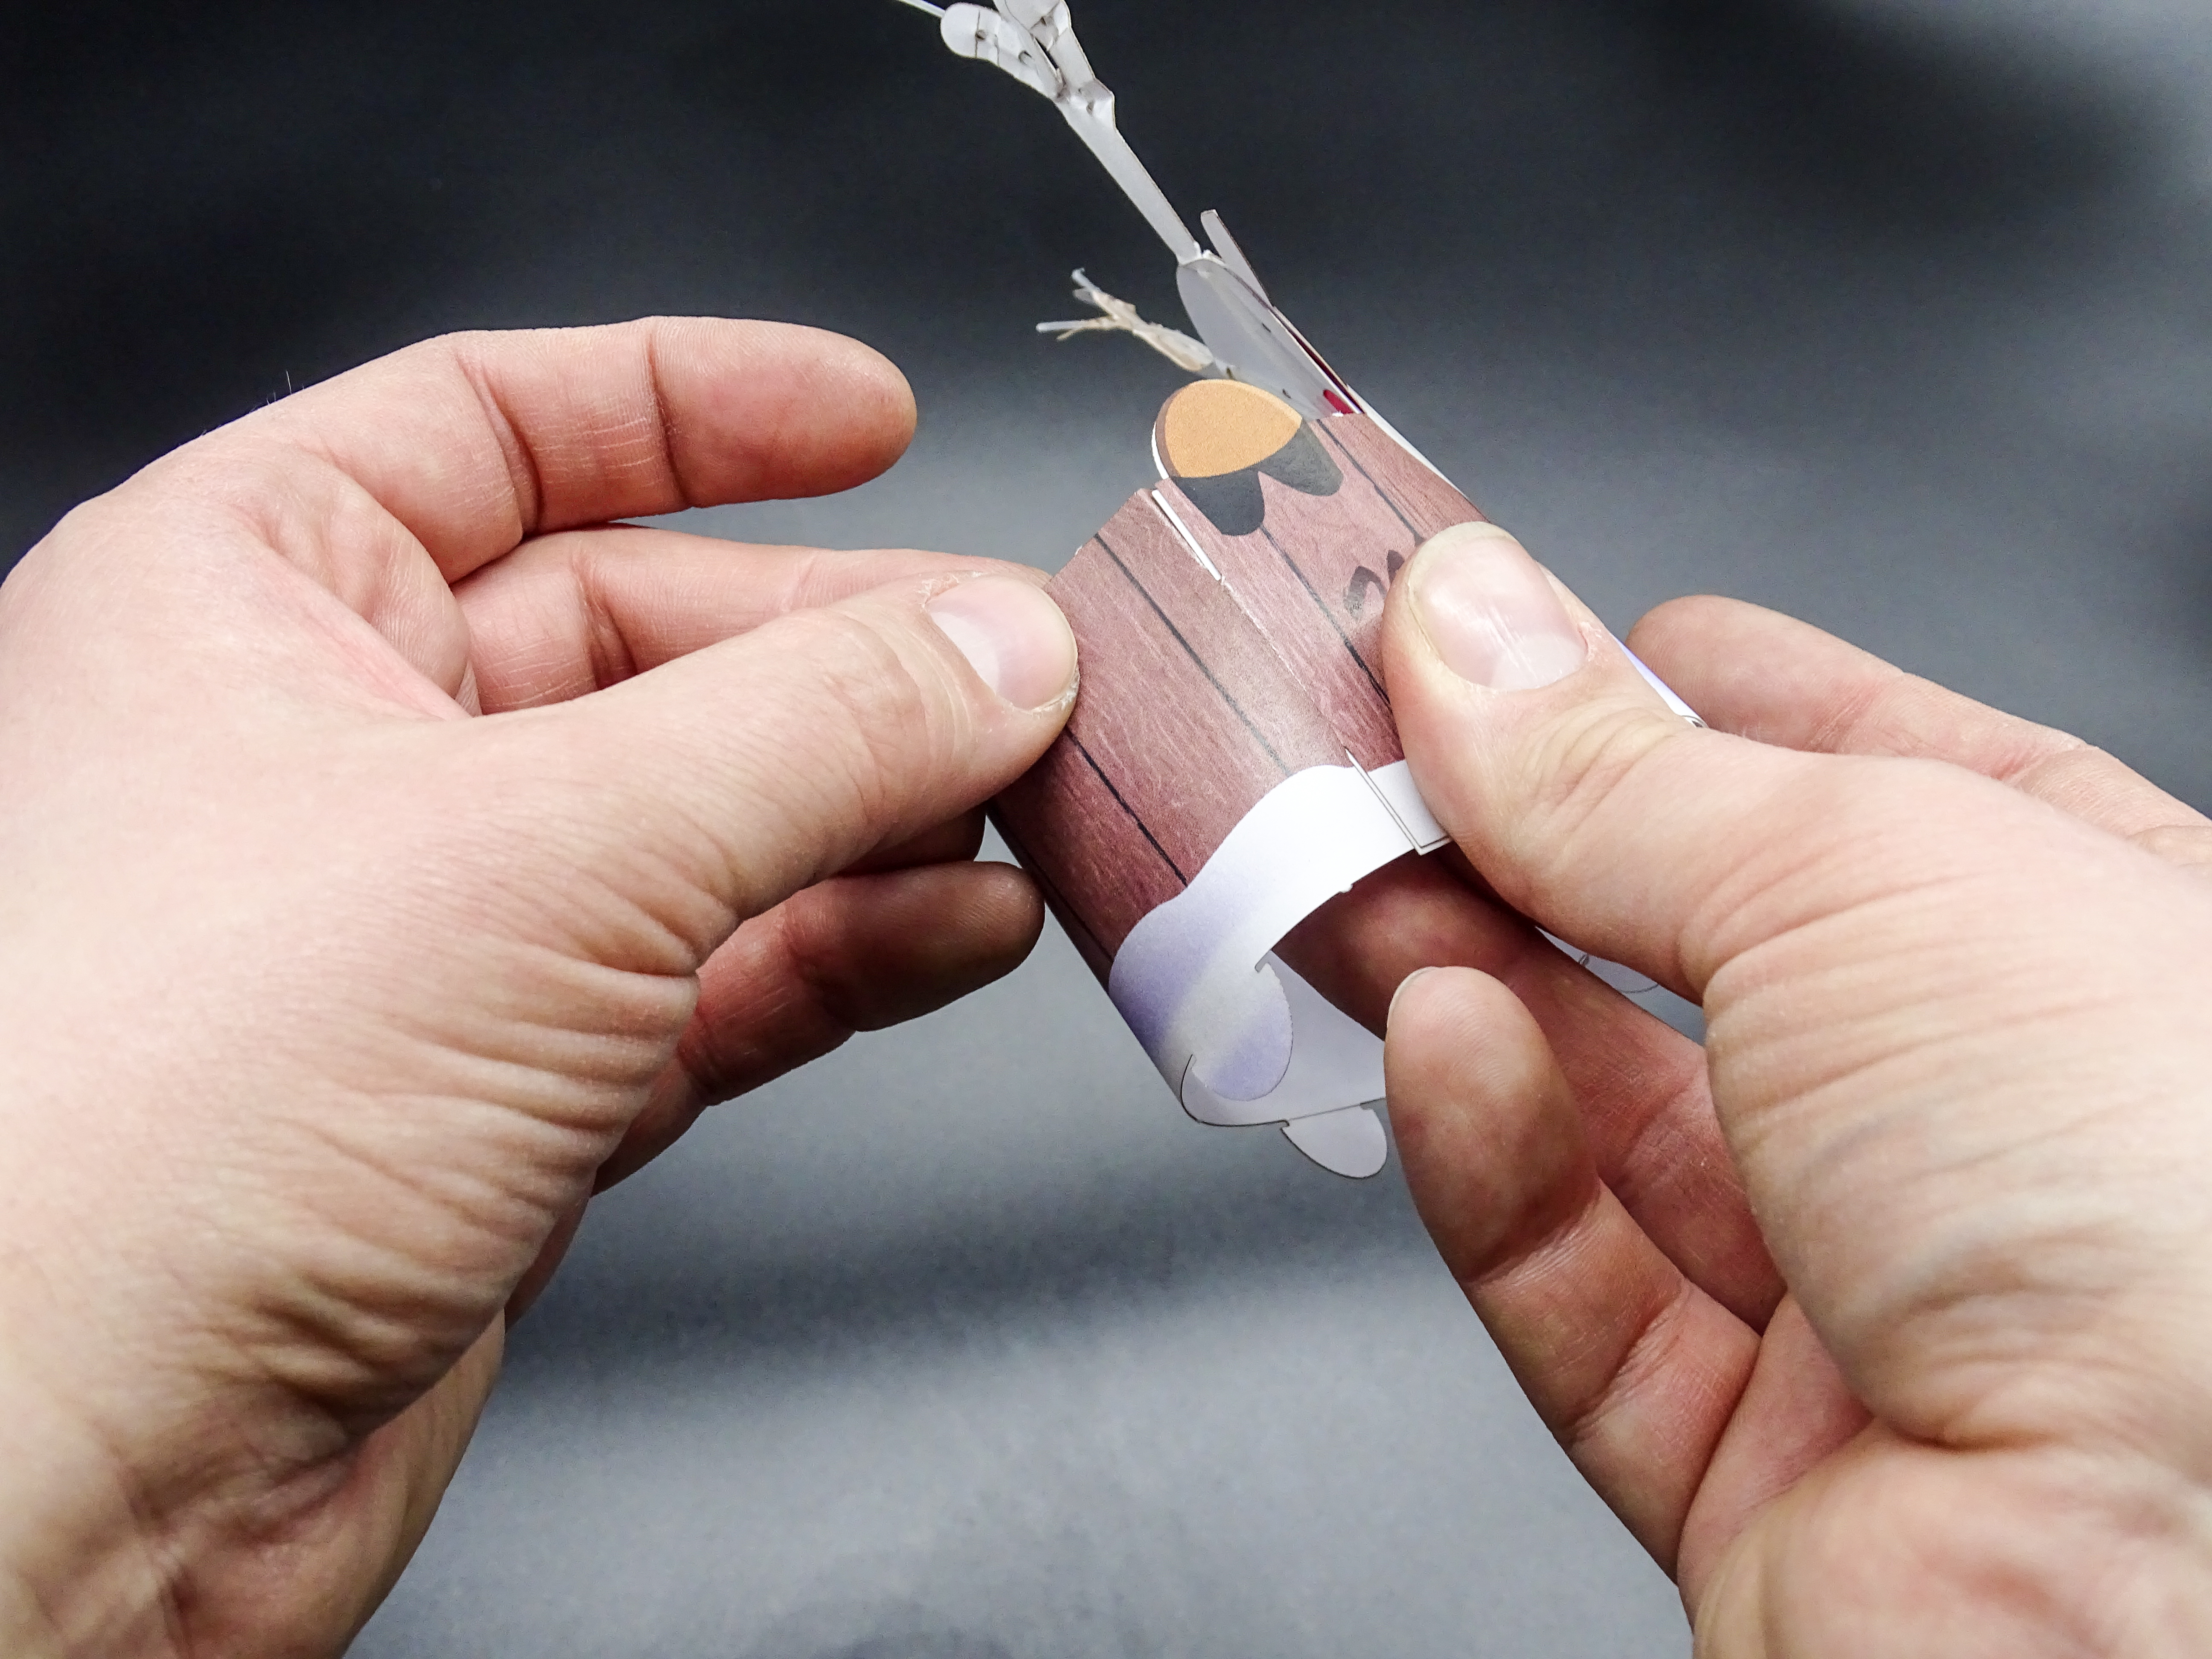
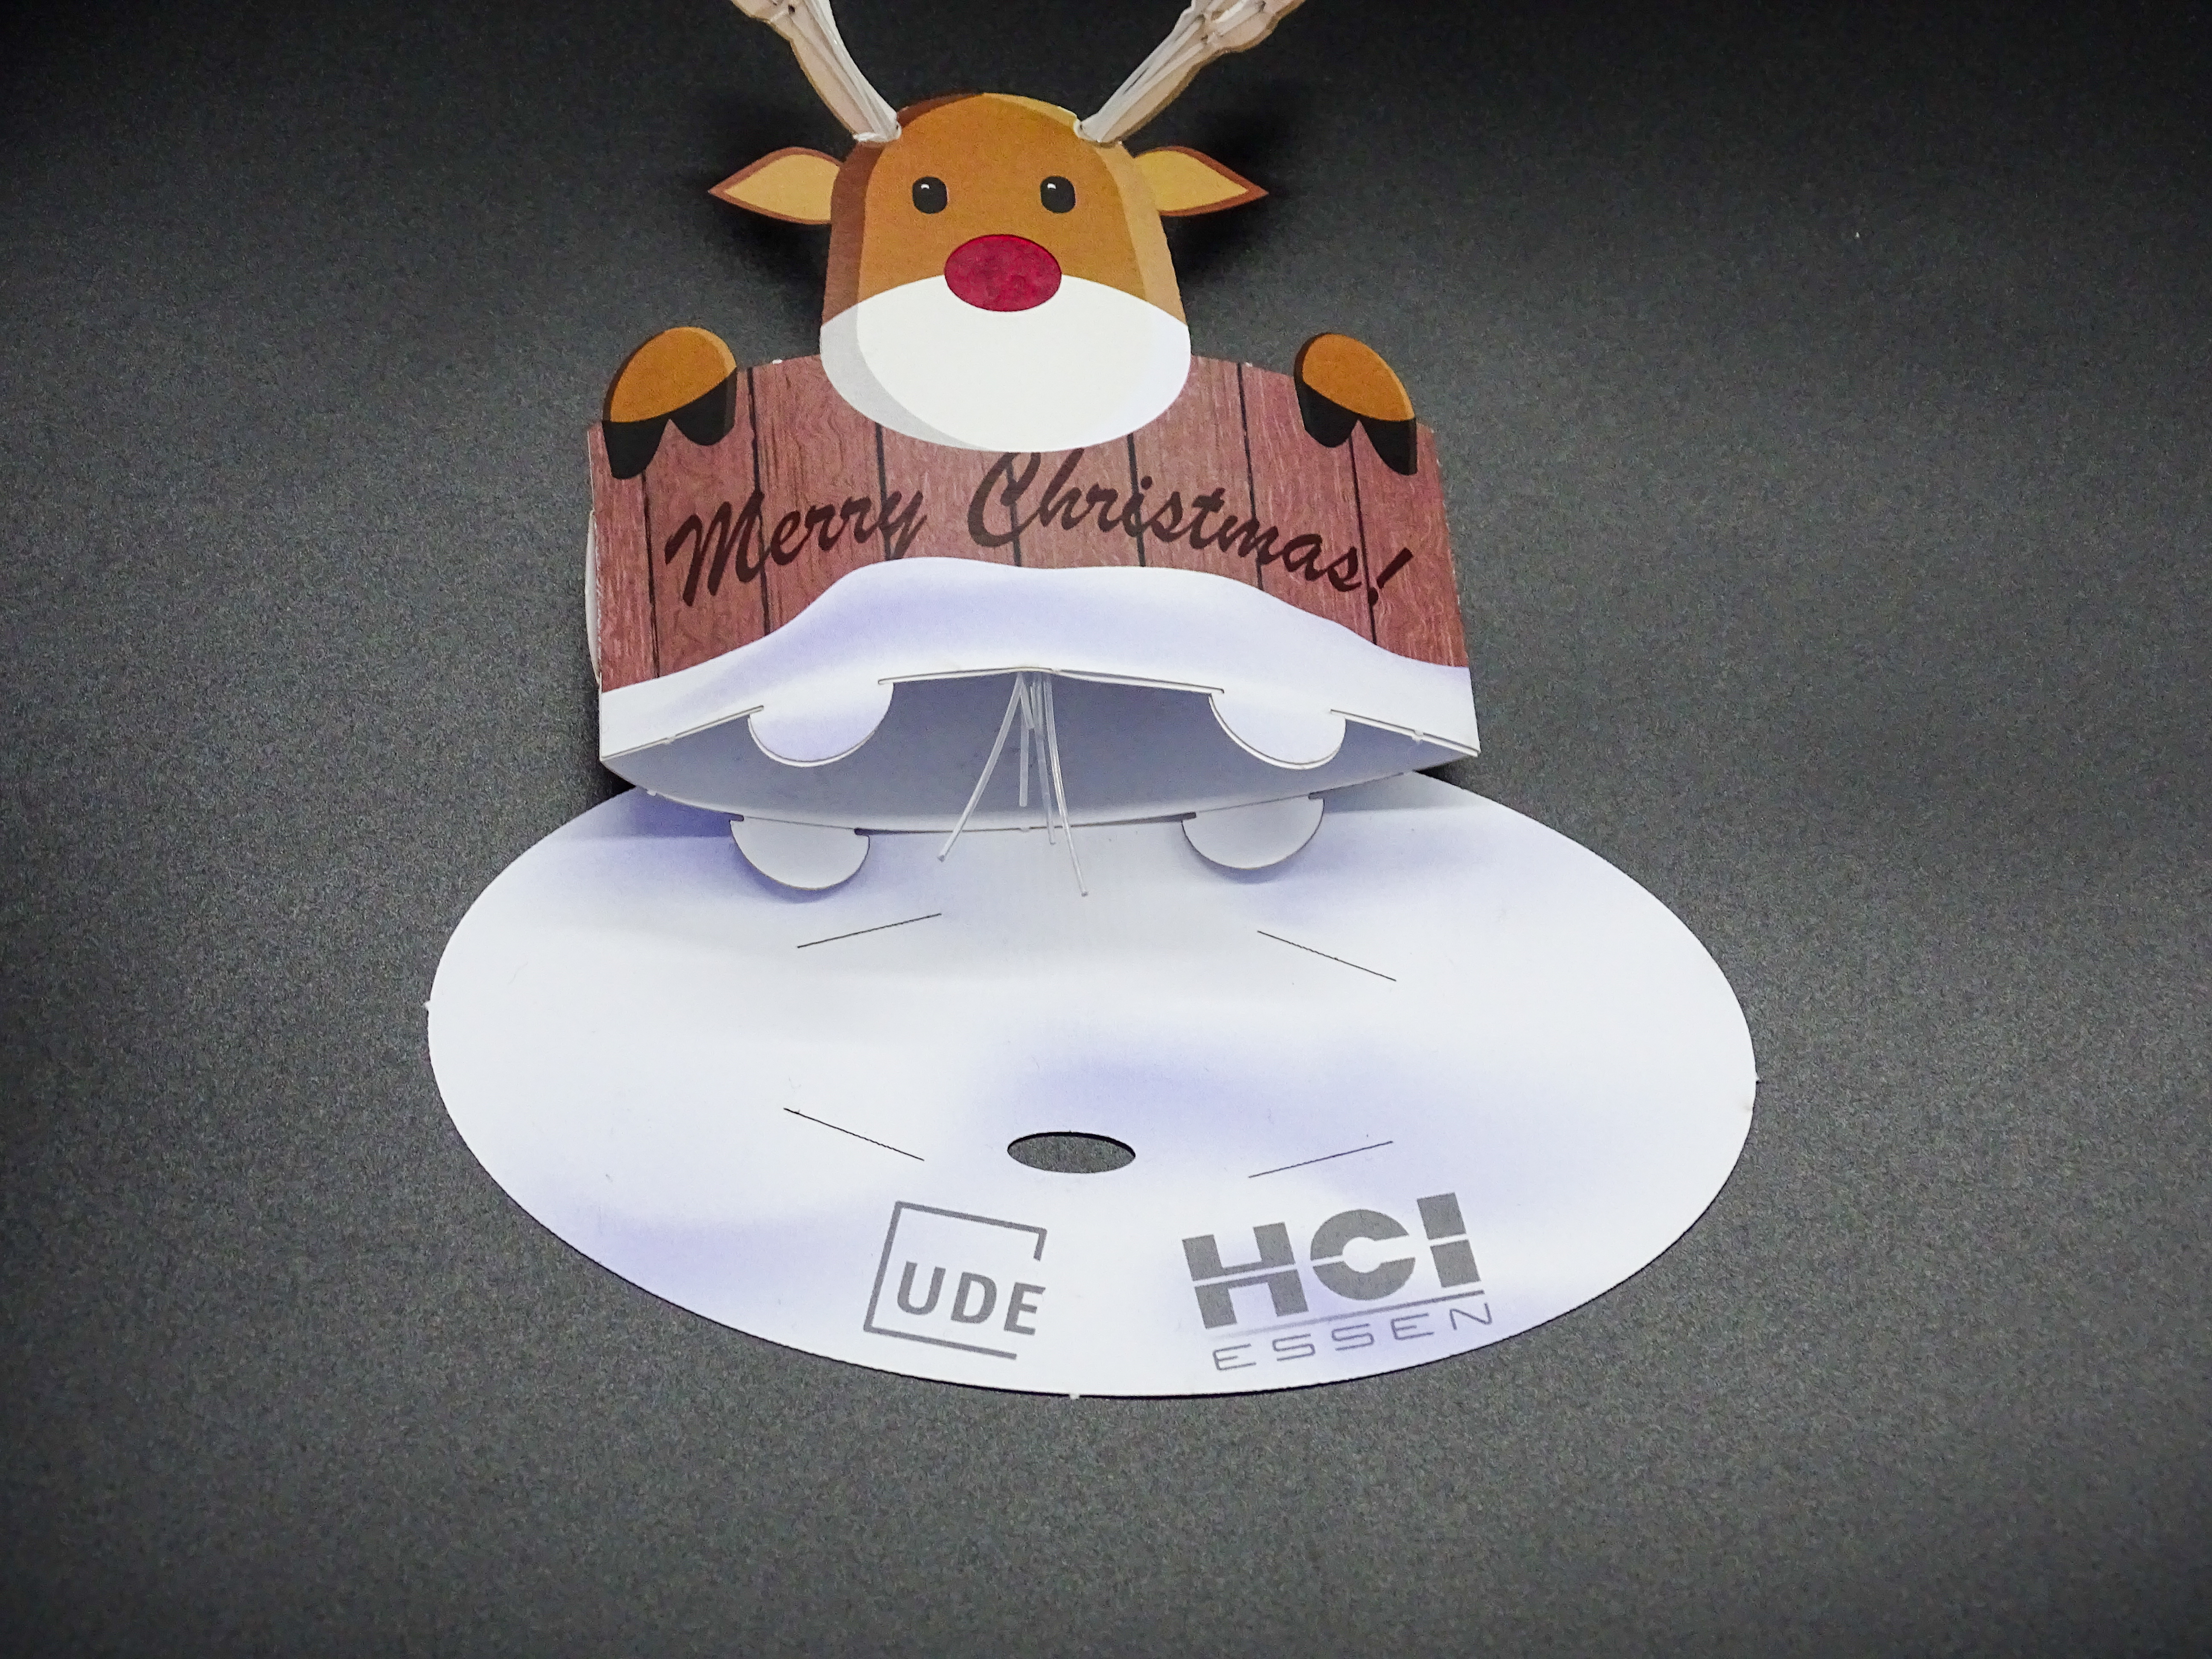
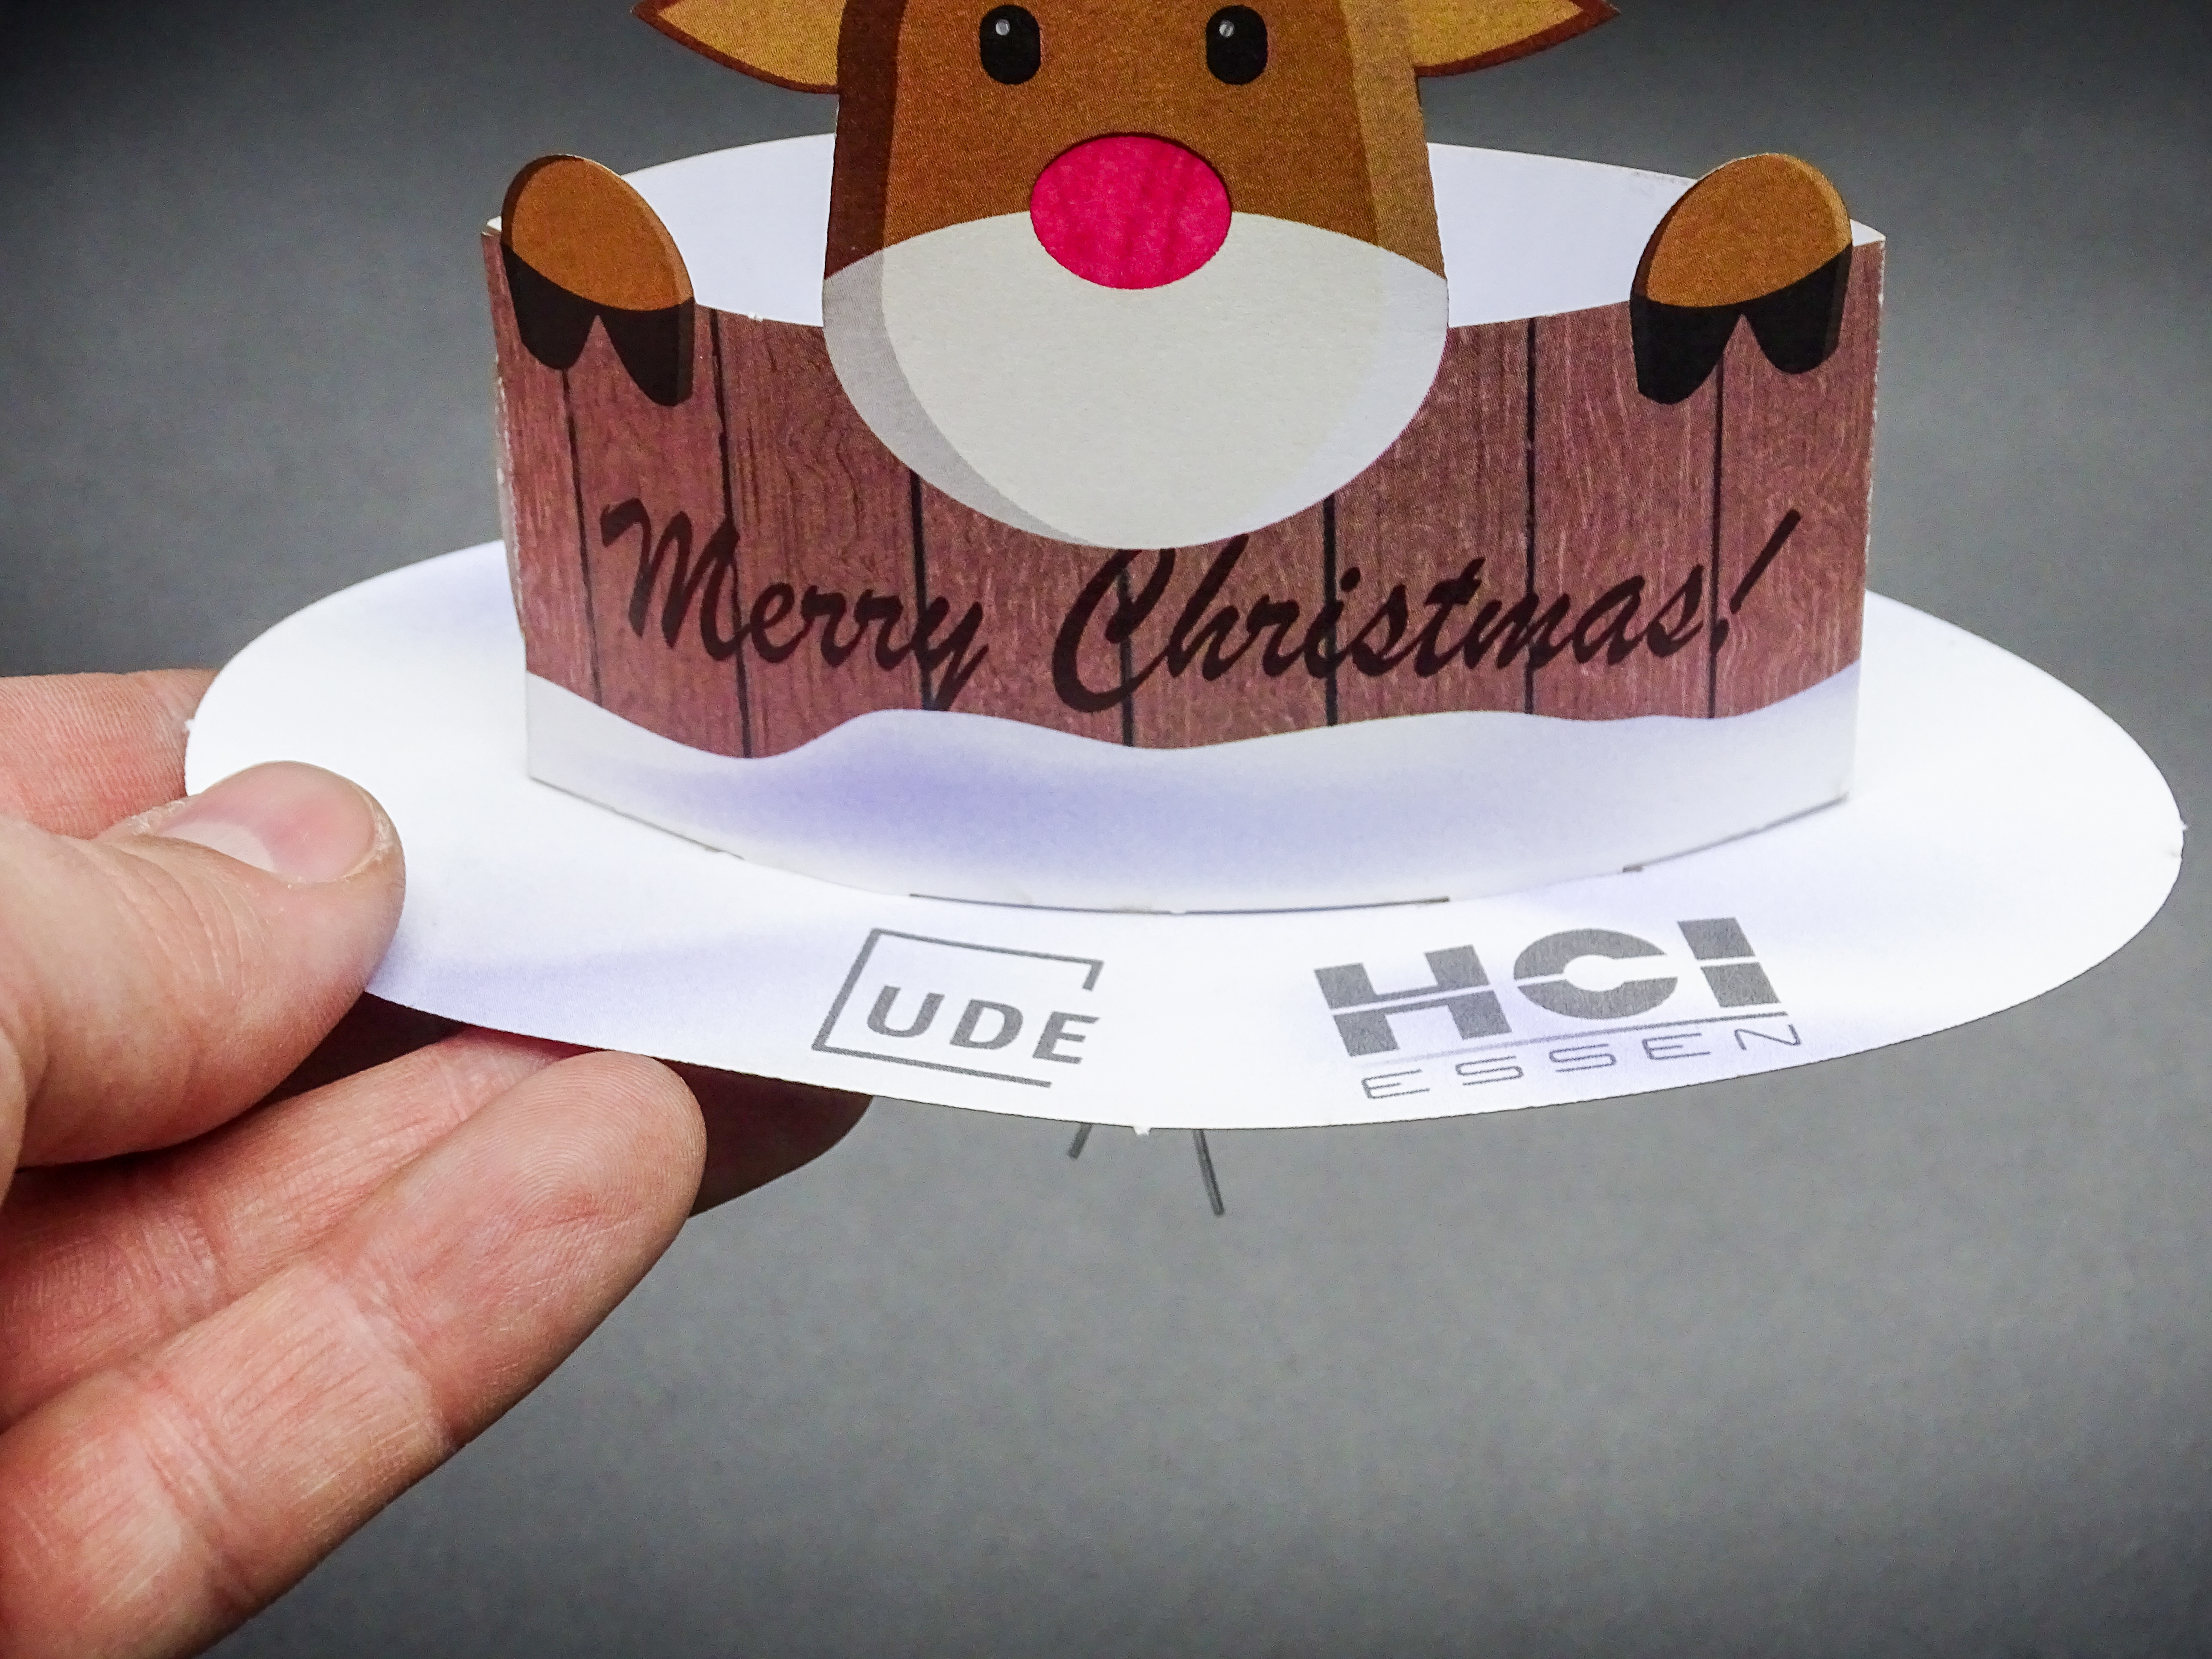
Fence and Base Plate
Now it's time to close the reindeer's fence to a loop. To do so, place the two ends on top of each other and push the flap into the corresponding slot. Thereby, hook in the bottom of the flip first and then push the top through the slot.
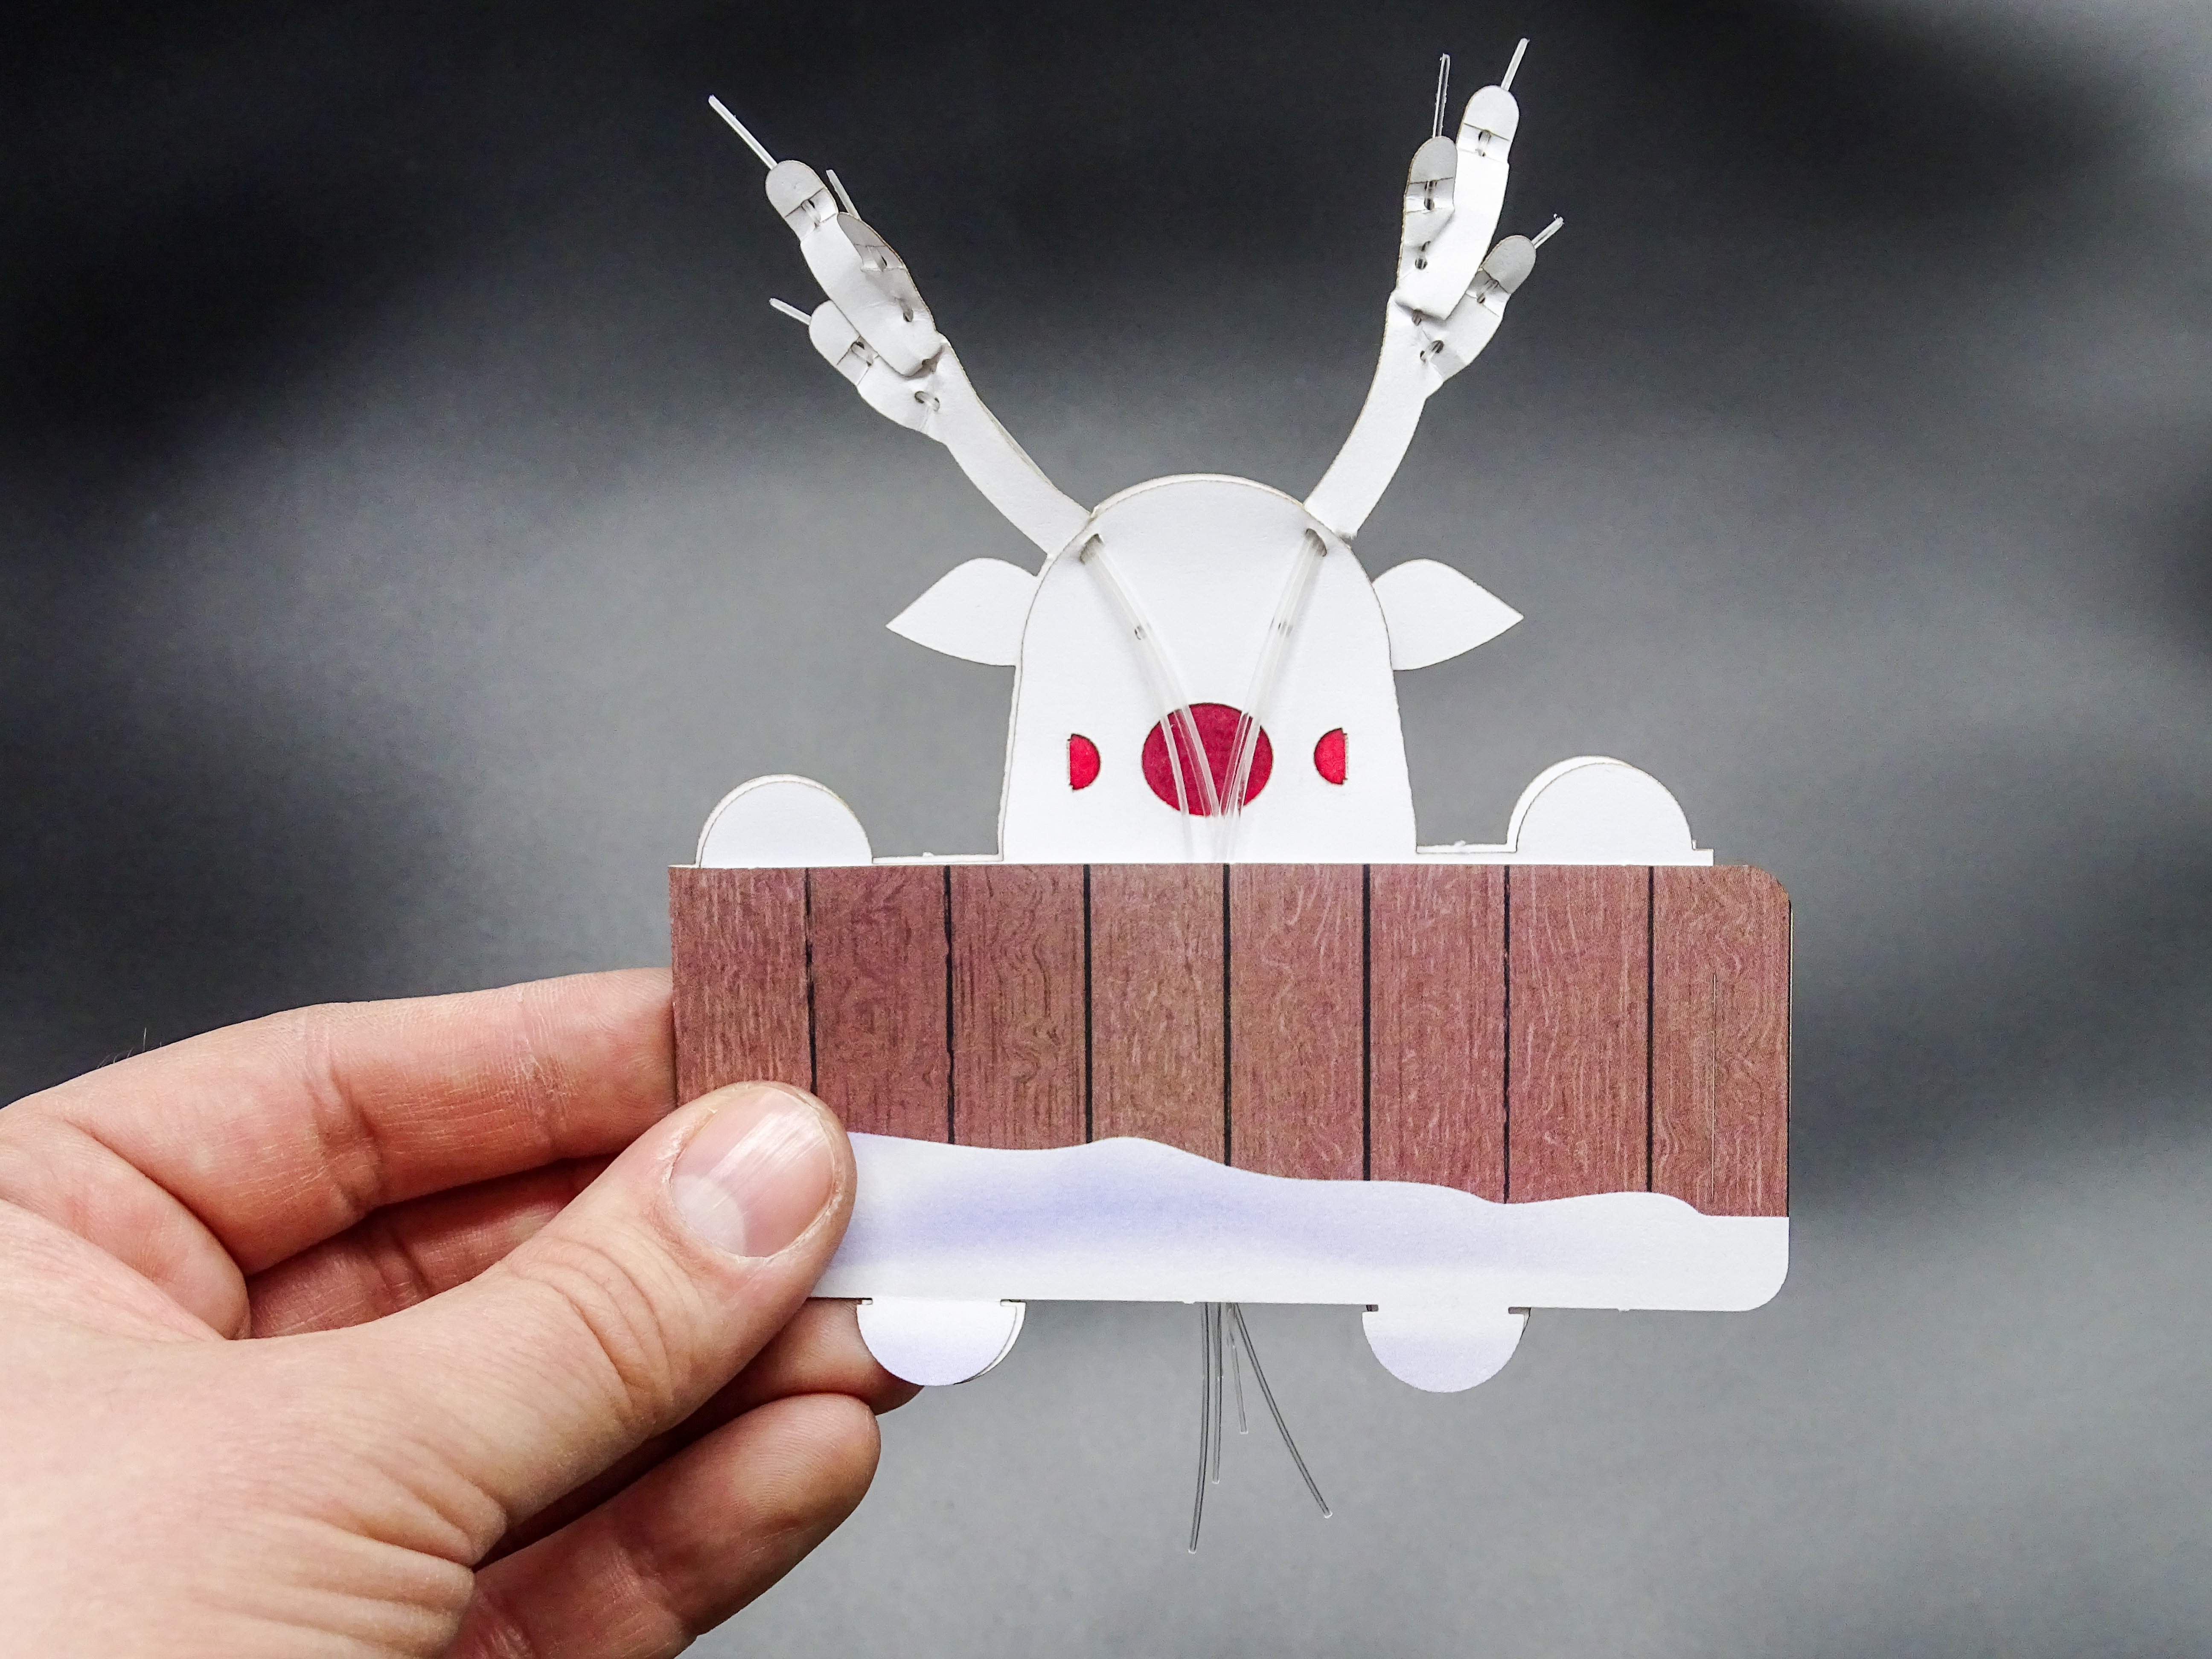
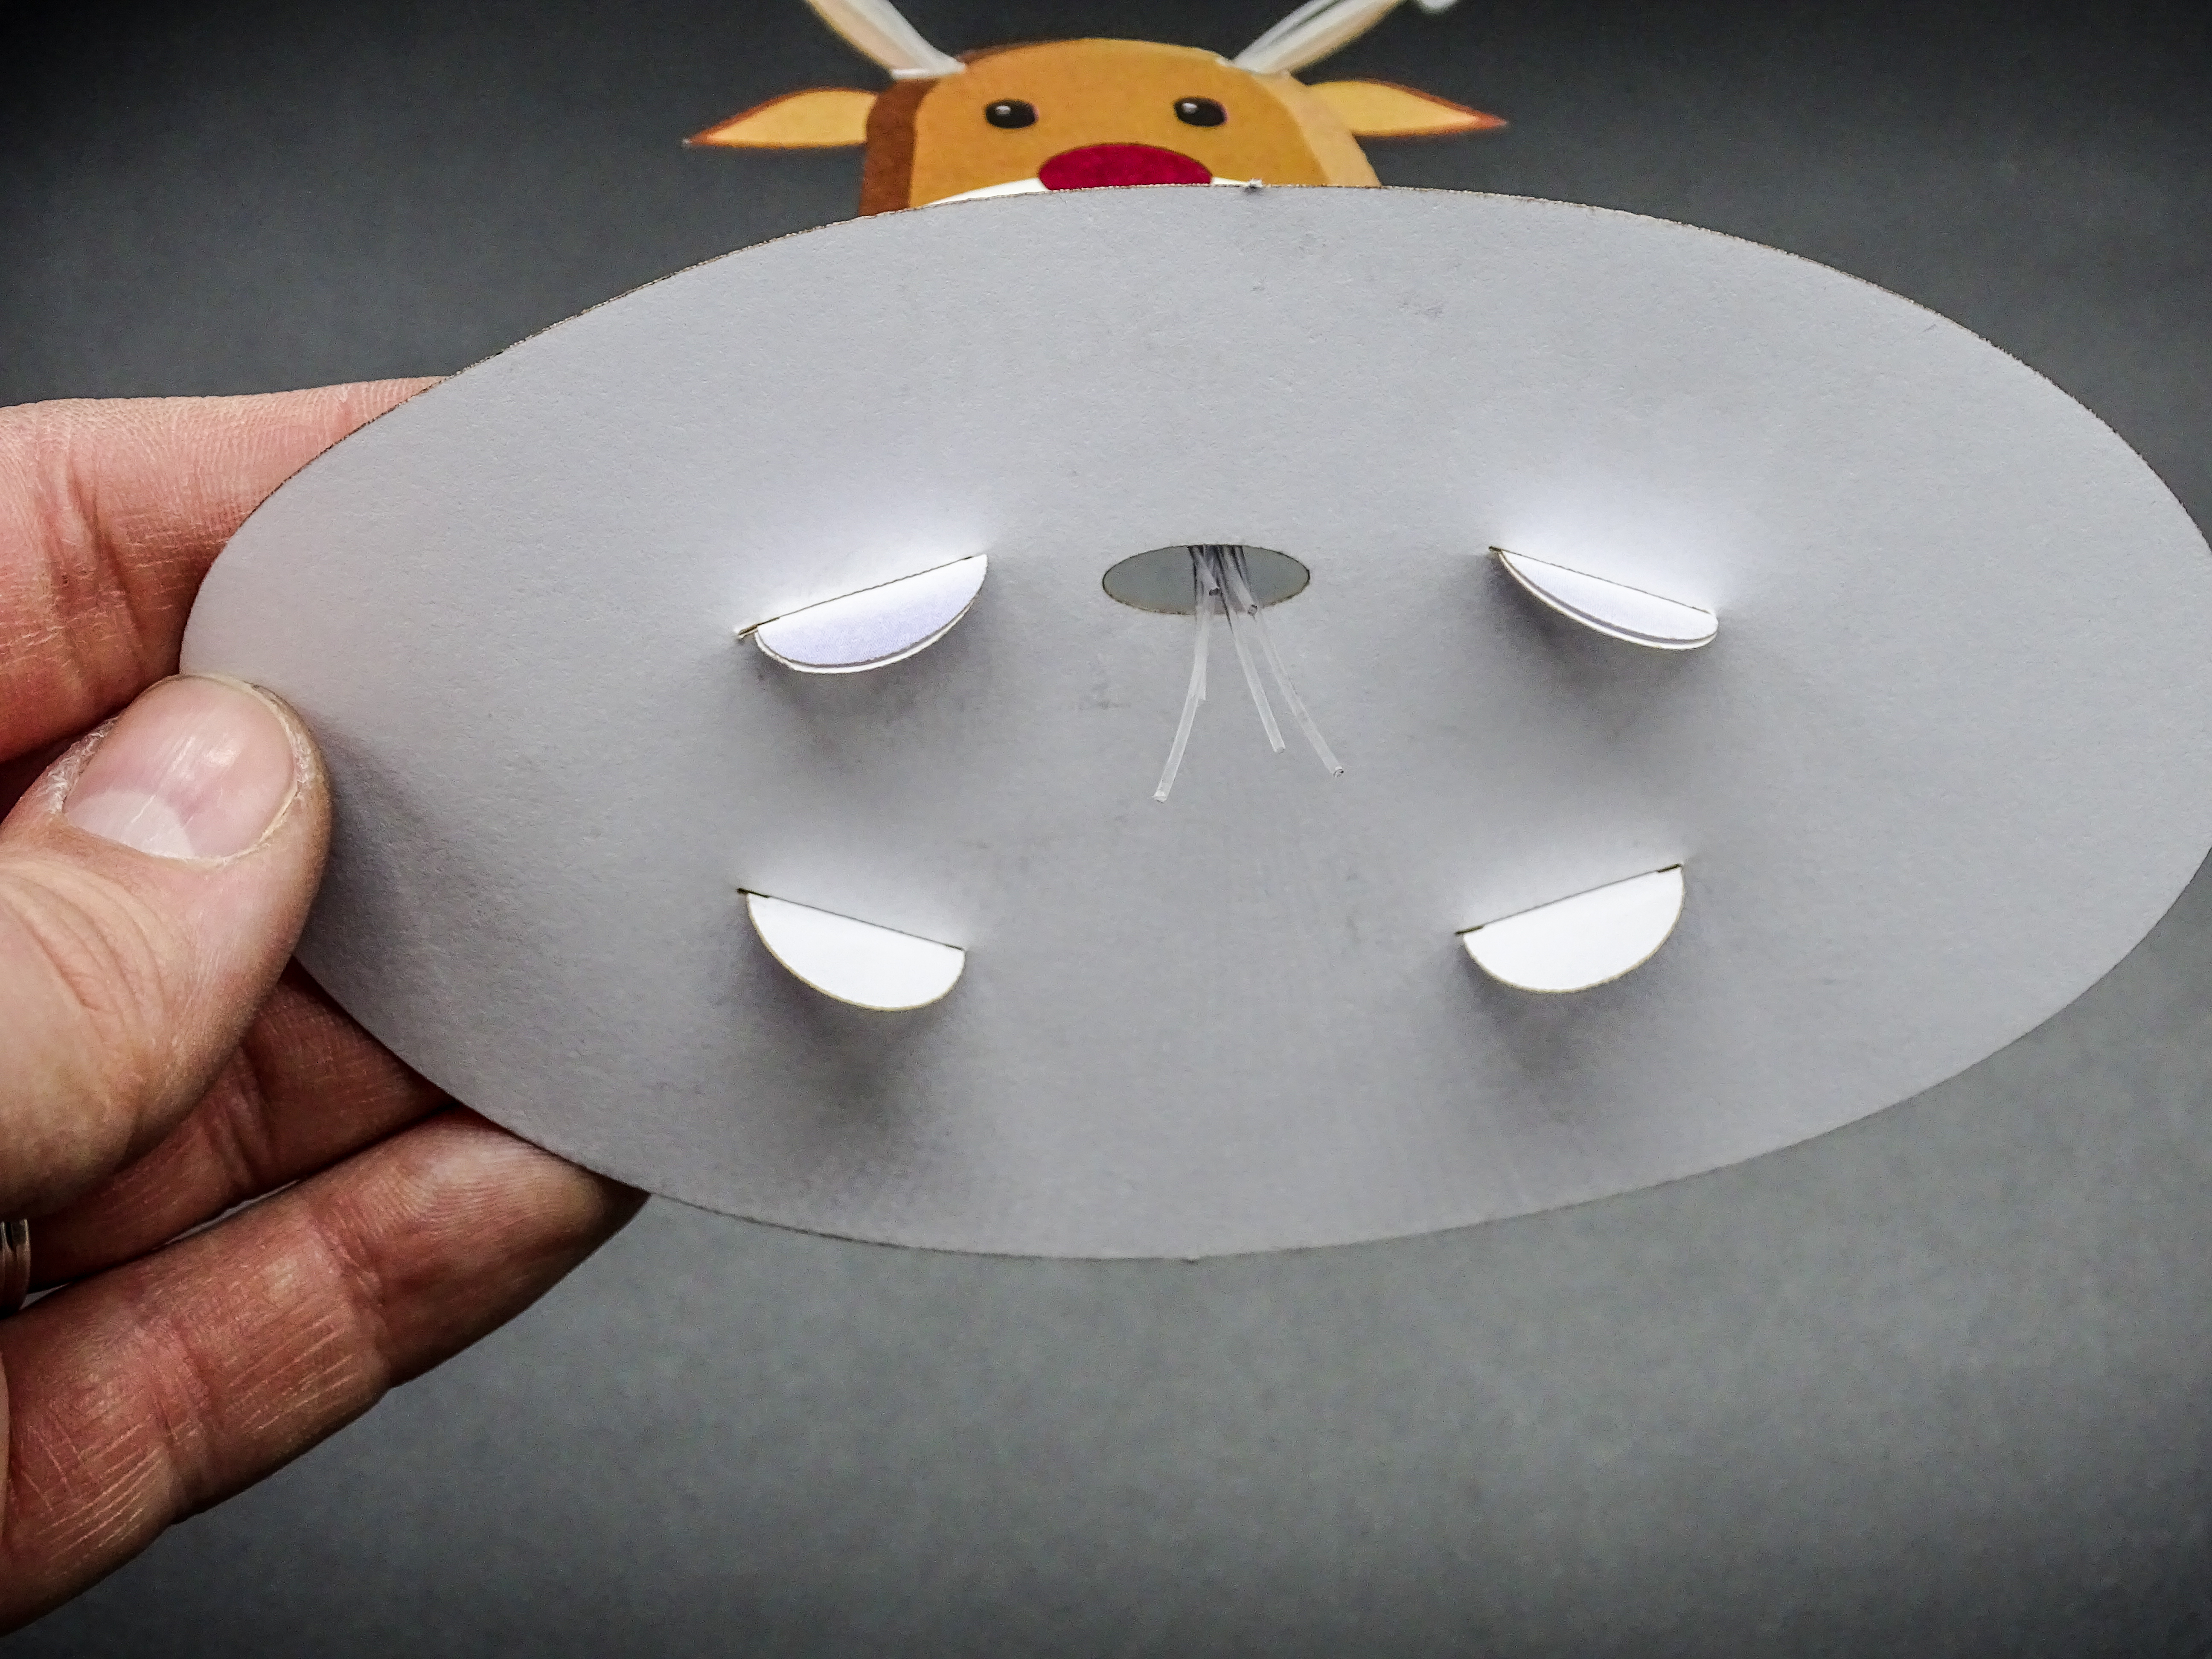
After the fence is closed, we can attach it to the base plate. Insert the flaps of the reindeer into the slots of the base and fold them over to fix everything in place. Take care to guide the fibers through the hole in the center of the base.
spacer
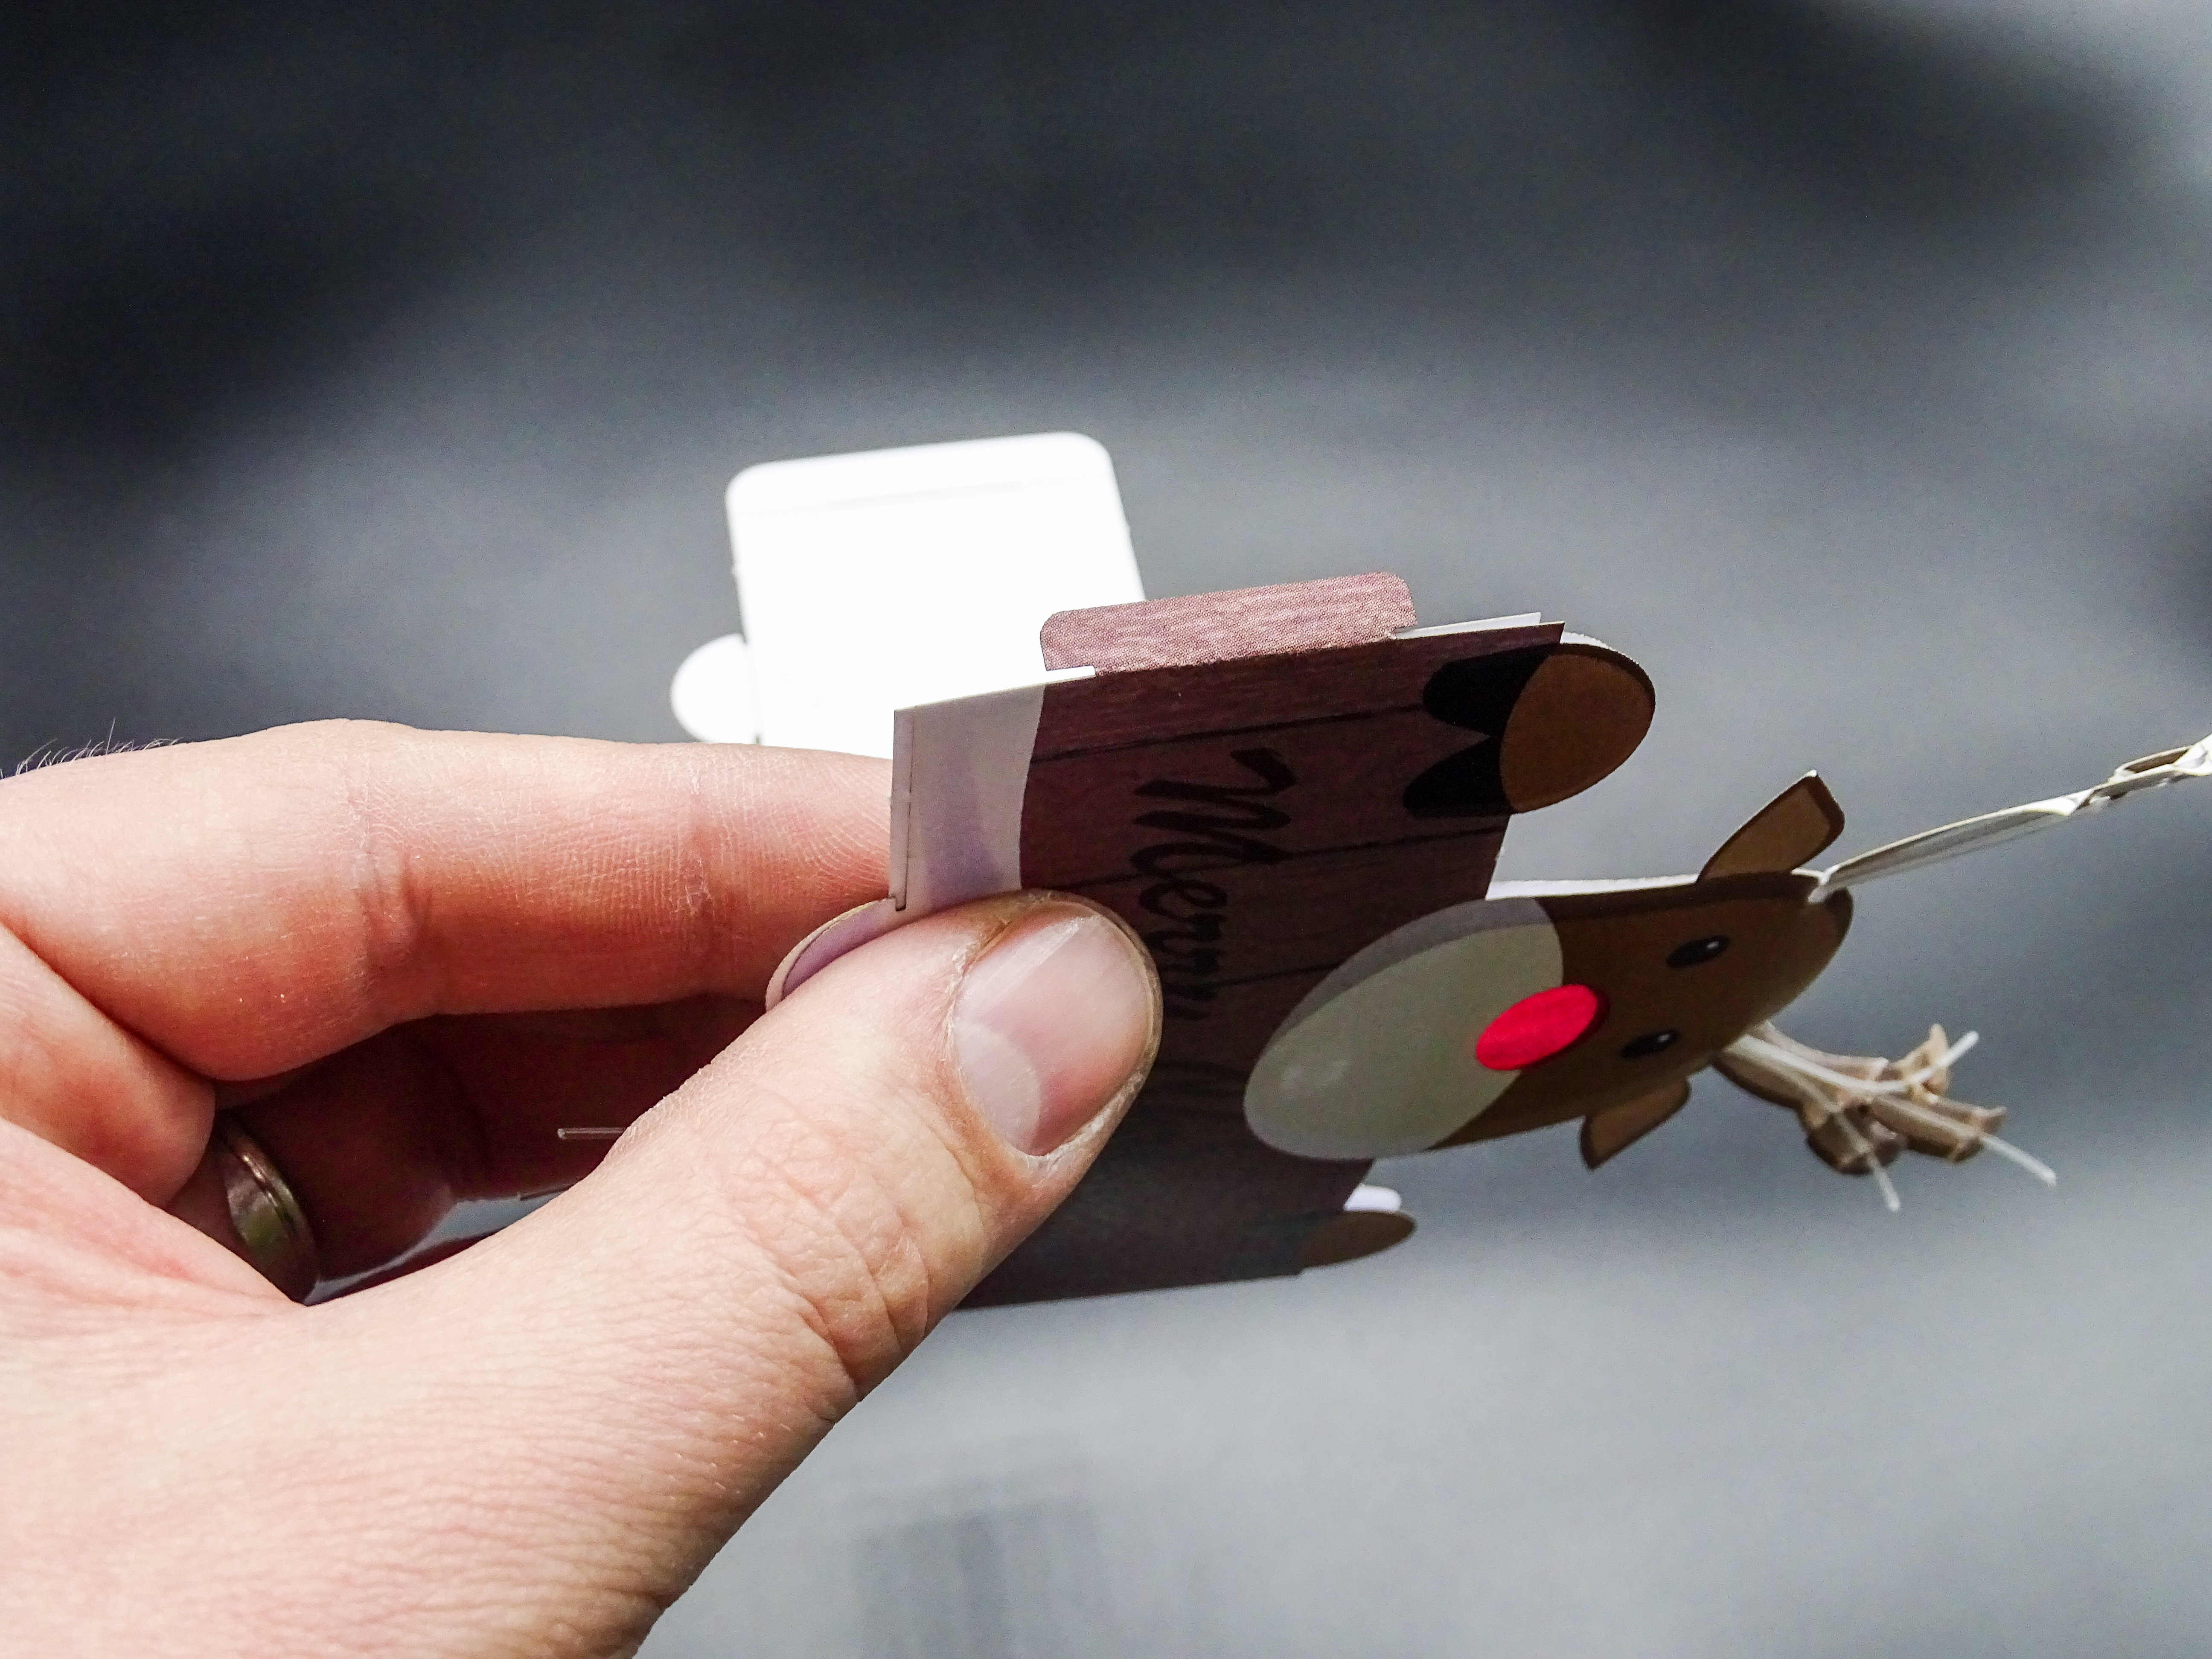
Finalization
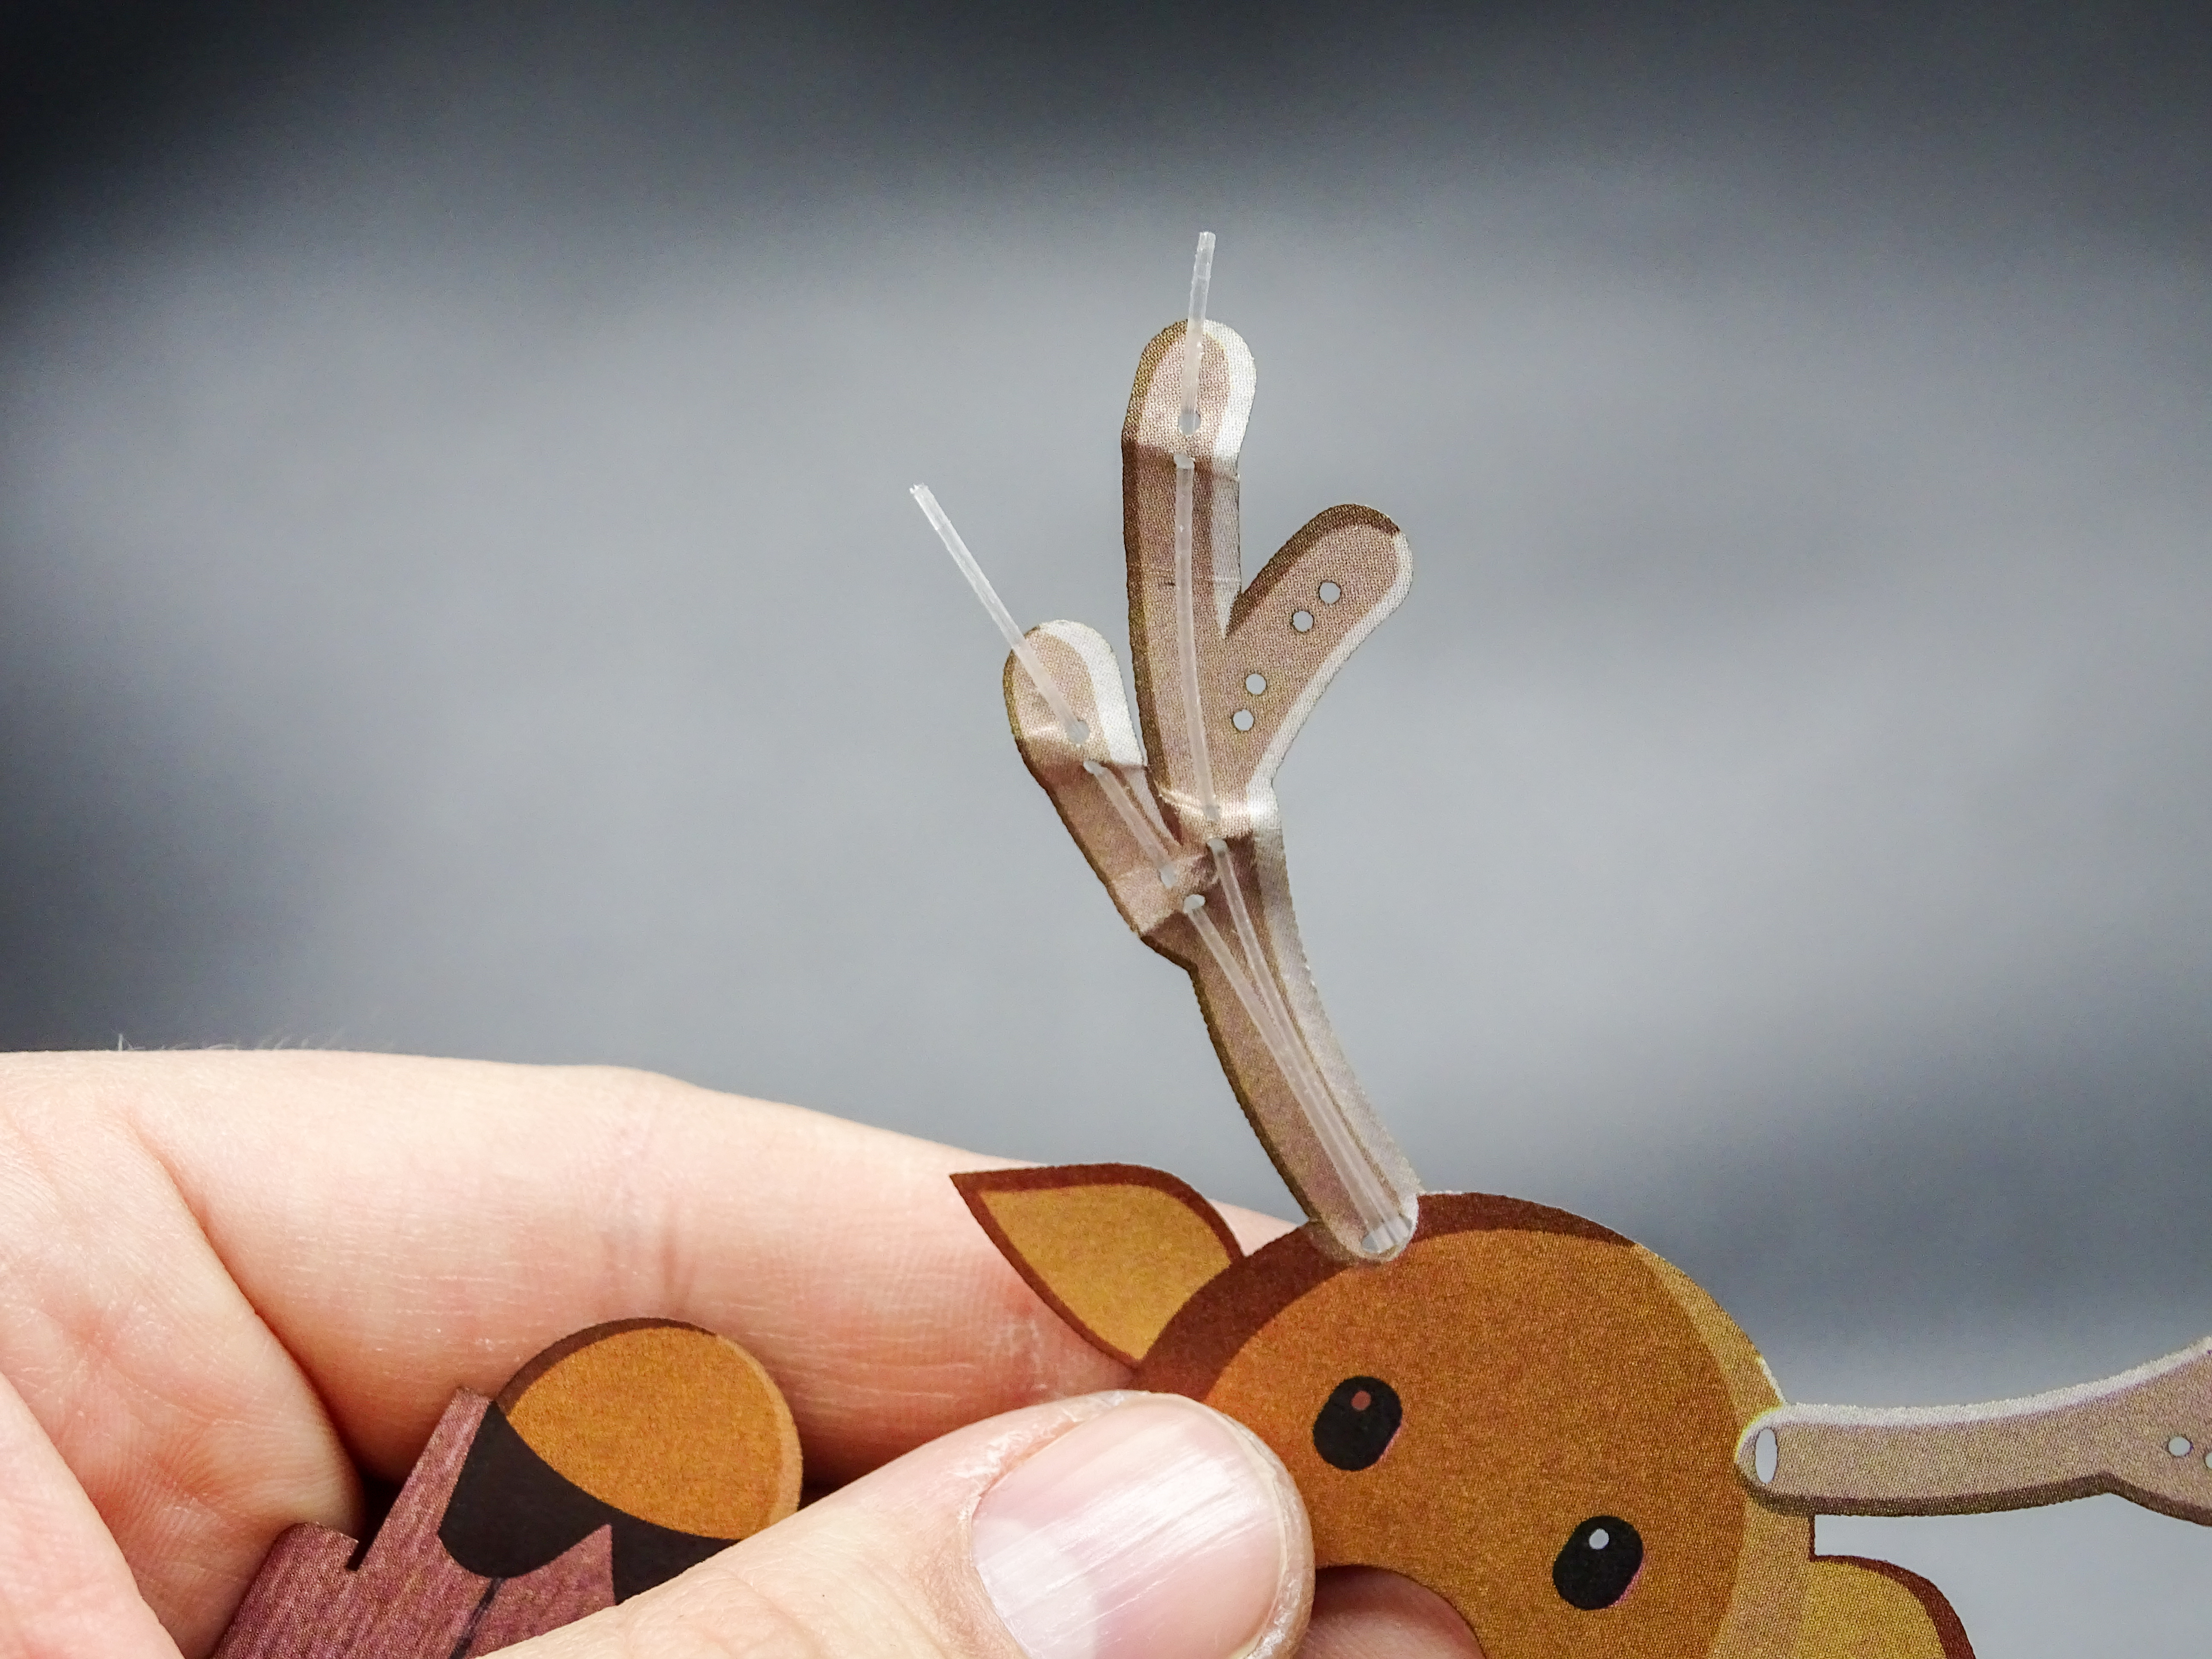
Finally, trim the fibers at the base and at the tips of the antlers.

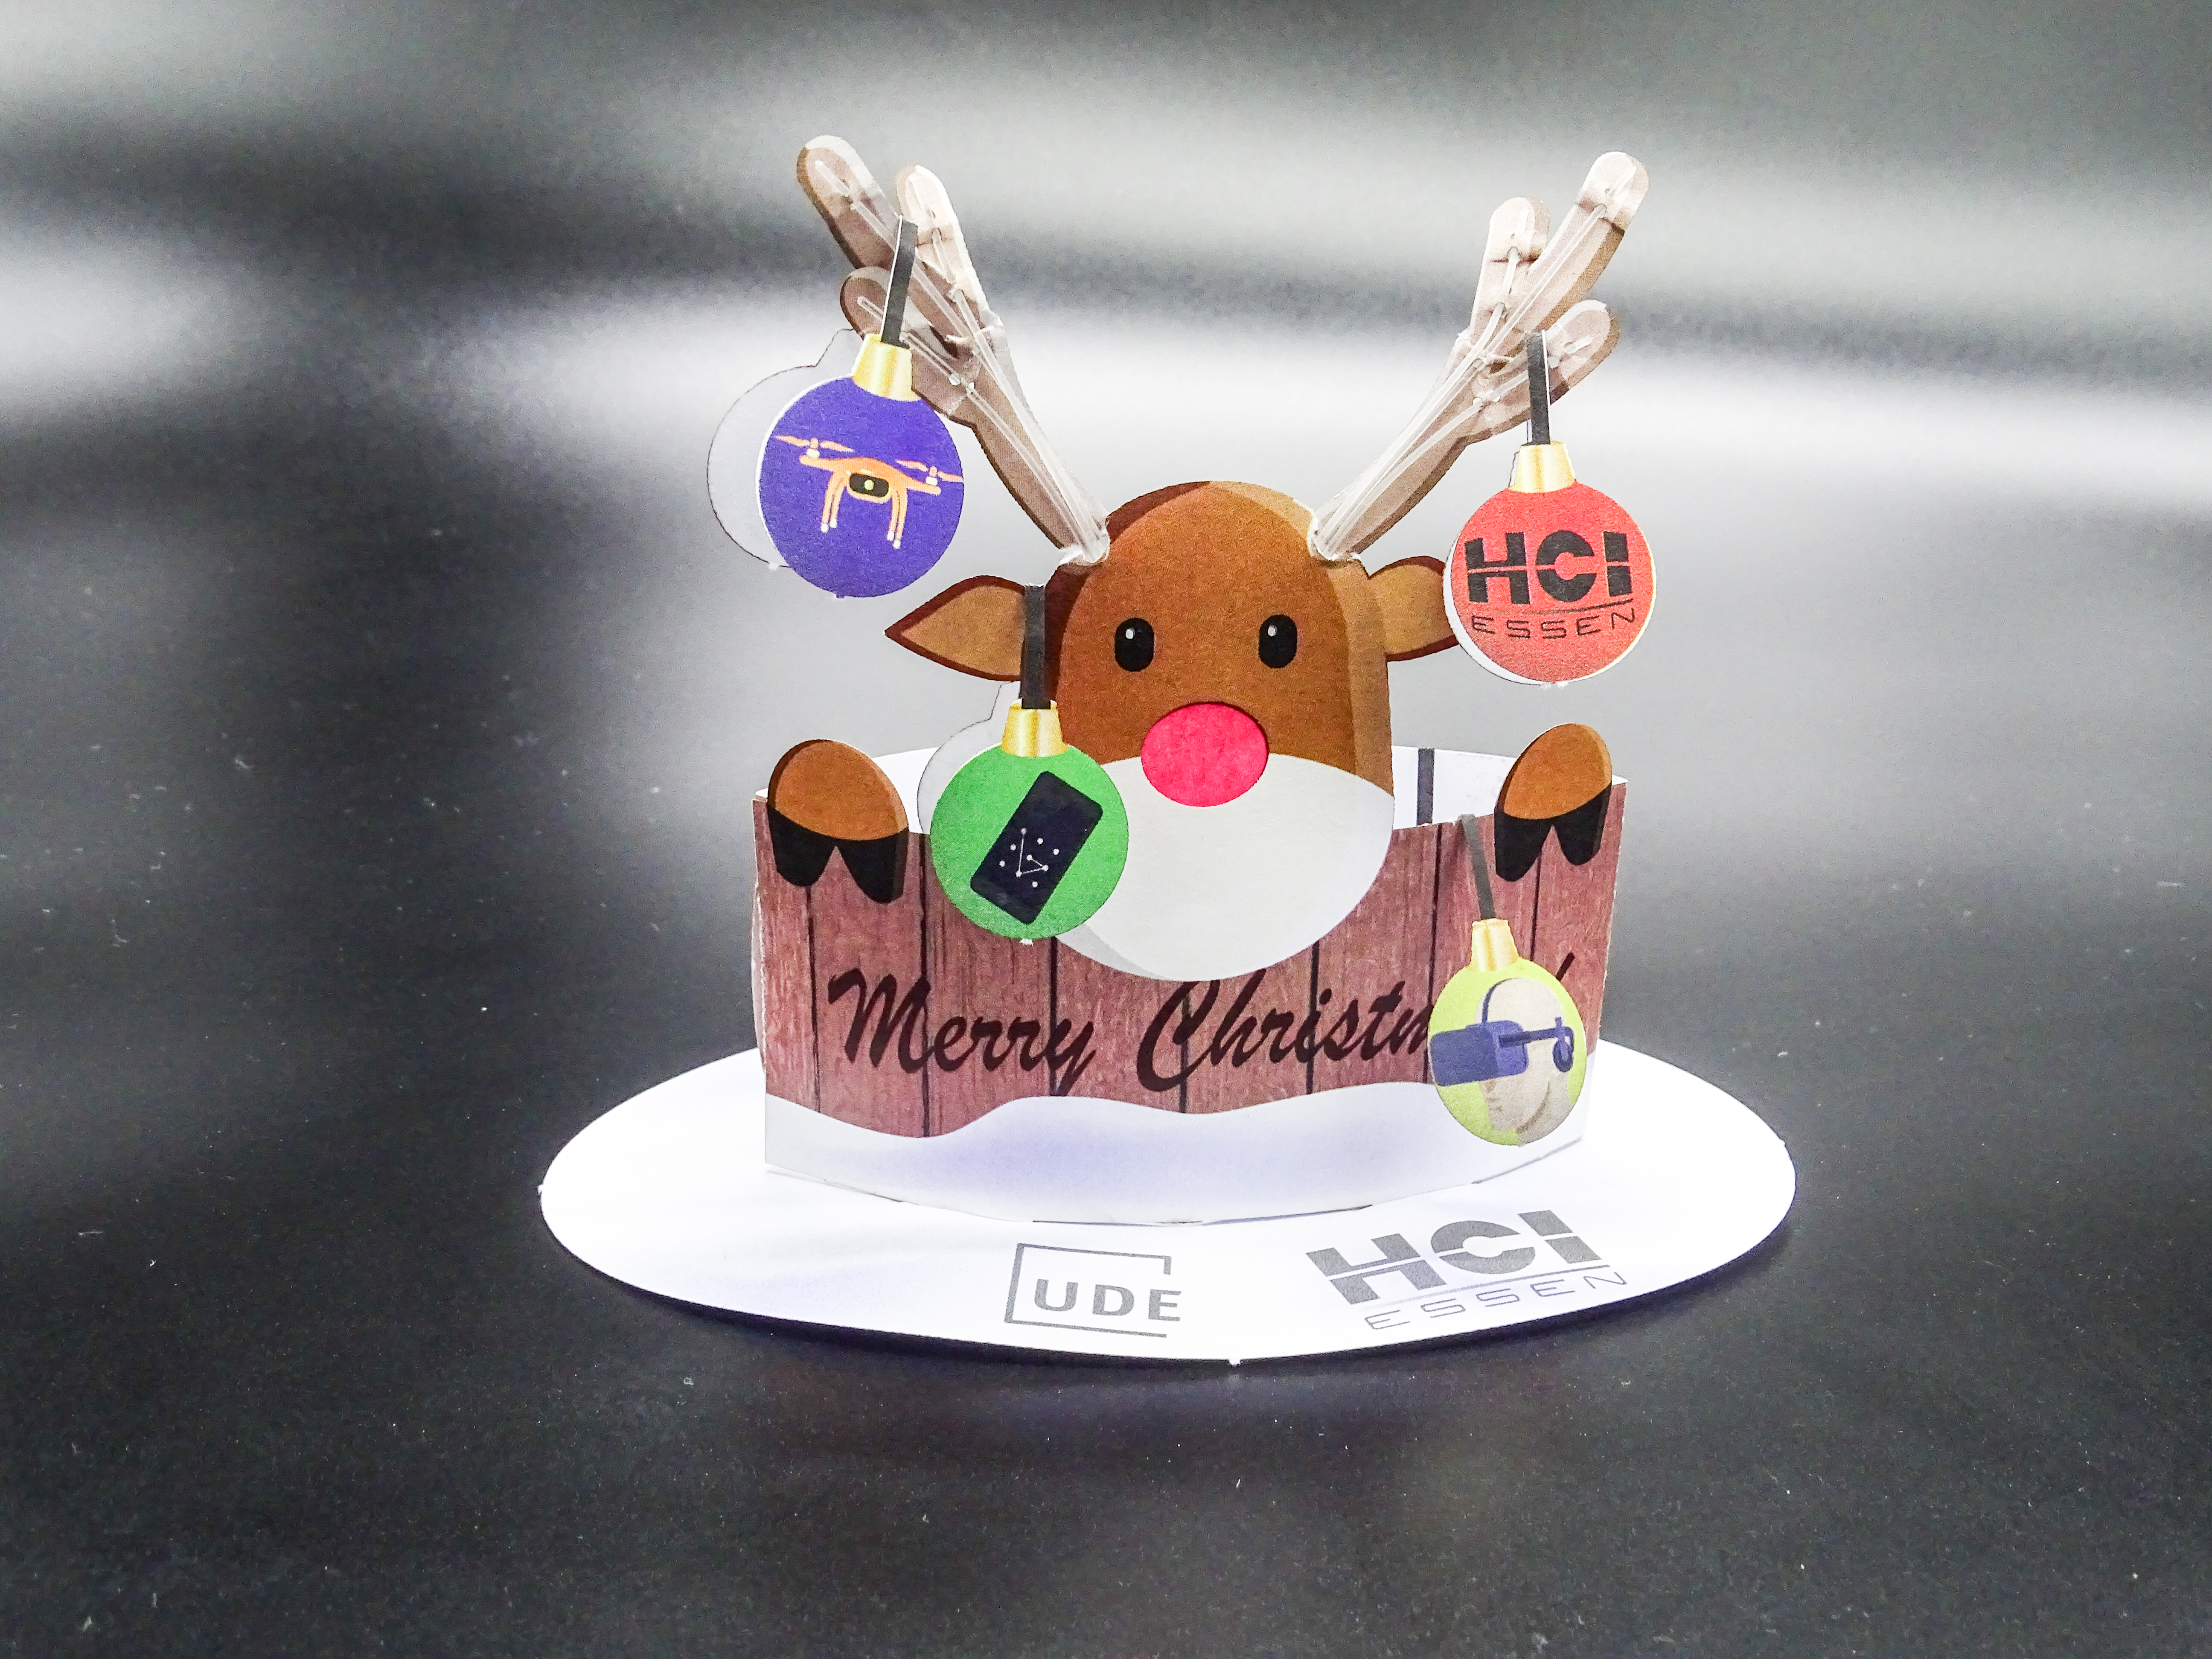
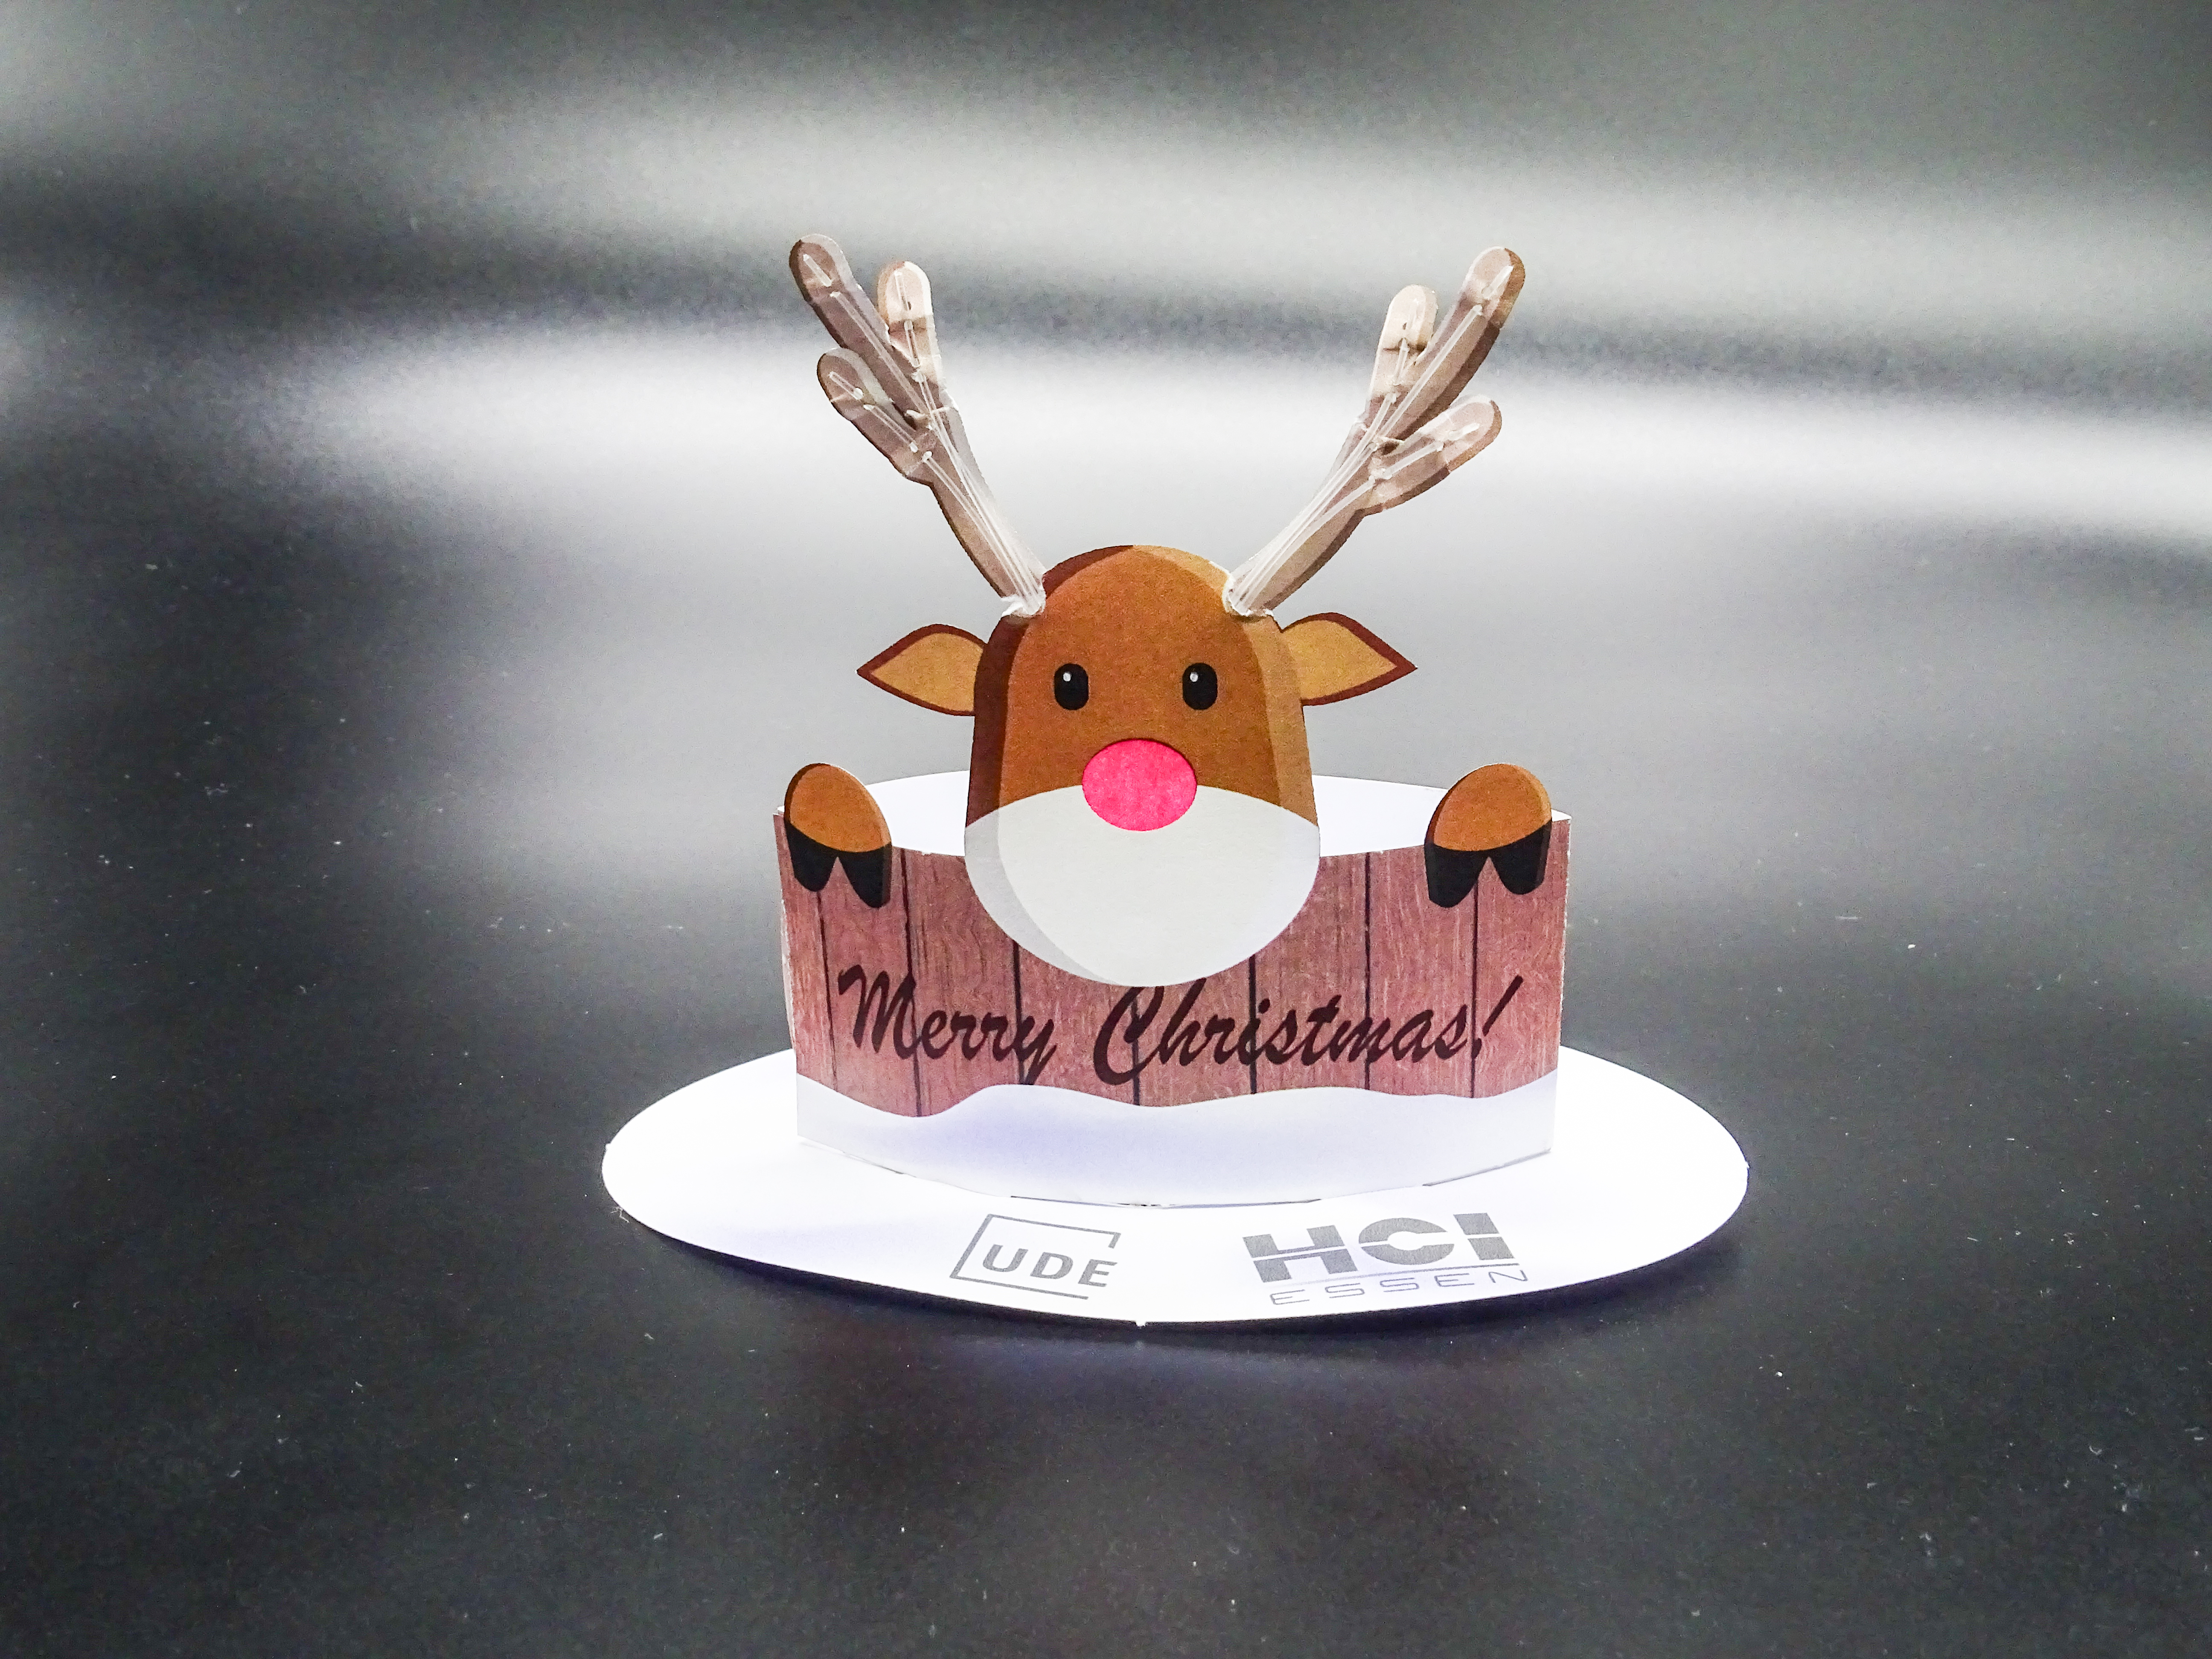
Your personal reindeer is now assembled!
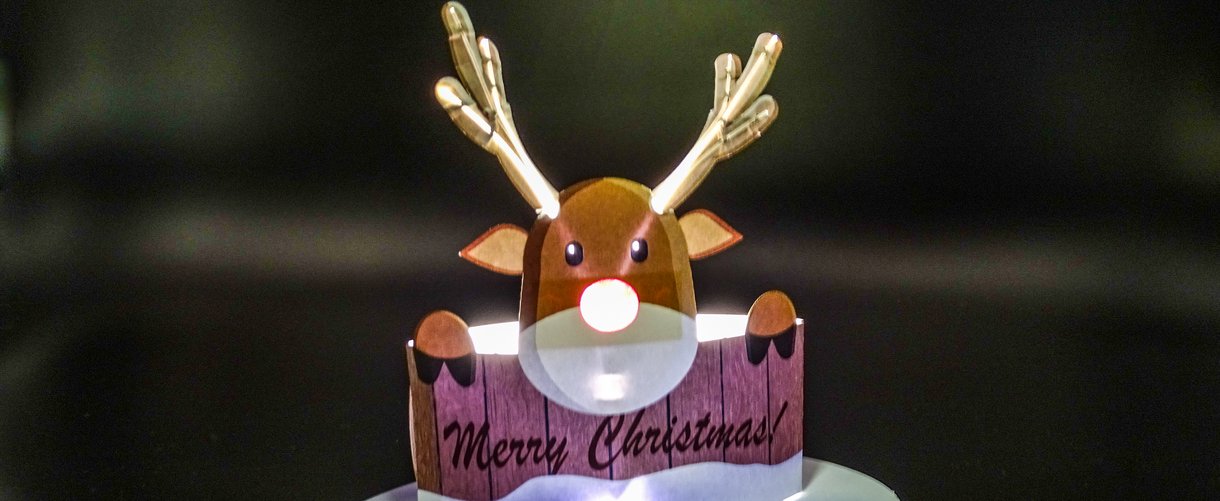
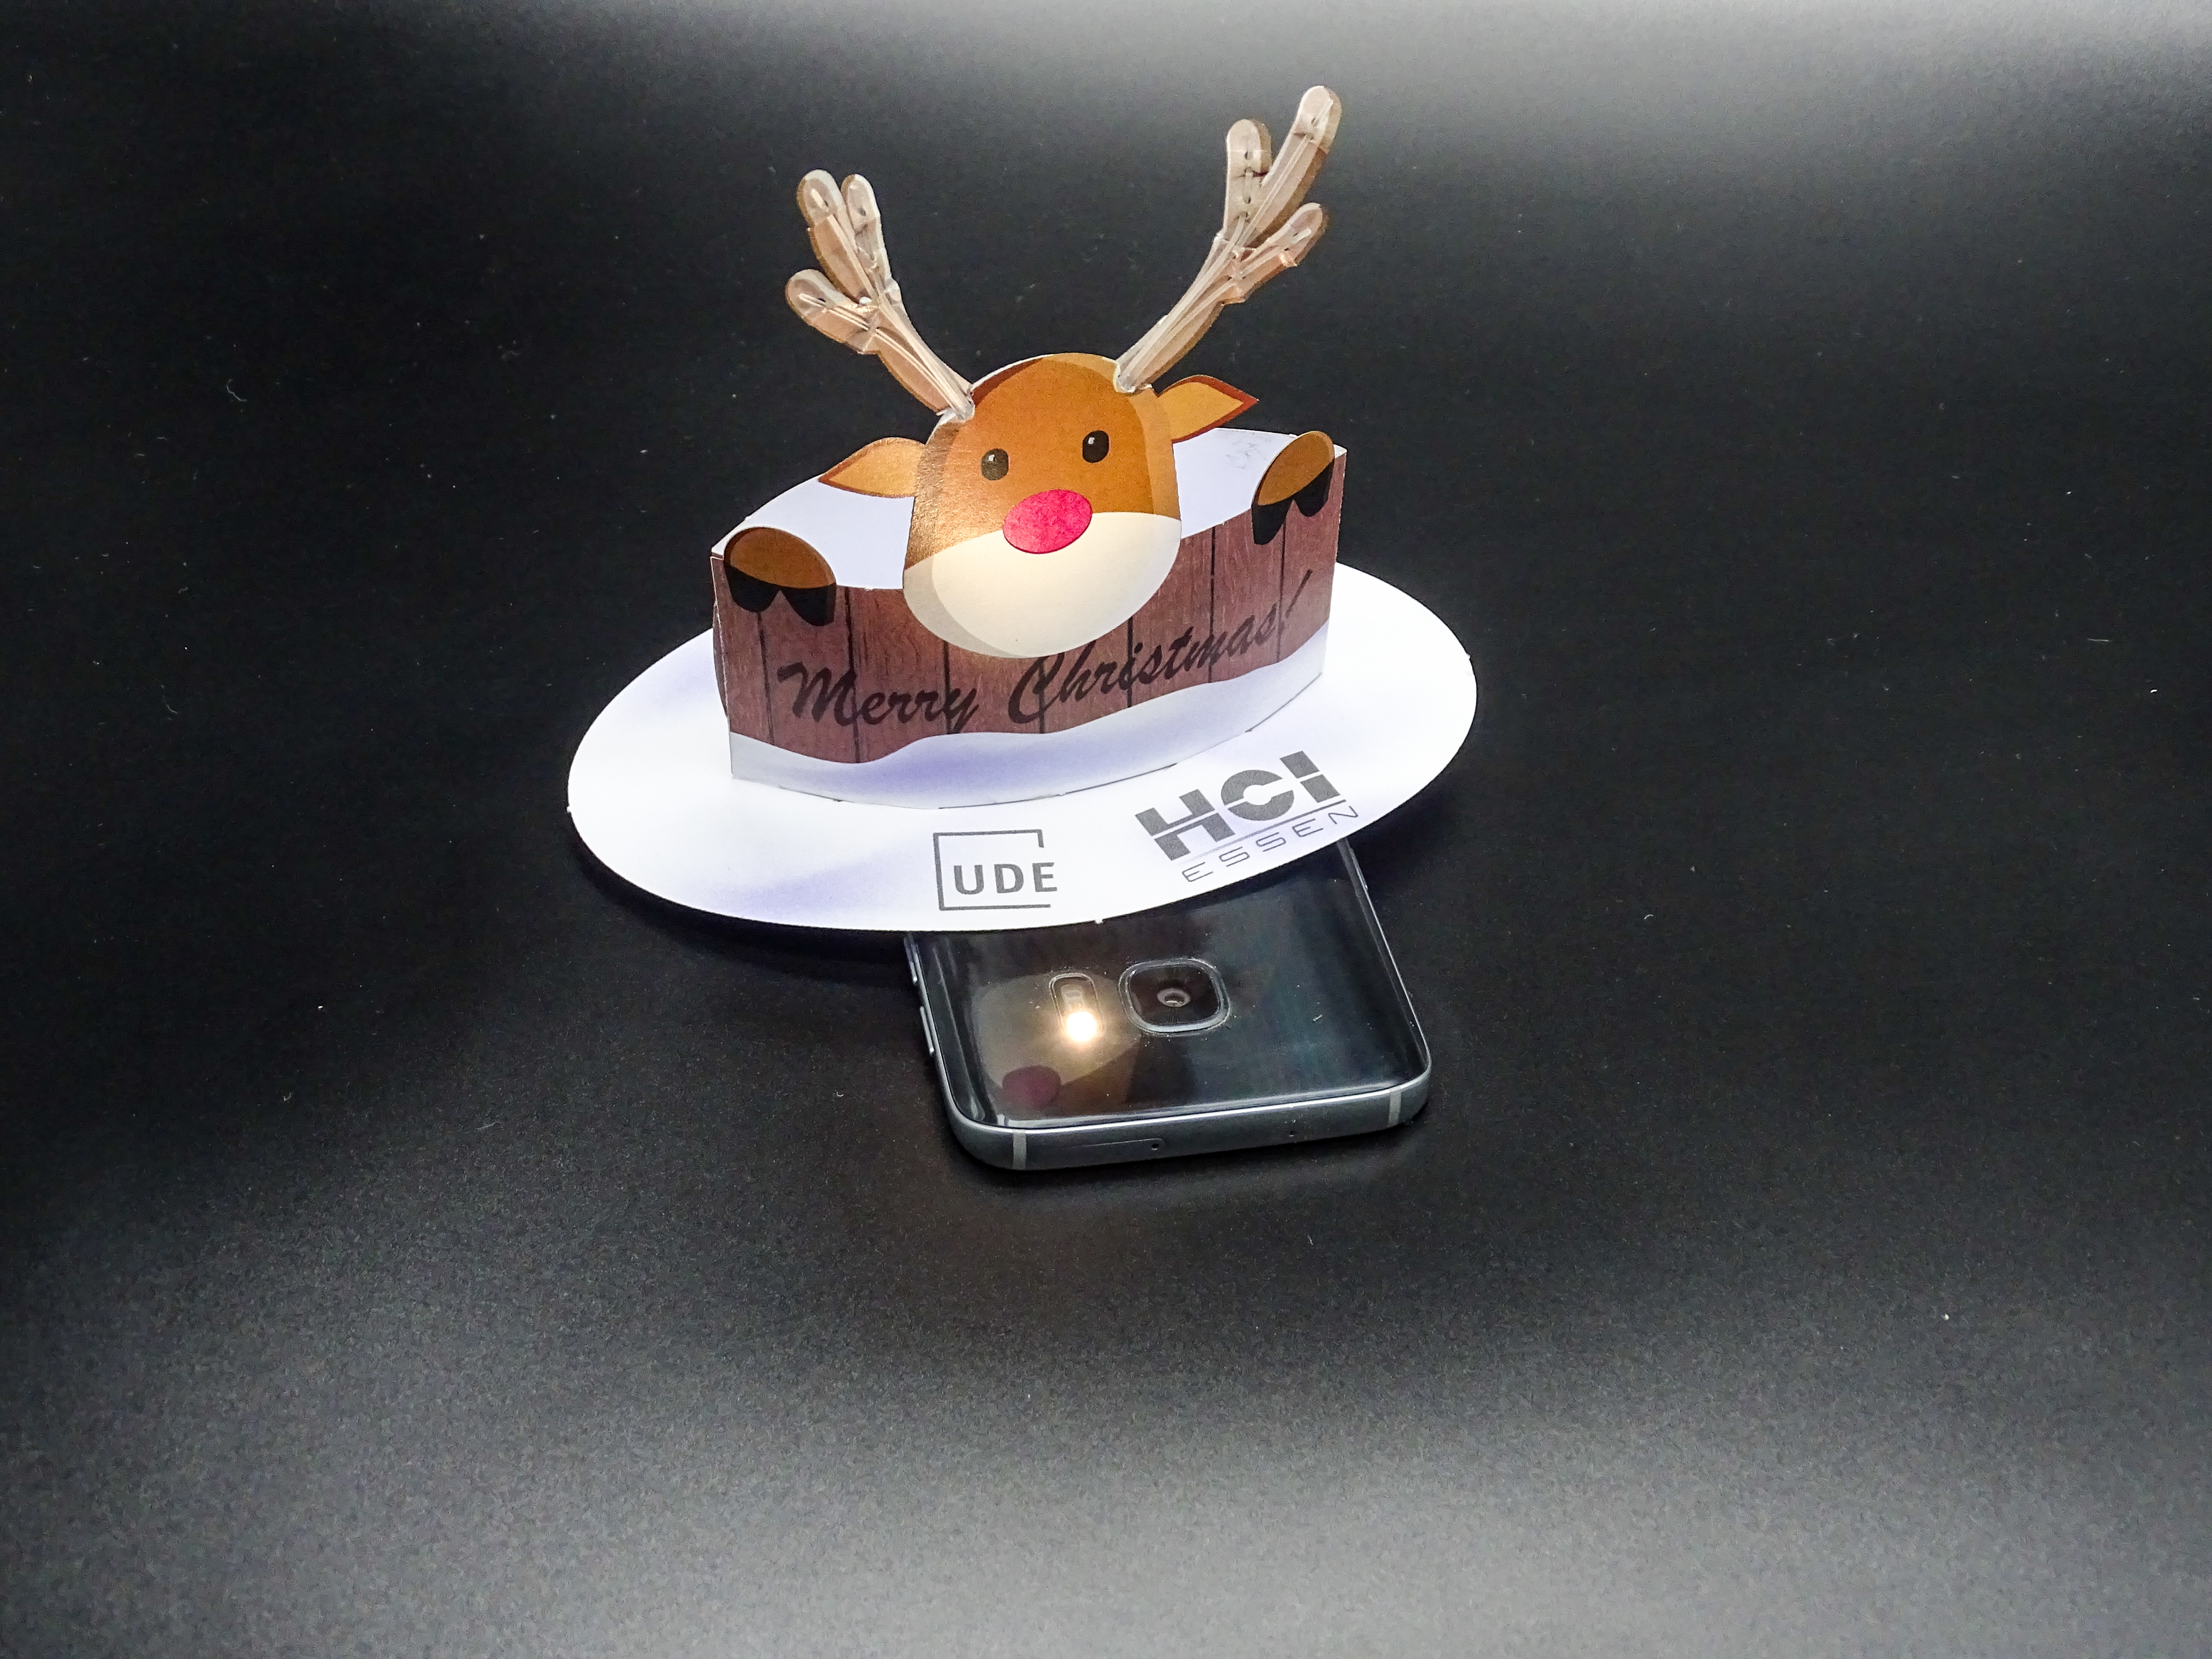
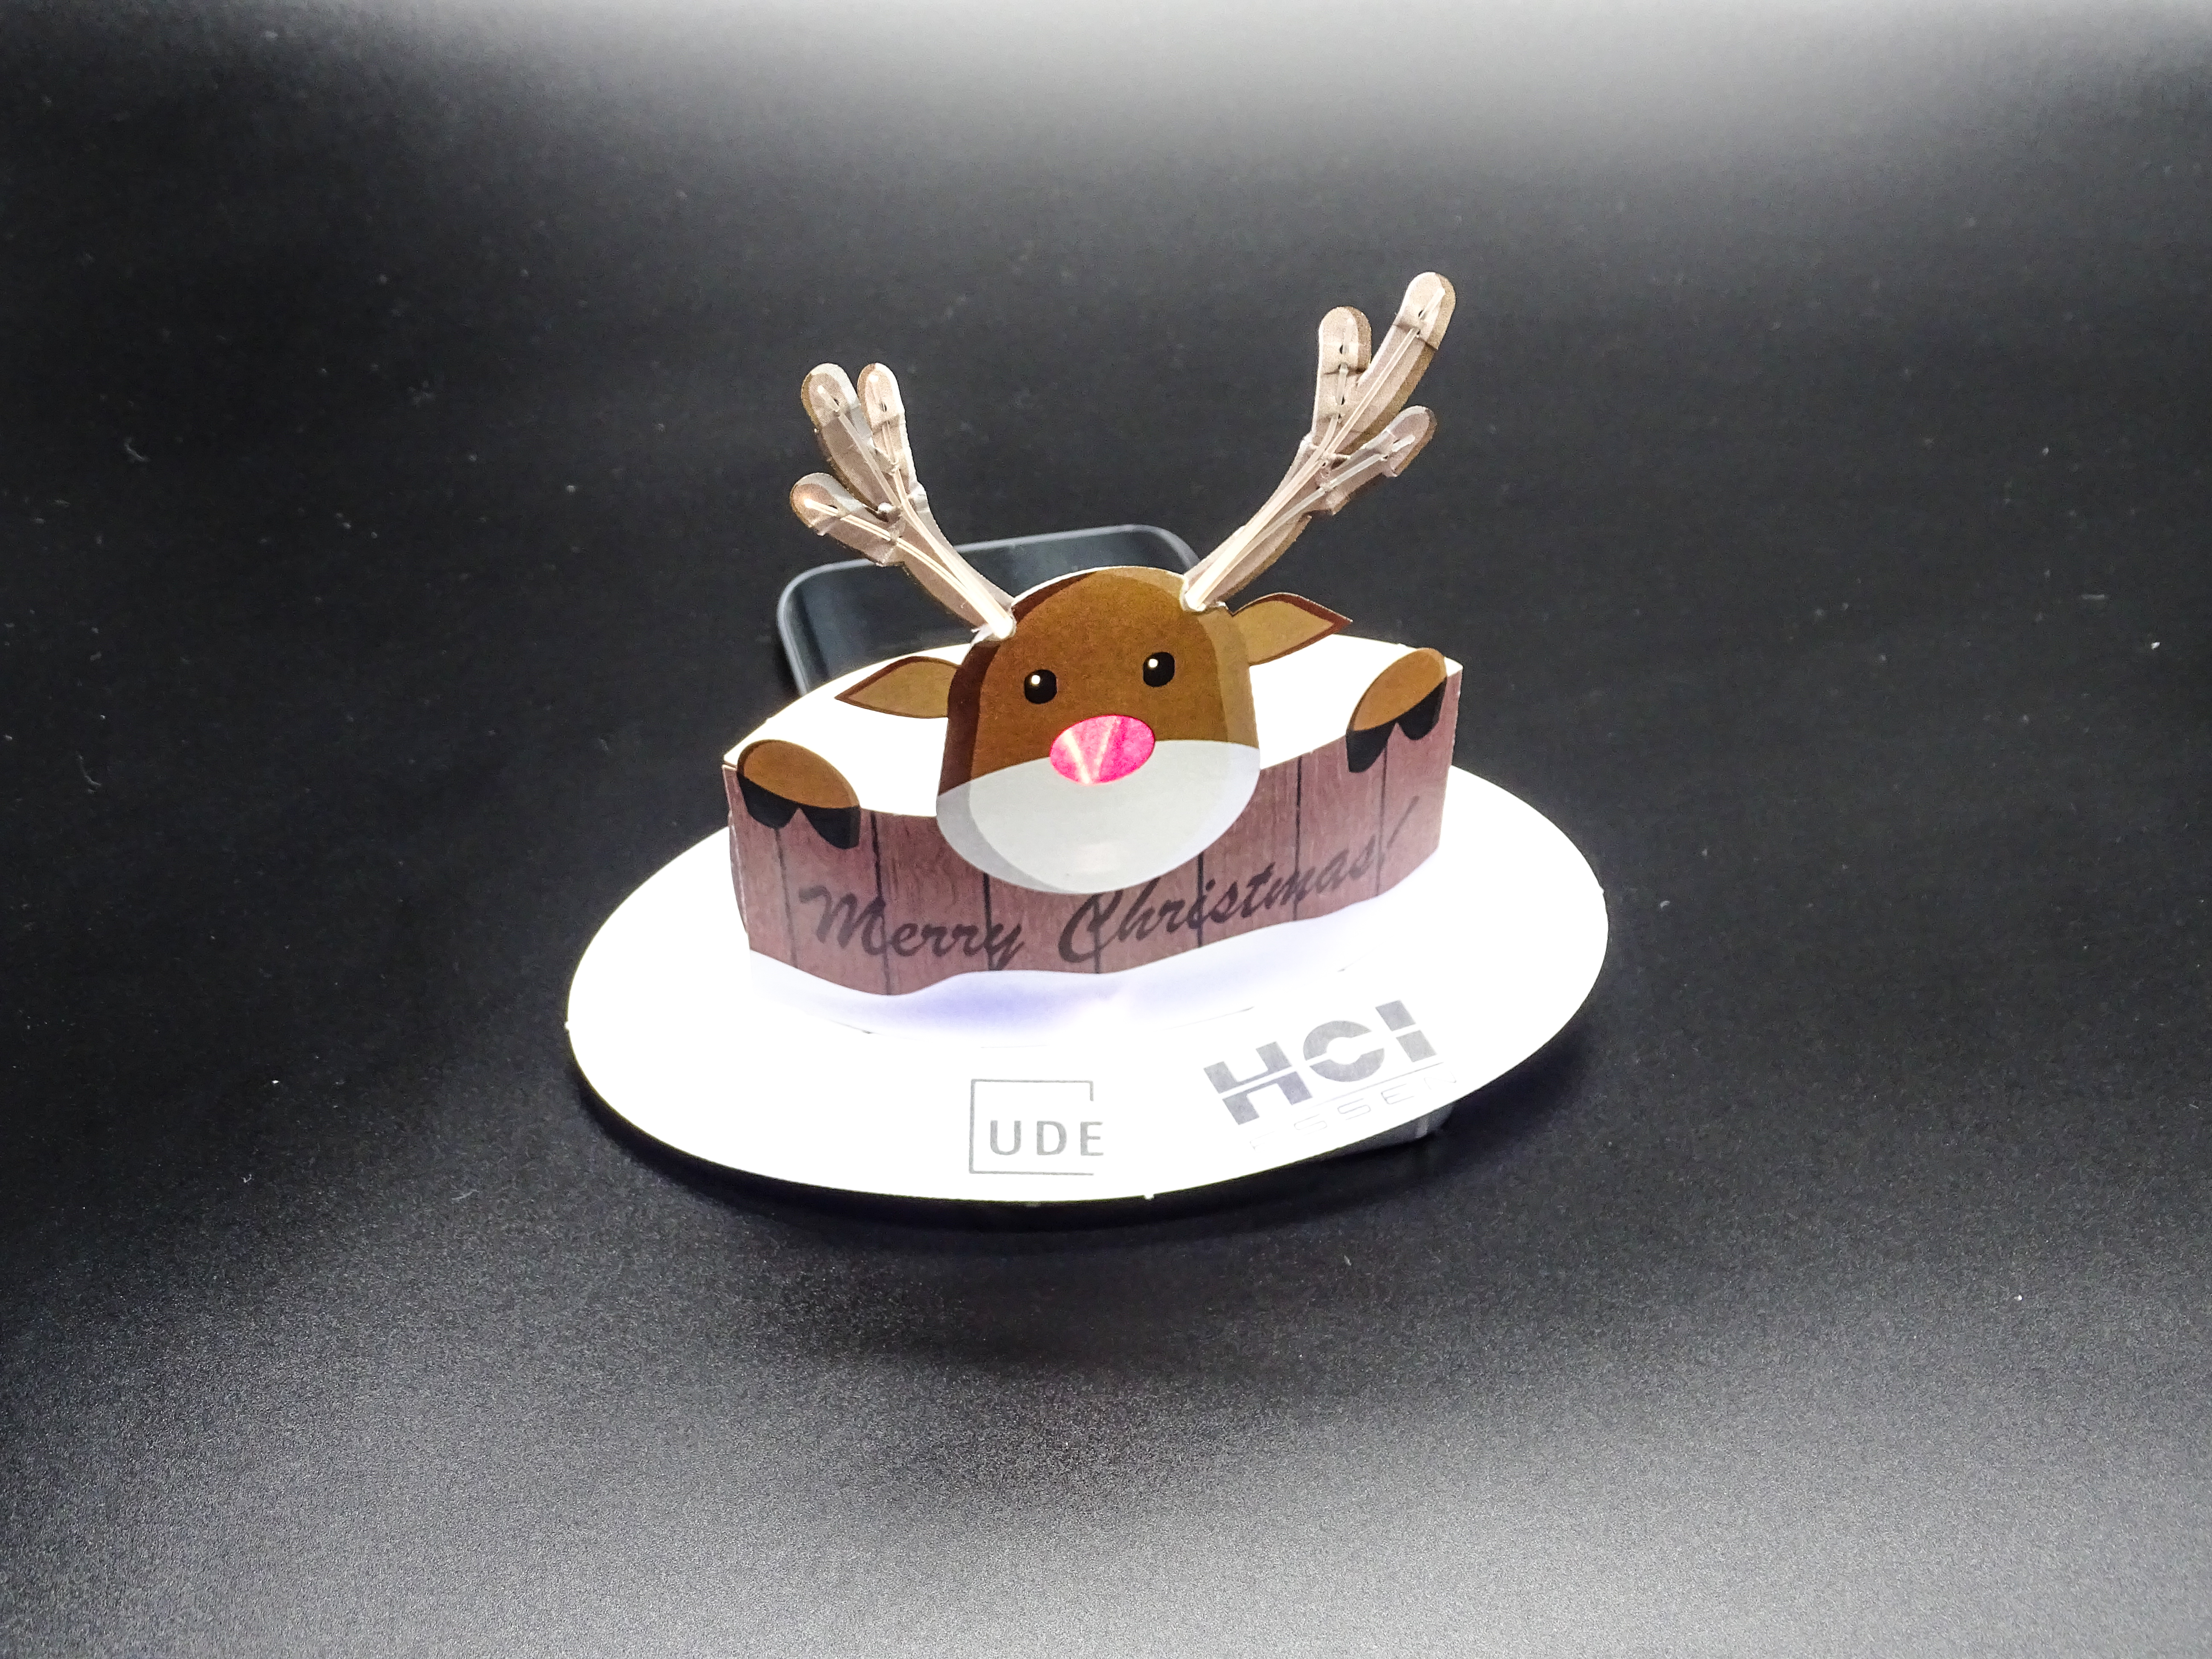
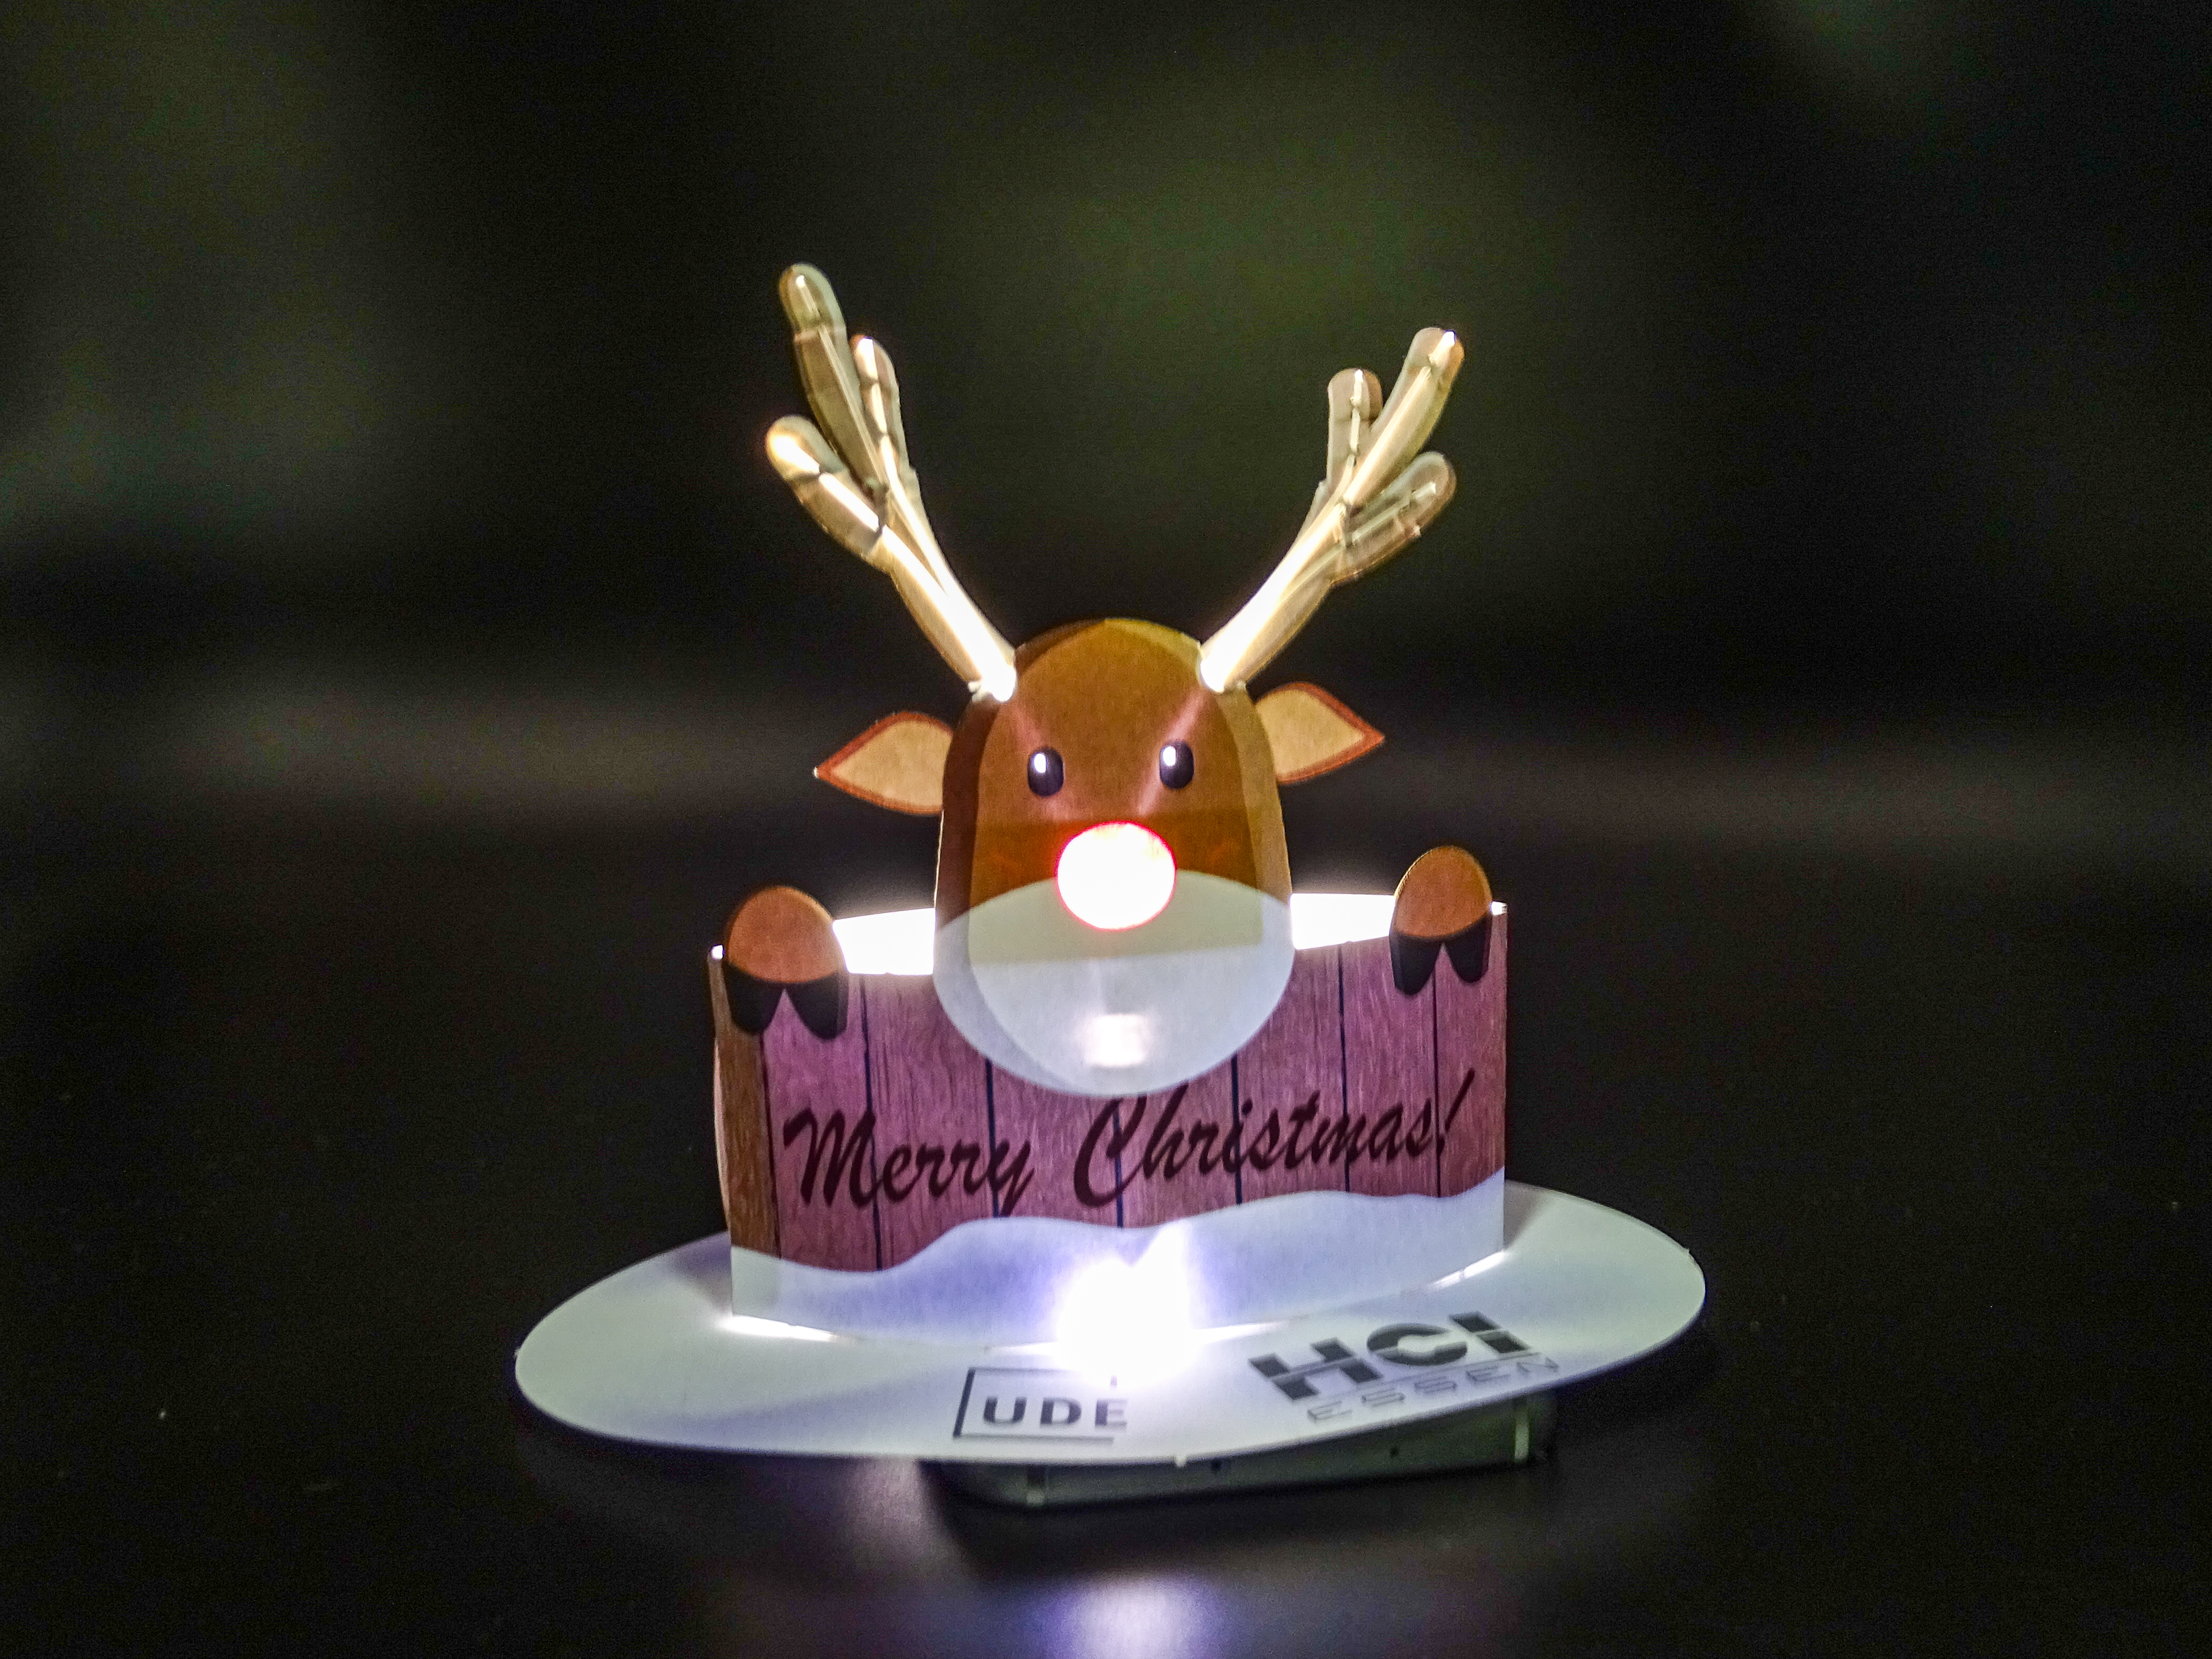
To illuminate the reindeer, place the hole in the base over a light source of your choice. You can for example activate the flashlight of your smartphone and place the reindeer on top of the light.
spacer
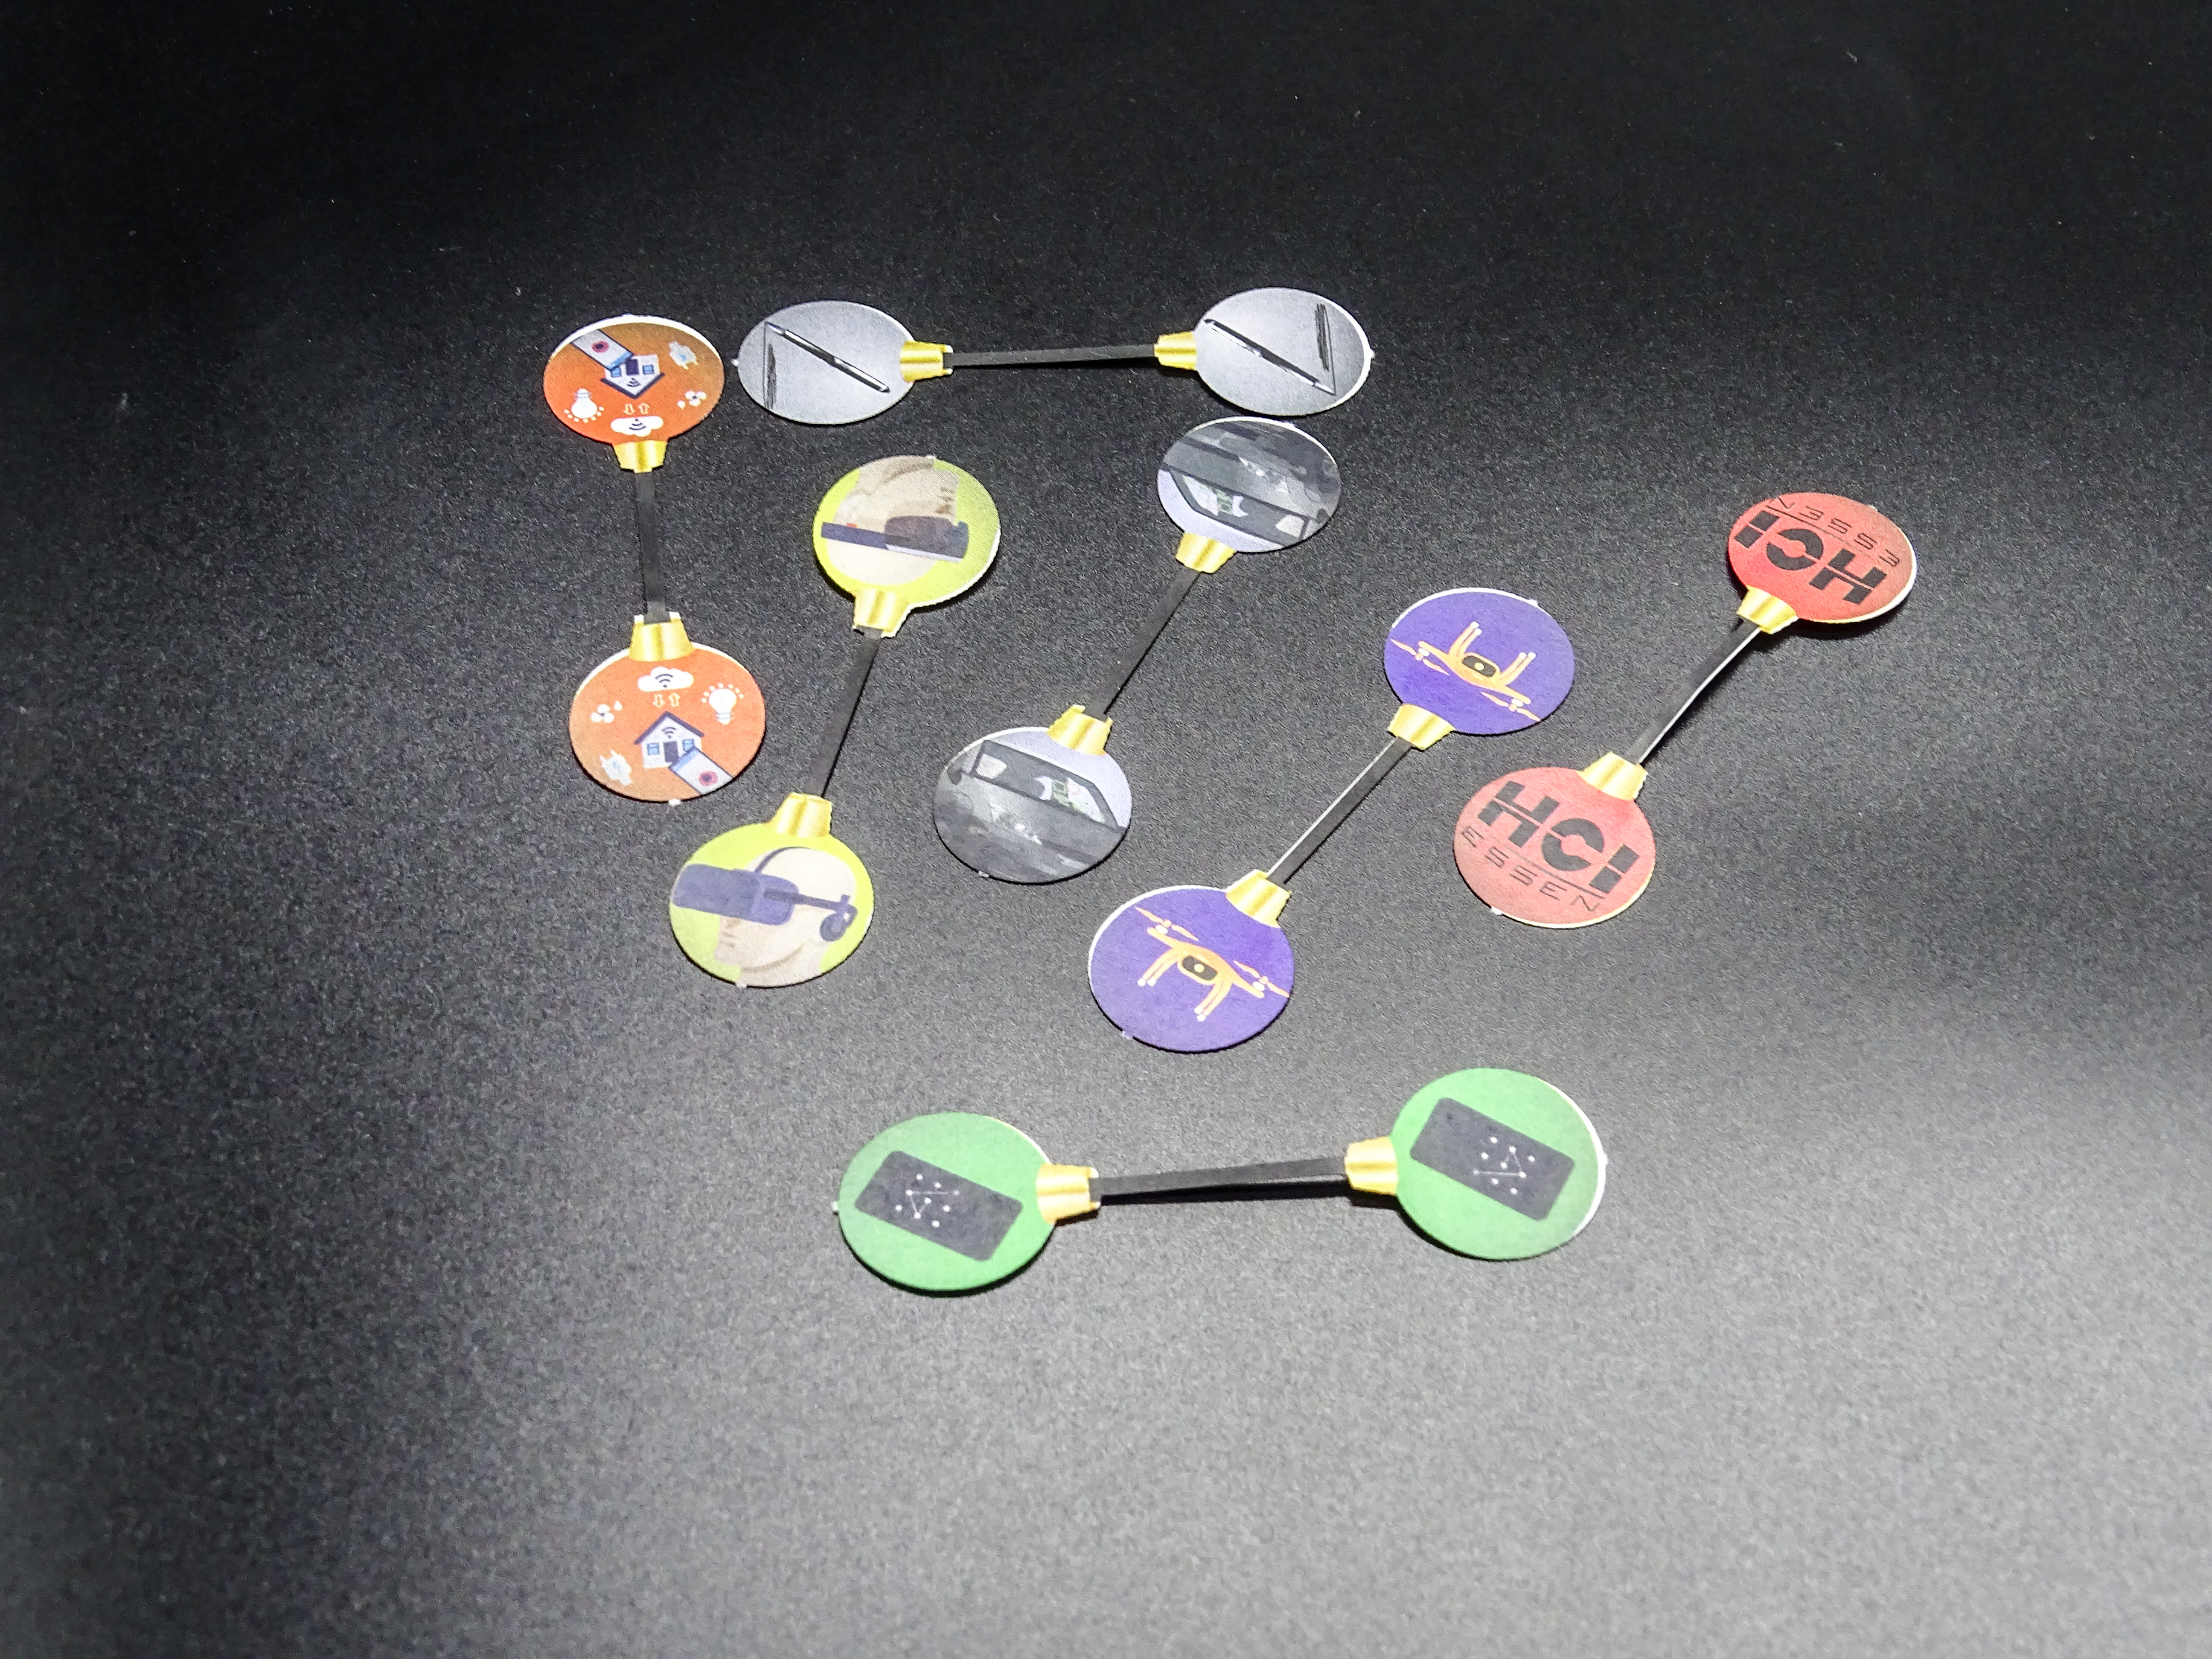
Decoration
Last but not least, give your reindeer some more Christmas decorations. To do so, fold the Christmas tree balls in half and place them all over your reindeer and its fence.